SFF Build: Cubeor Aski 2
Thu, Jul 27, 2023Background
I’m moving to a different country for an unspecified length of time, and have made the difficult decision to leave my behemoth of a desktop PC behind. Initially I was planning on just living off of my Framework 12th gen laptop, which is a very capable little machine, but then managed to convince myself that it would be fun to build a small form factor desktop that it would be practical to ship to the other side of the world. My design goals in researching cases were:
- Must be small enough to easily ship internationally, but large enough to fit a performance CPU and a cooler that is at least ‘adequate’
- Does not have to have enough space for a GPU, but it’s a bonus
- Would ideally be pleasing to look at as a desk object, since storage space will be at a premium in my new location.
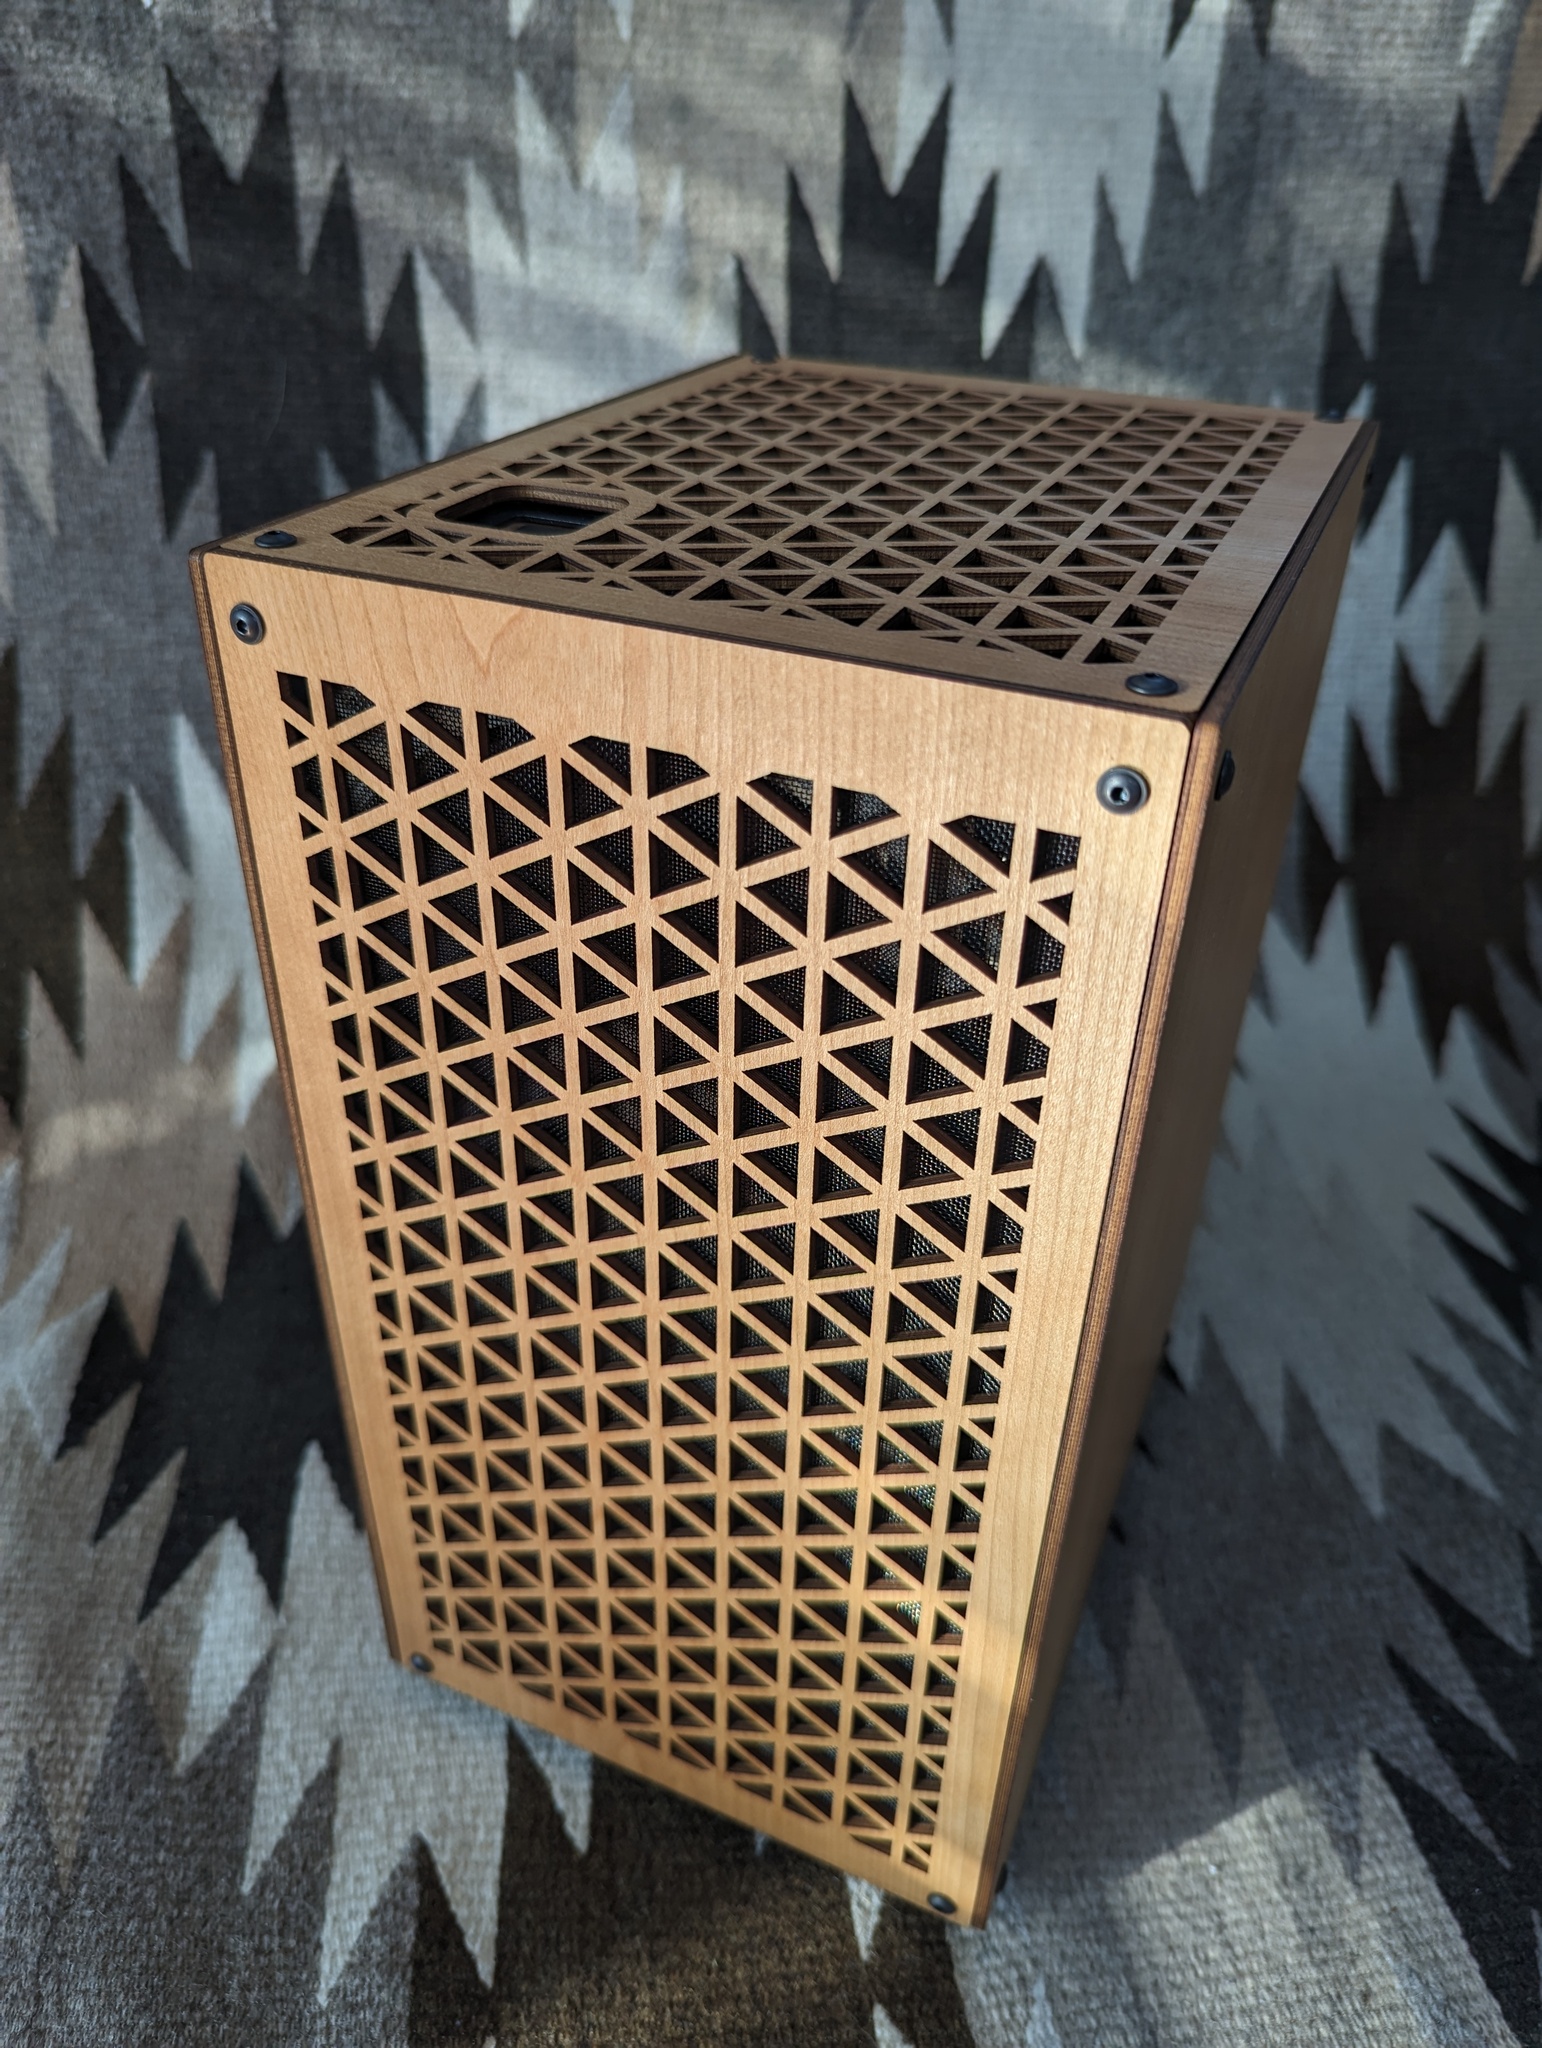
After looking around, I ended up settling on the Cubeor Aski 2, a 10L small form factor computer with fetching laser-cut wood panels. Key features that seemed attractive are the space for a large number of fans (to help cool a performance CPU), the ability to insert a GPU without a riser (simpler build process) and aesthetics (I love the wood panelling). After ordering the case, I then specced out the internals as follows:
- CPU: Intel i9-13900K
- Cooler: Noctua NH-U9S
- Motherboard: Gigabyte B760I Aorus Pro DDR4
- Memory: Corsair Vengeance 64GB DDR4 kit (CL16)
- Storage: Samsung 970 EVO 1TB
- GPU: MSI RTX 3060 AERO ITX 12G OC
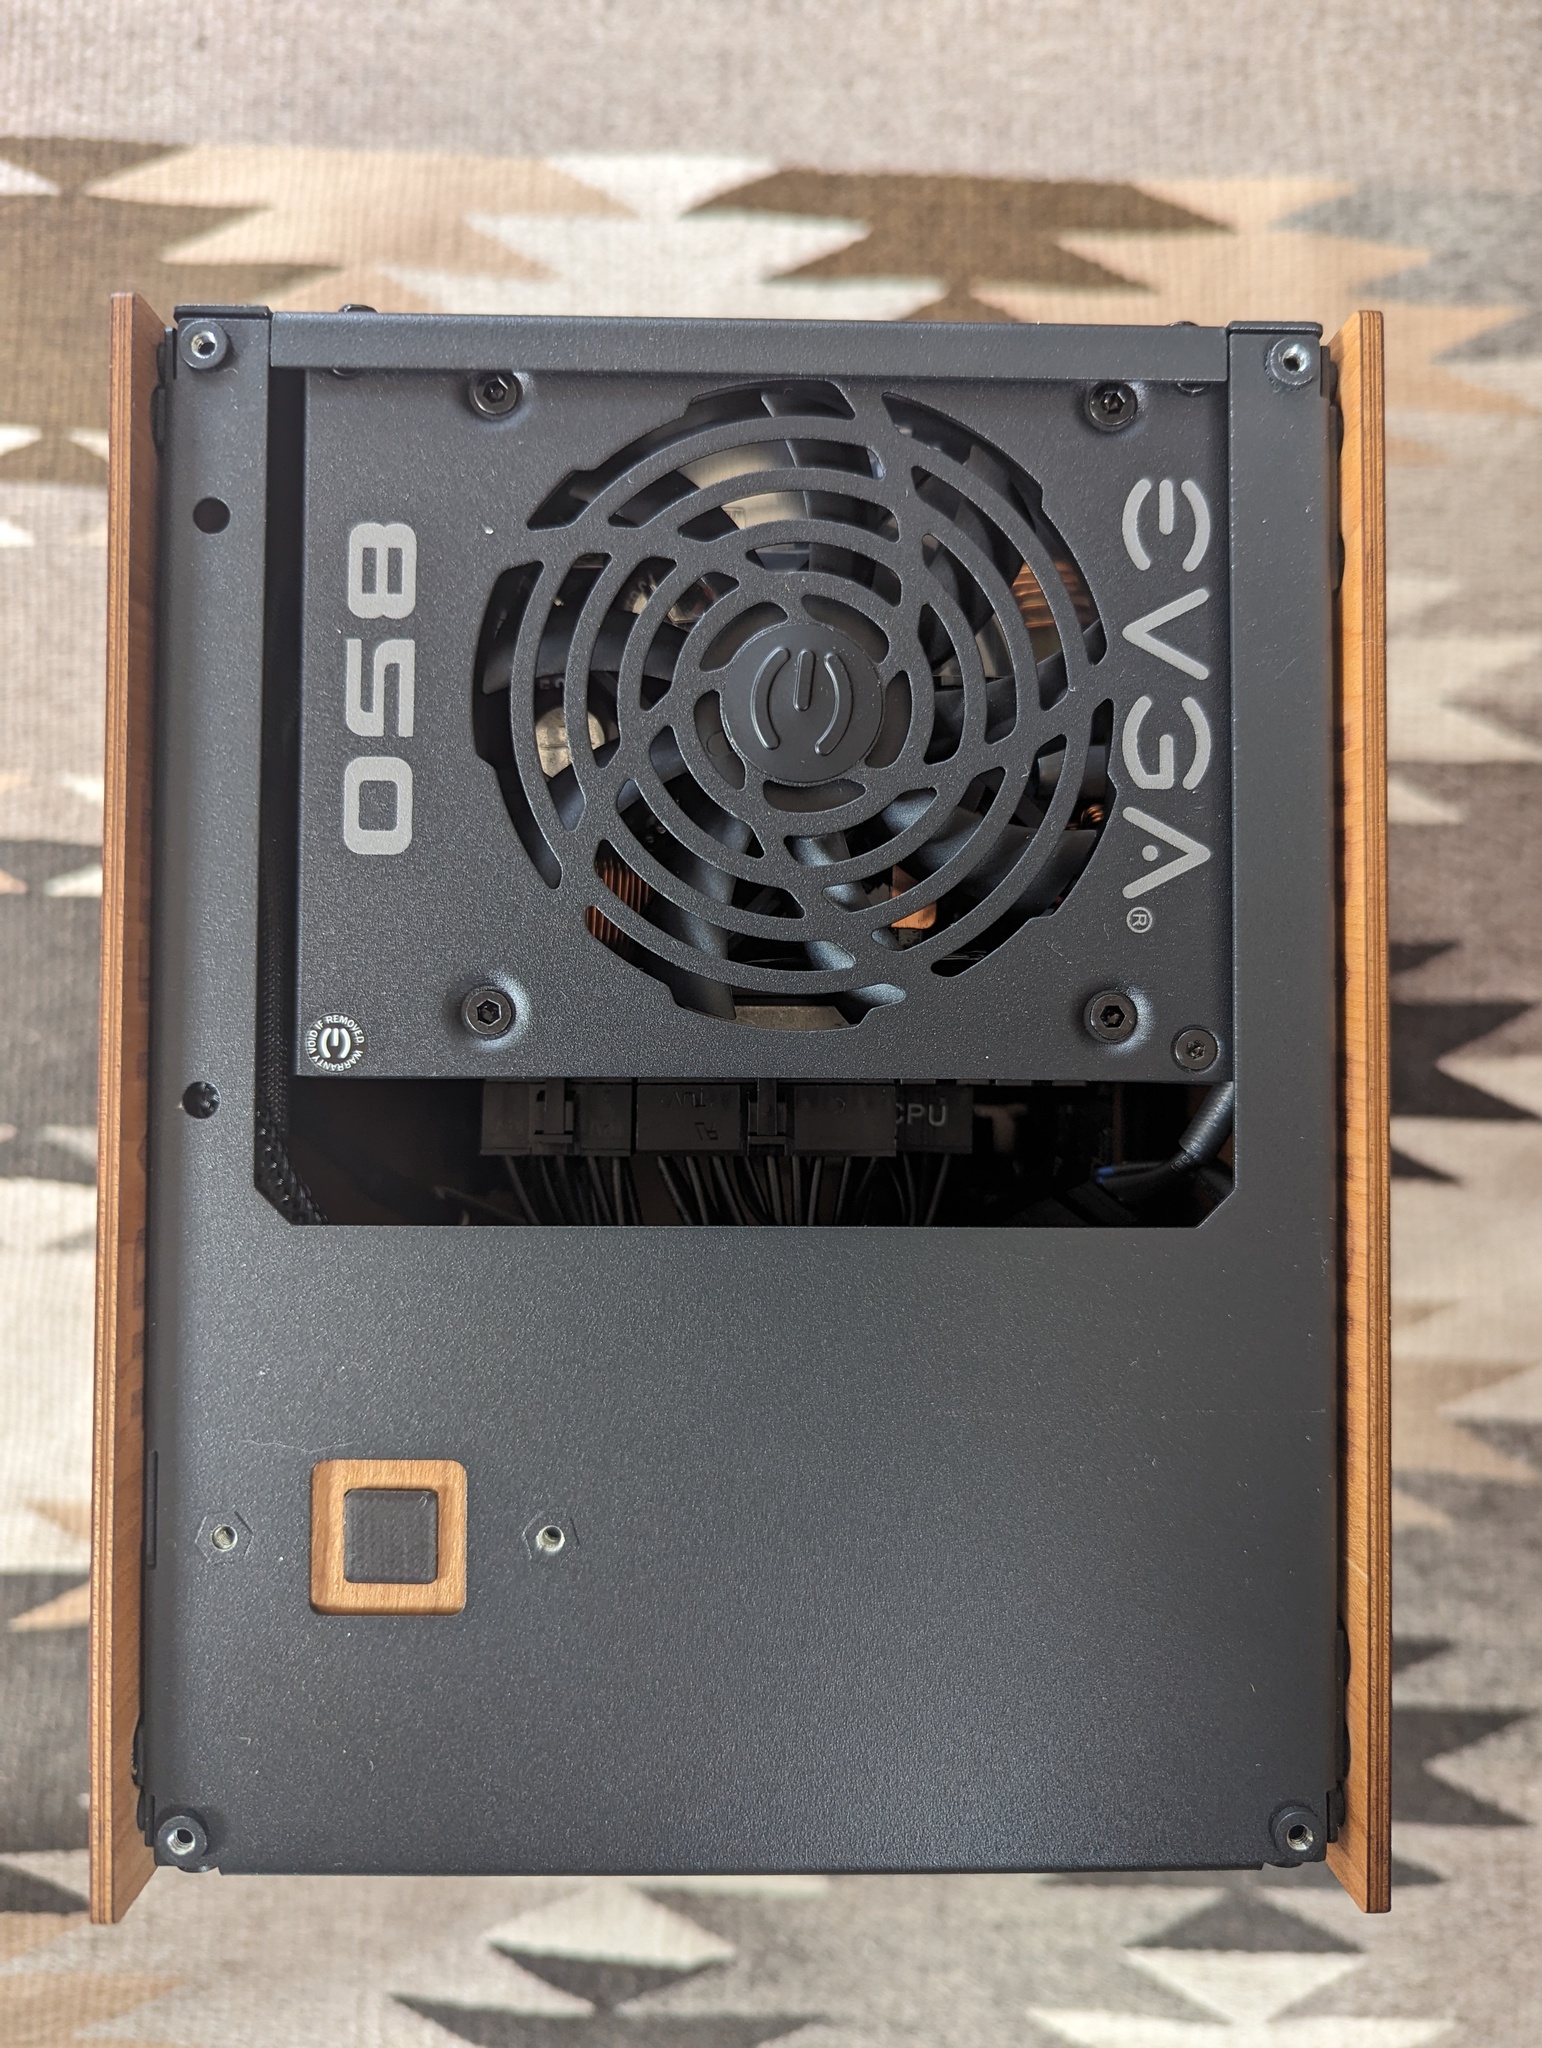
- PSU: EVGA SuperNOVA 850 GM
- Additional fans:
- 1x NF-A14 140mm front intake fan (top)
- 1x NF-F12 120mm front intake fan (bottom)
- 2x NF-A8 80mm rear exhaust fans
The Case
Quick Look
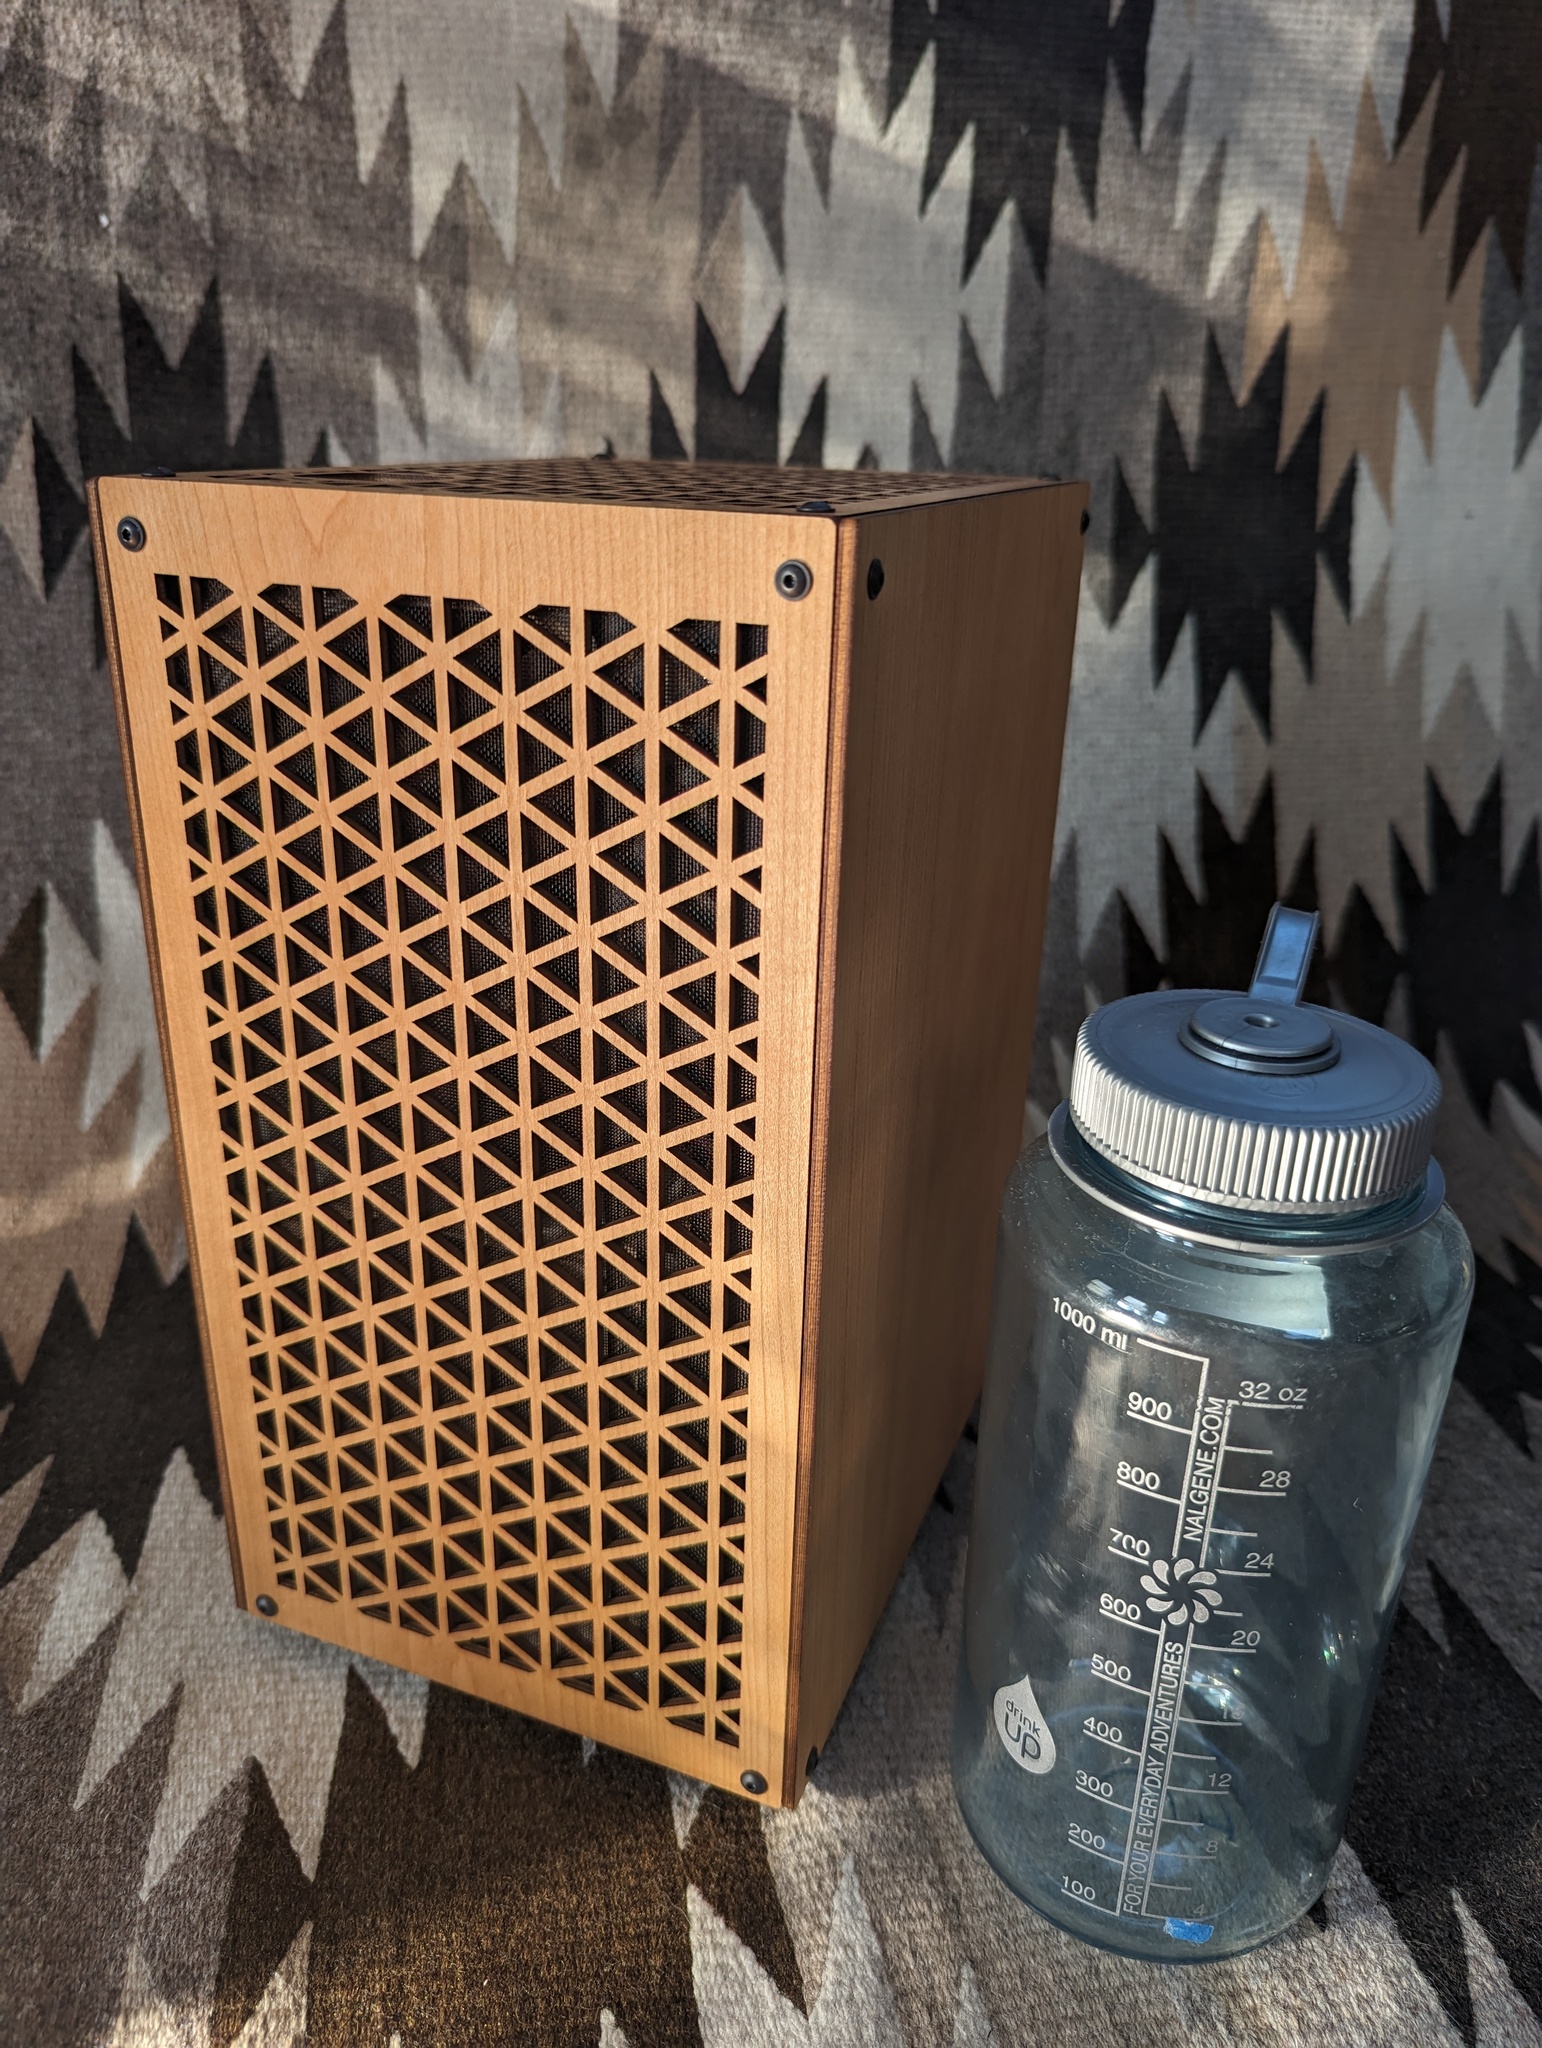
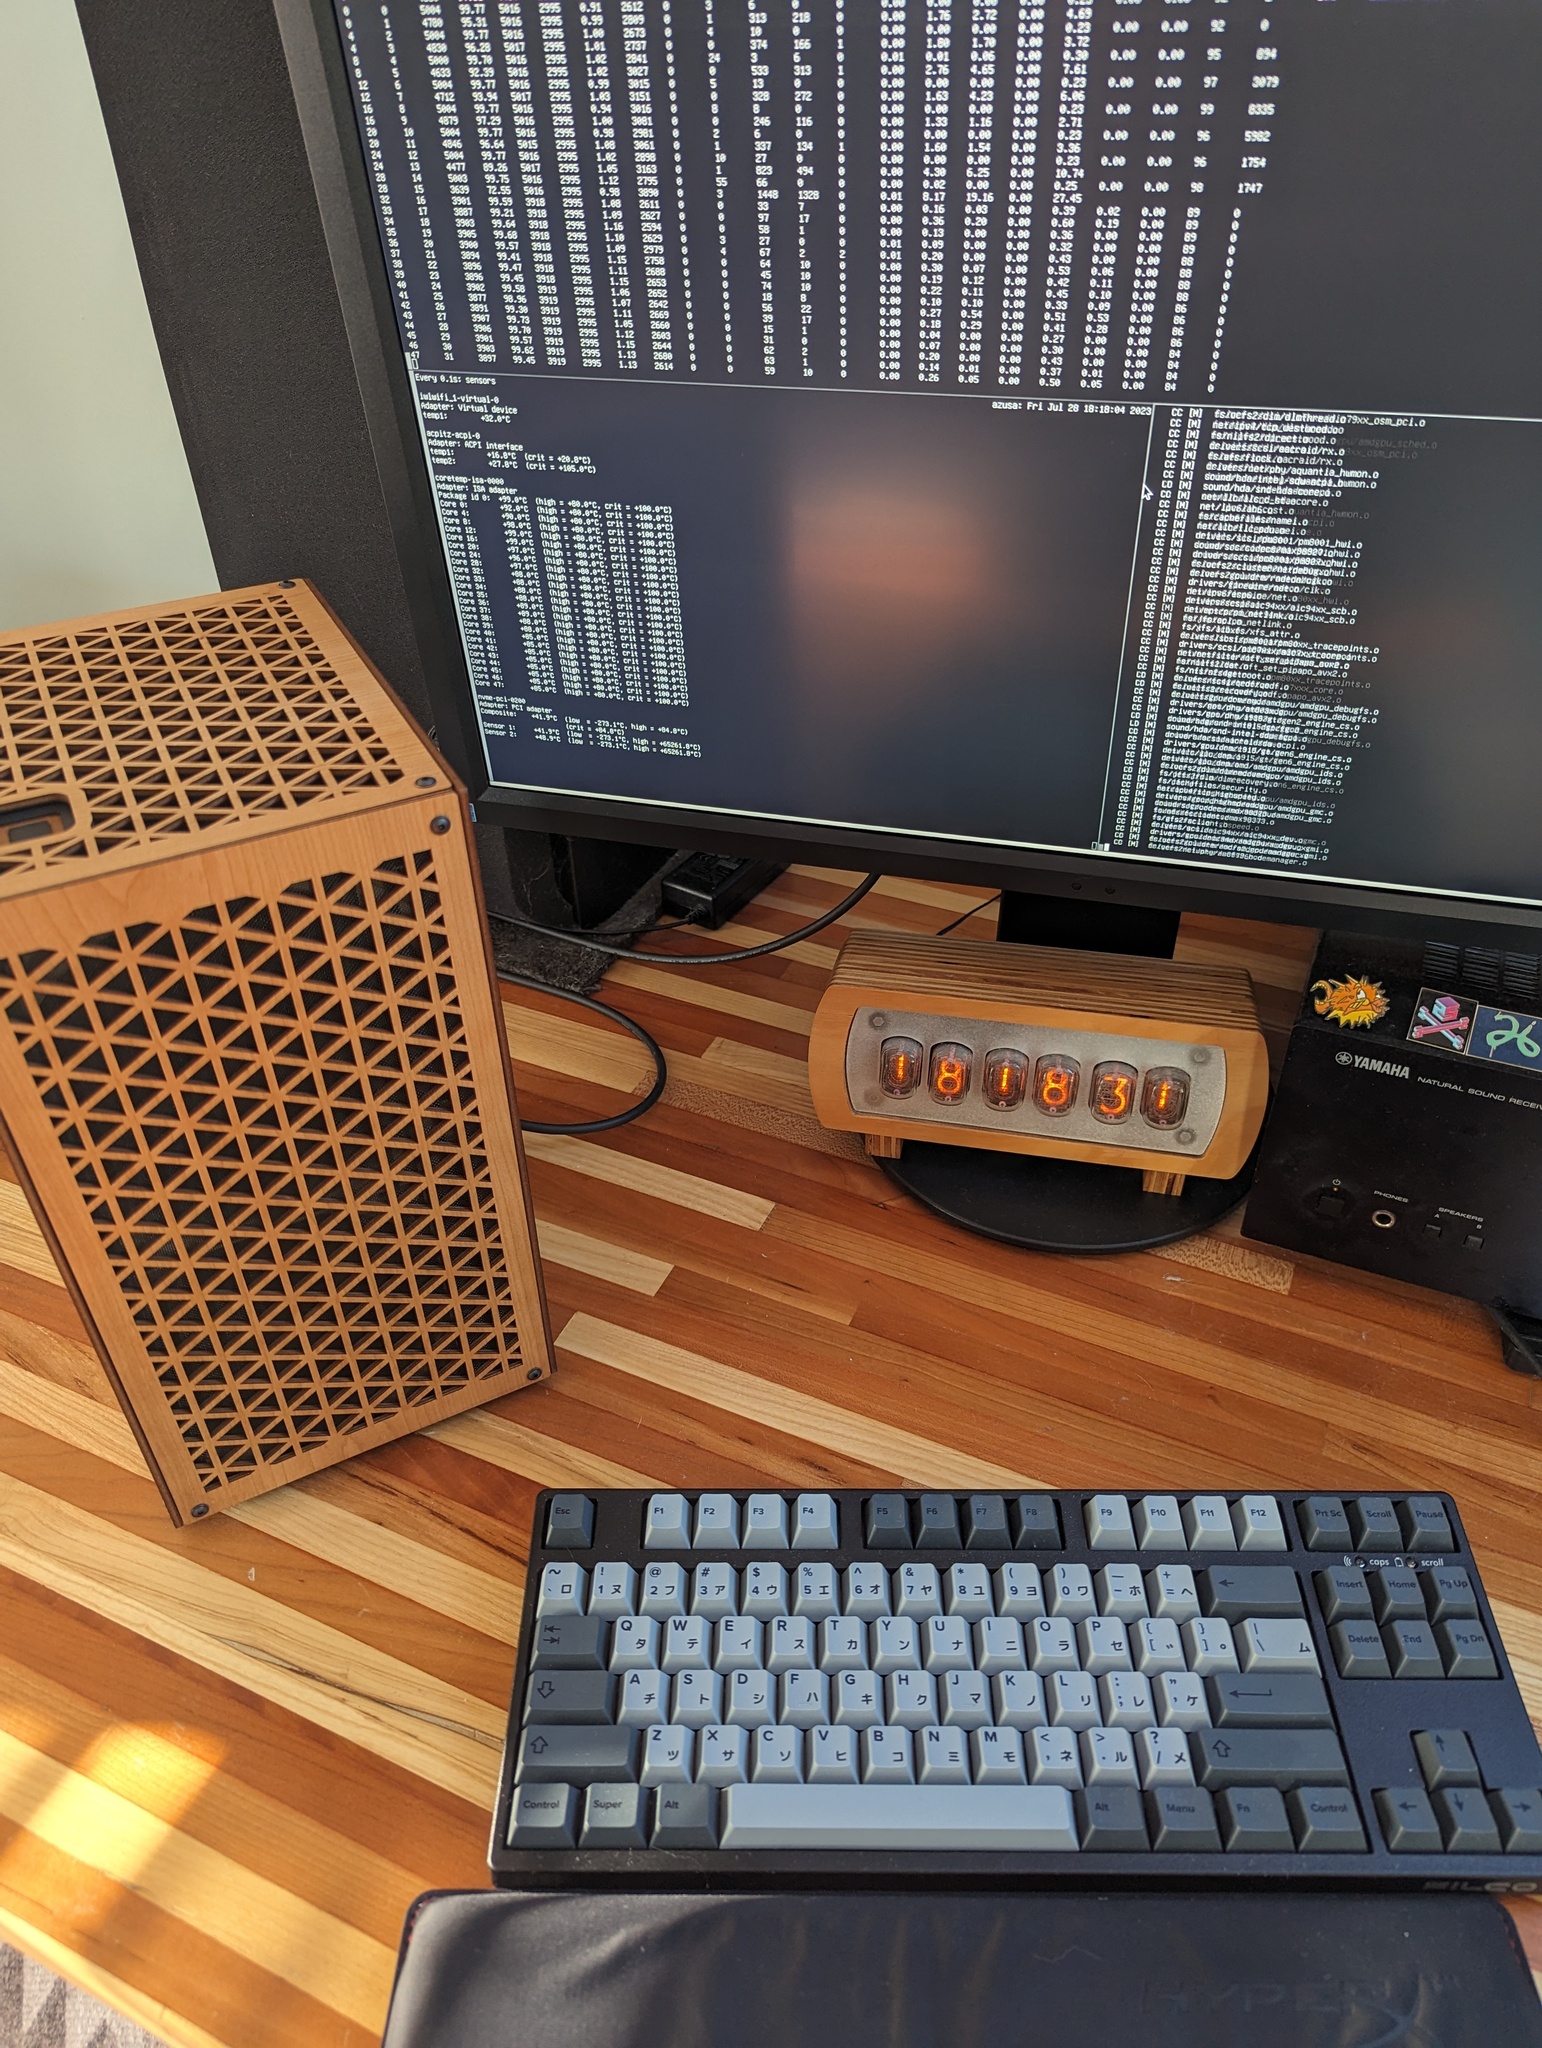
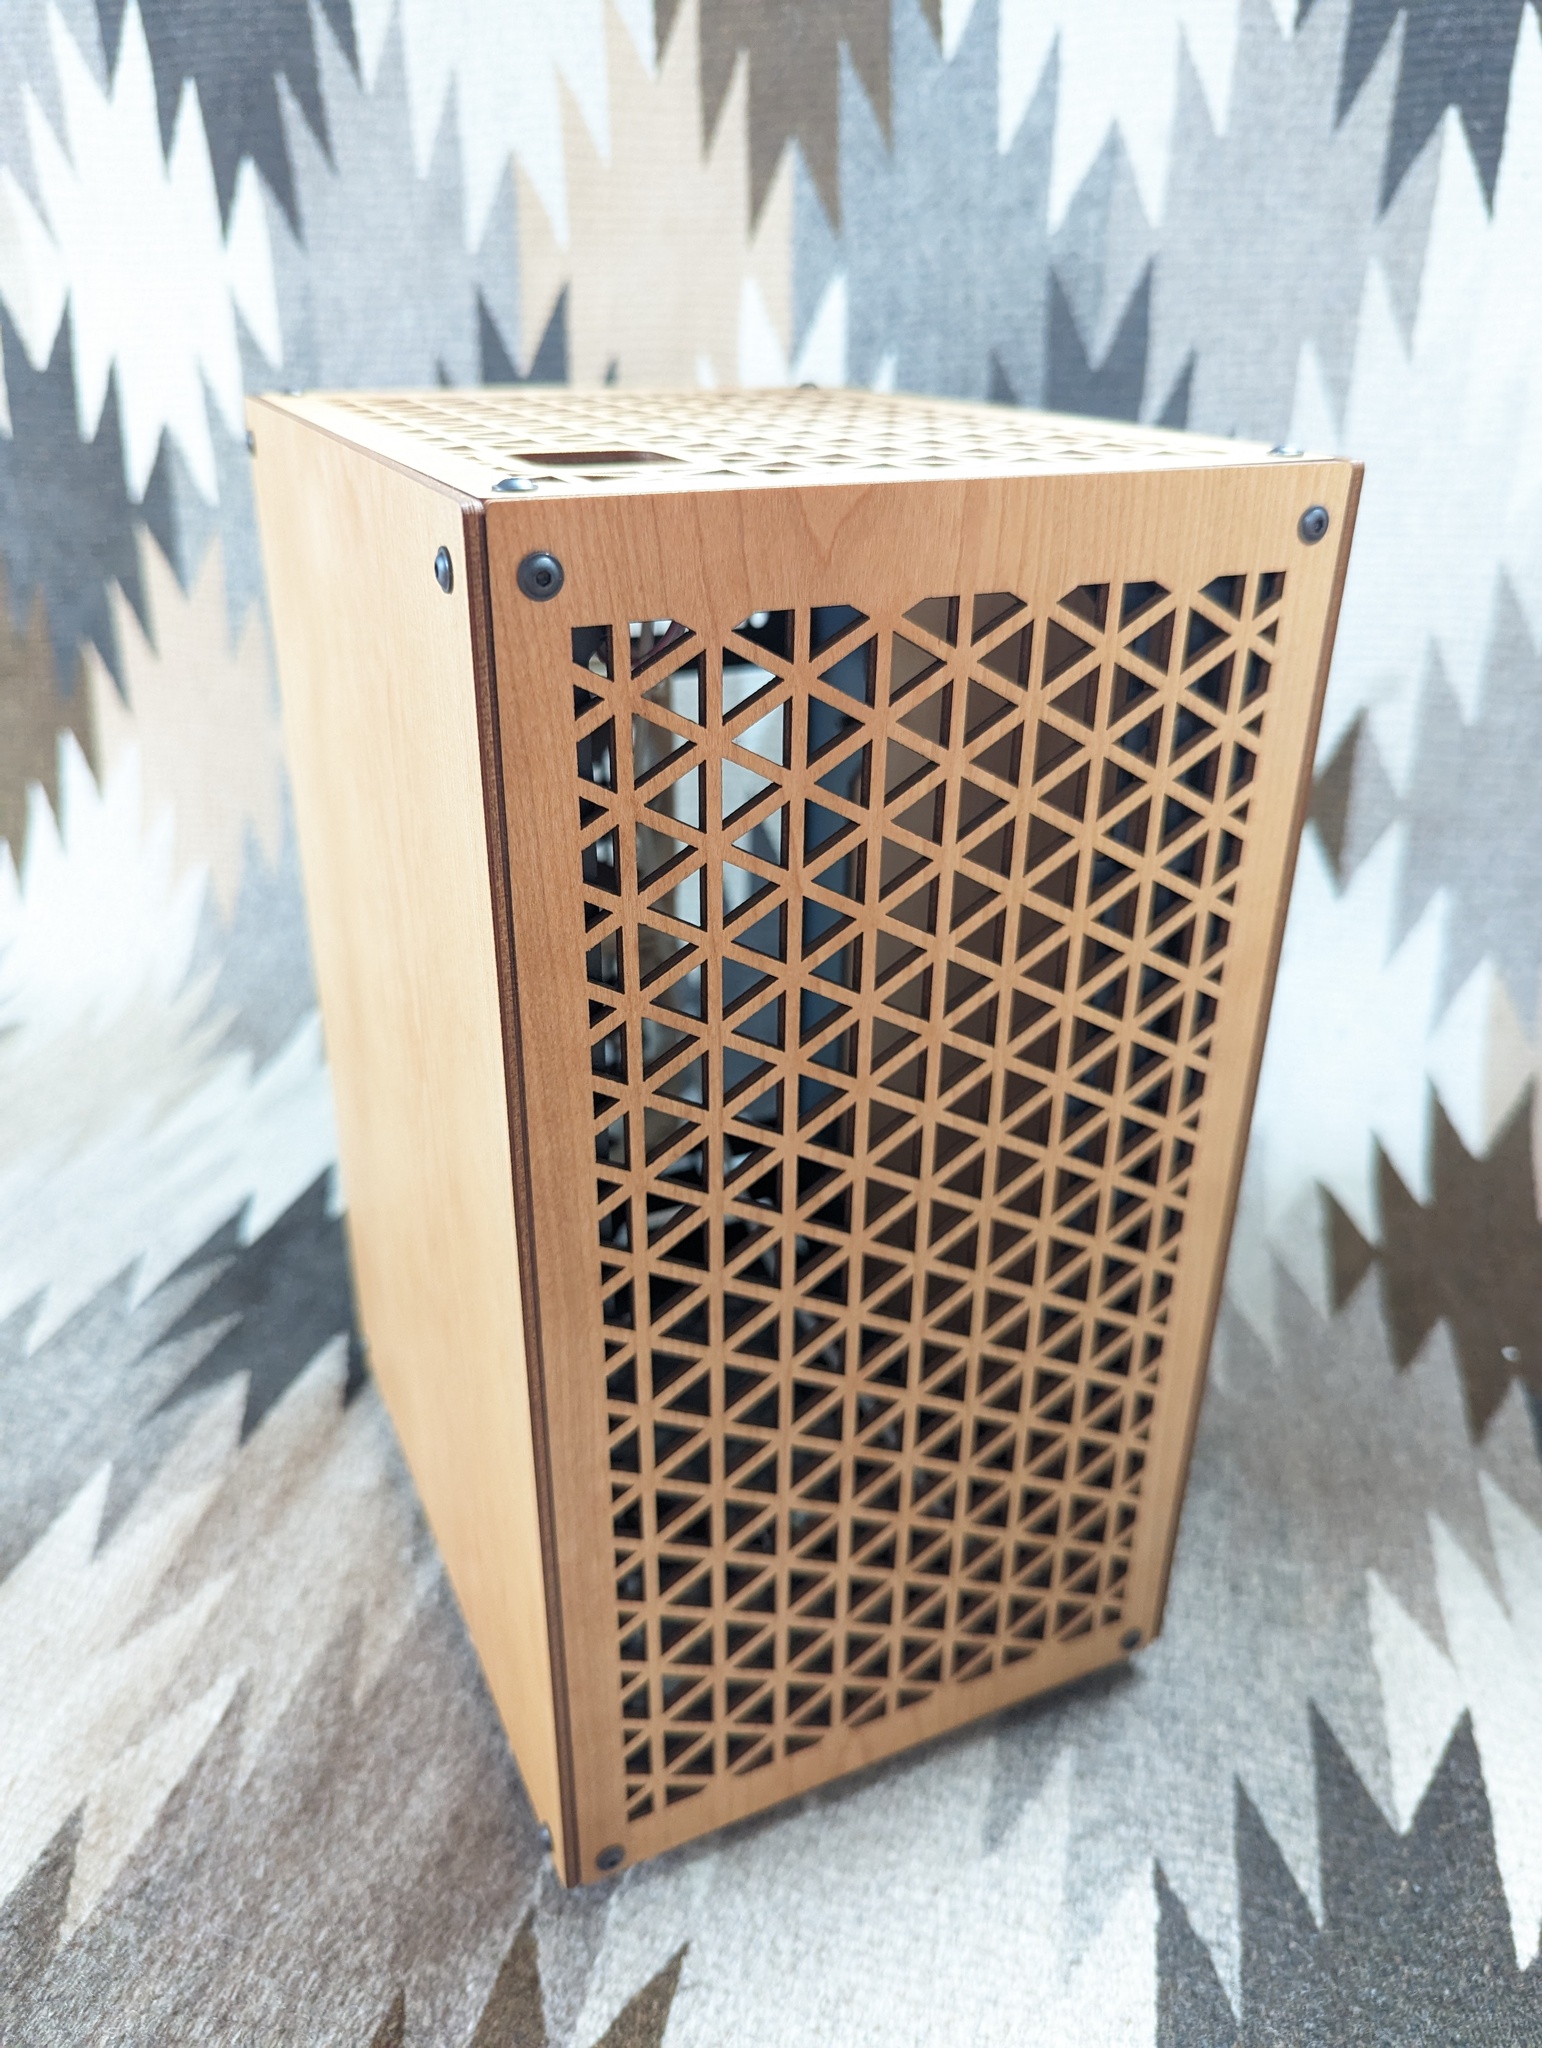
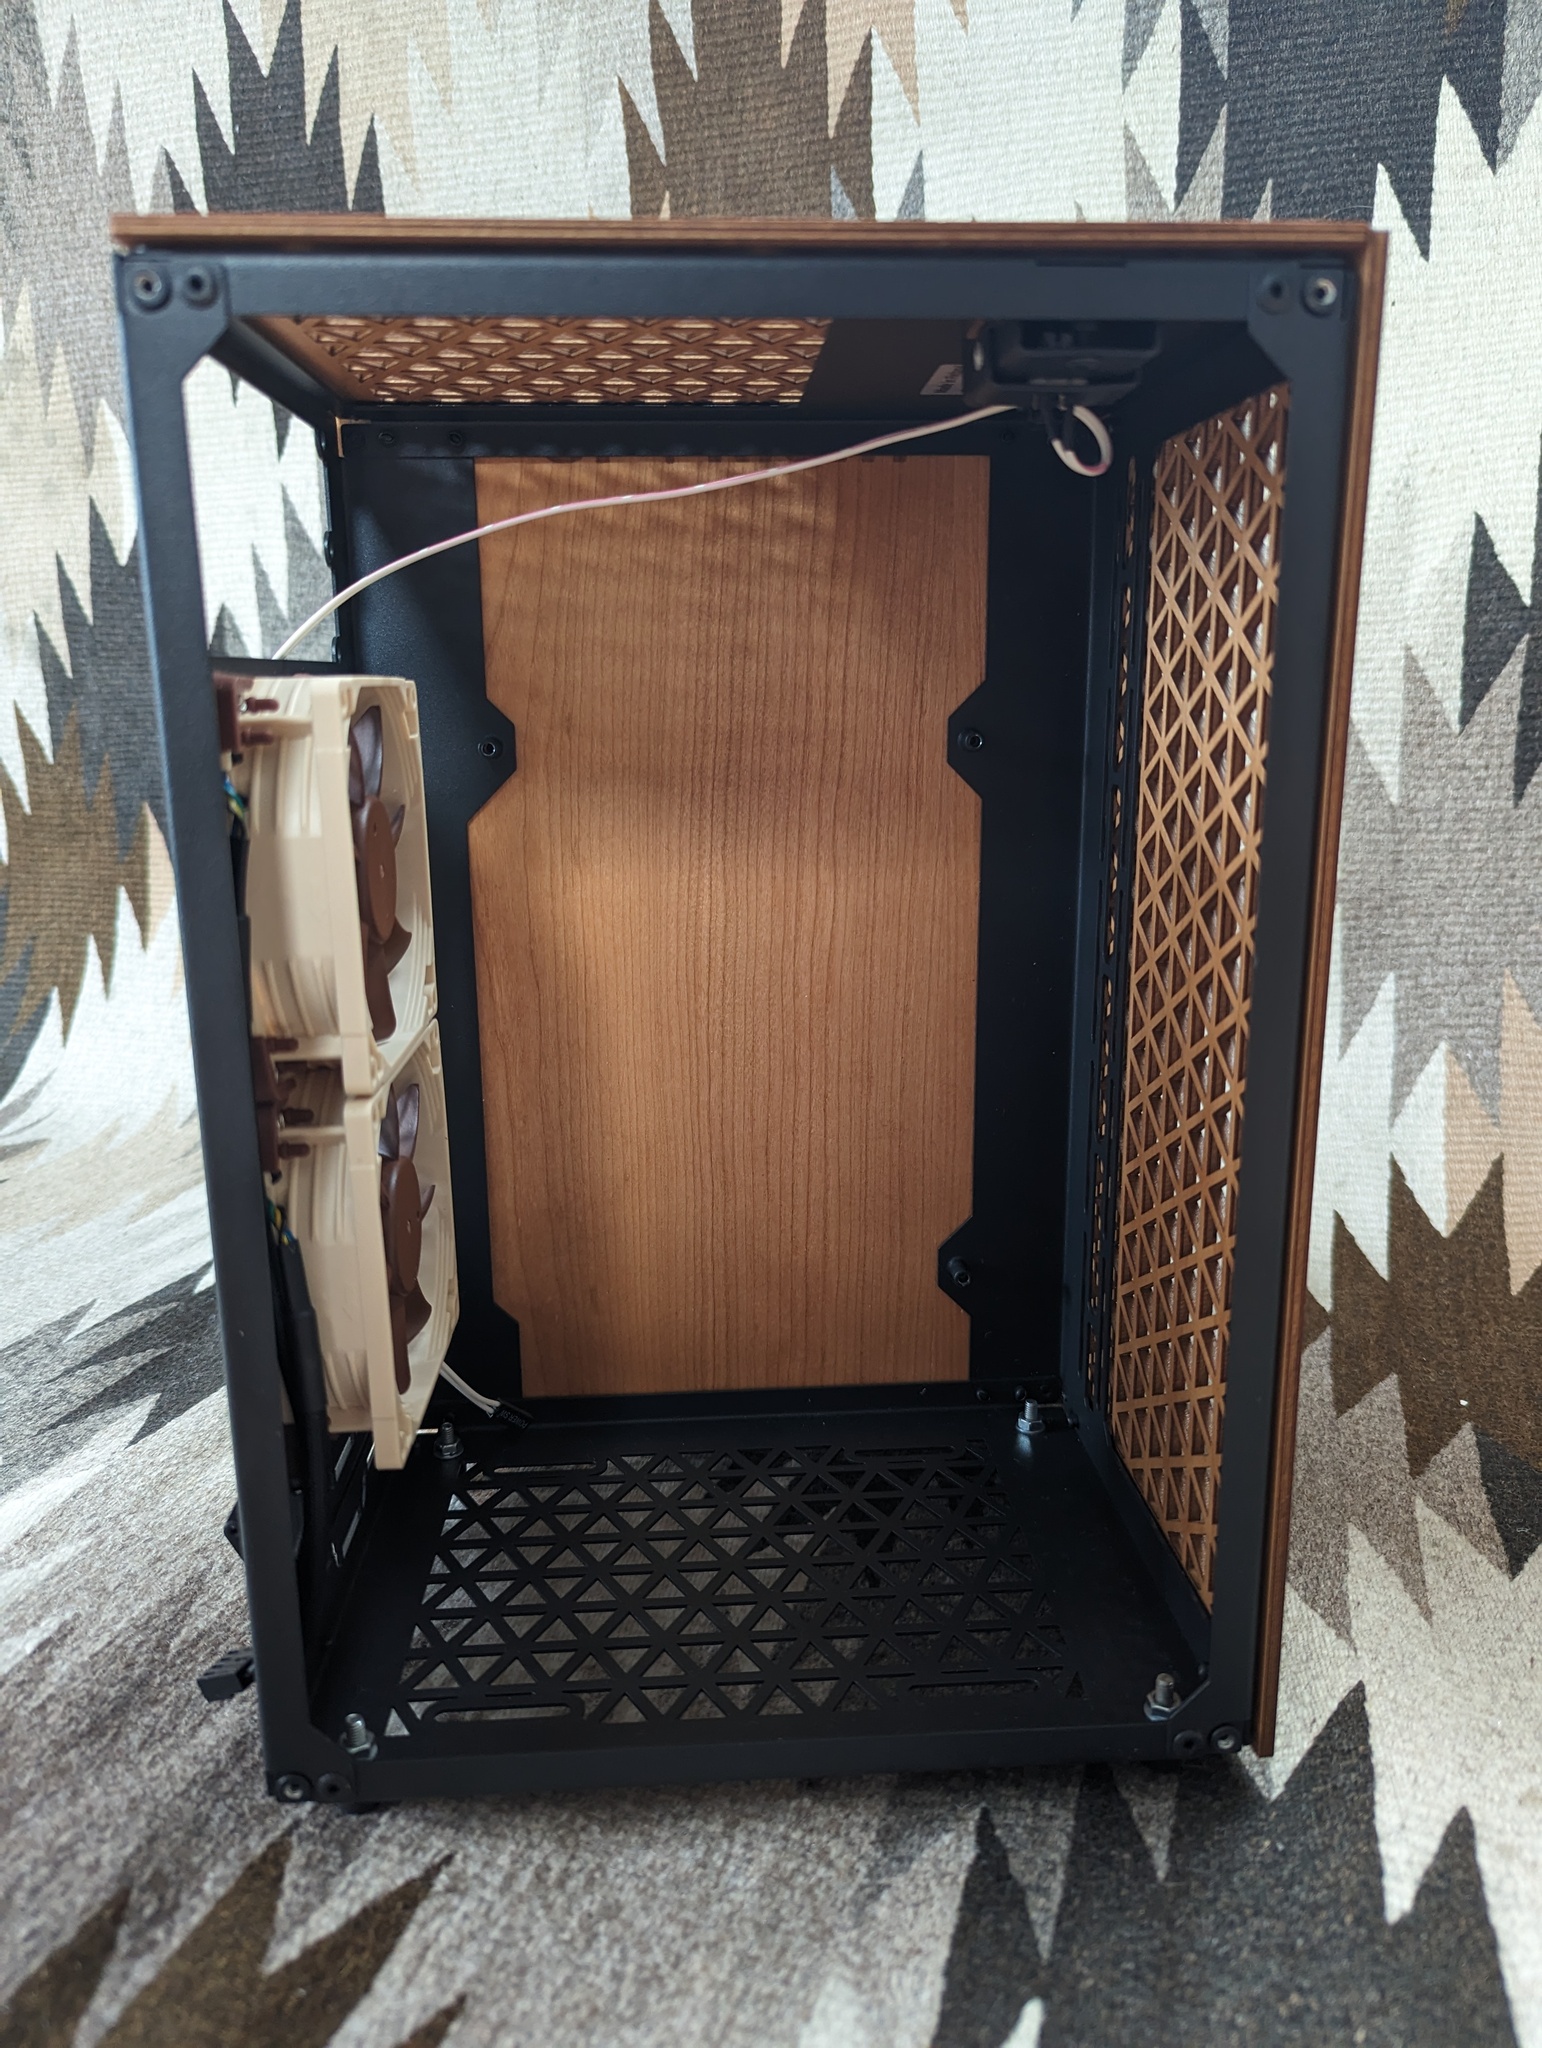
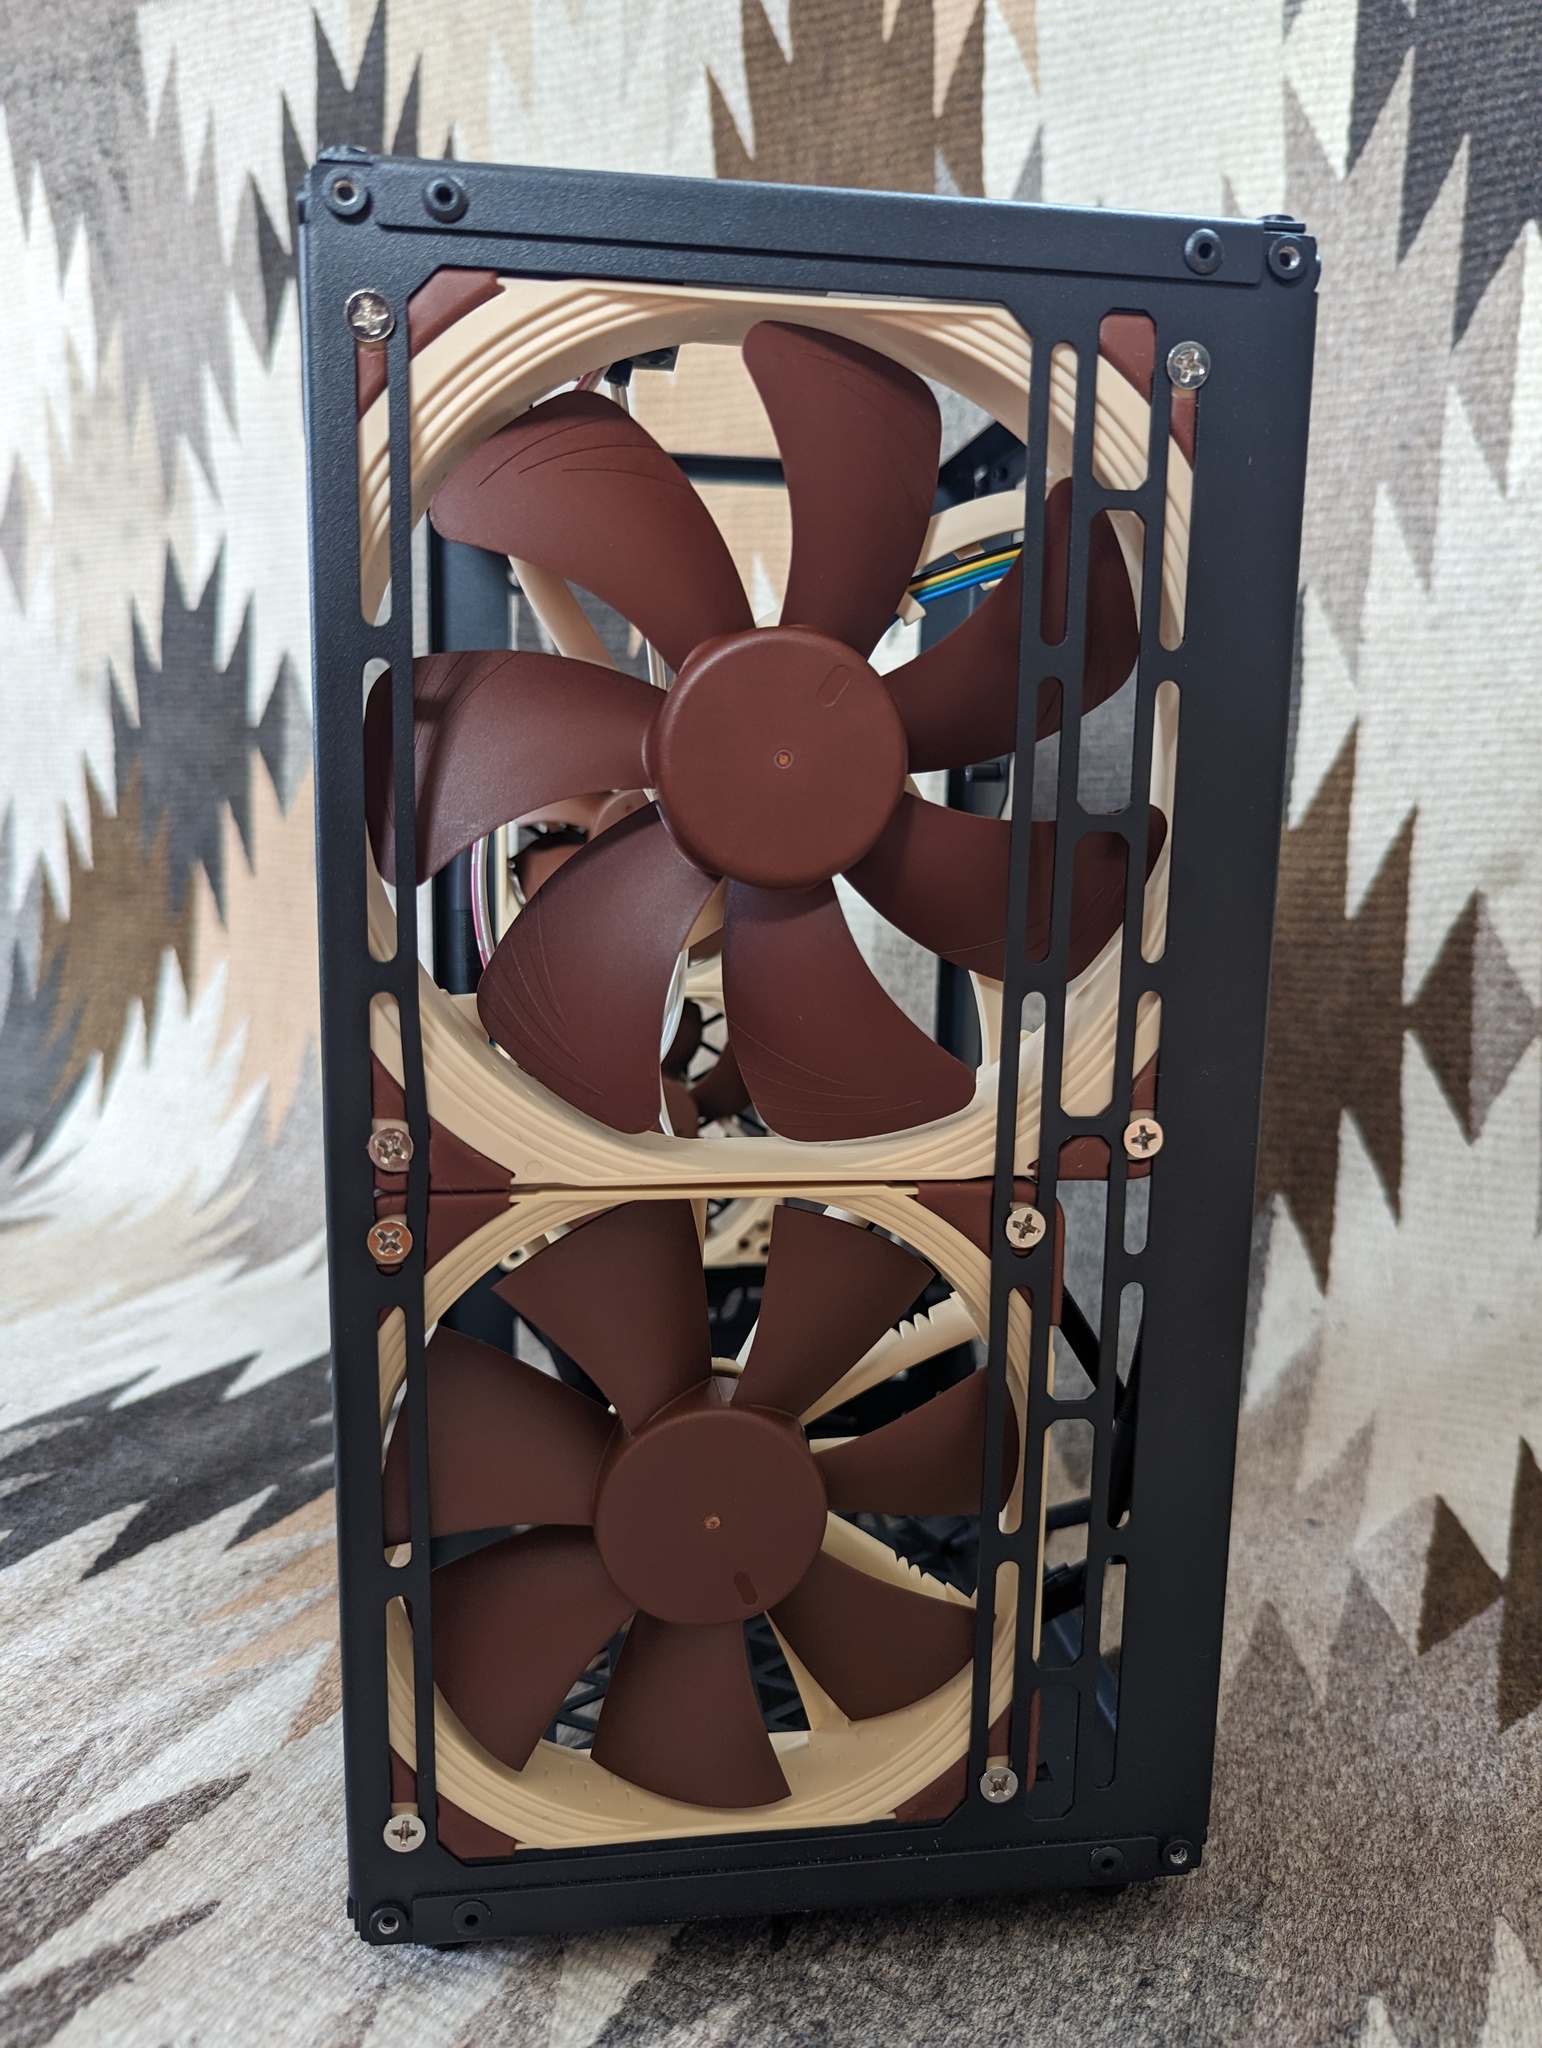
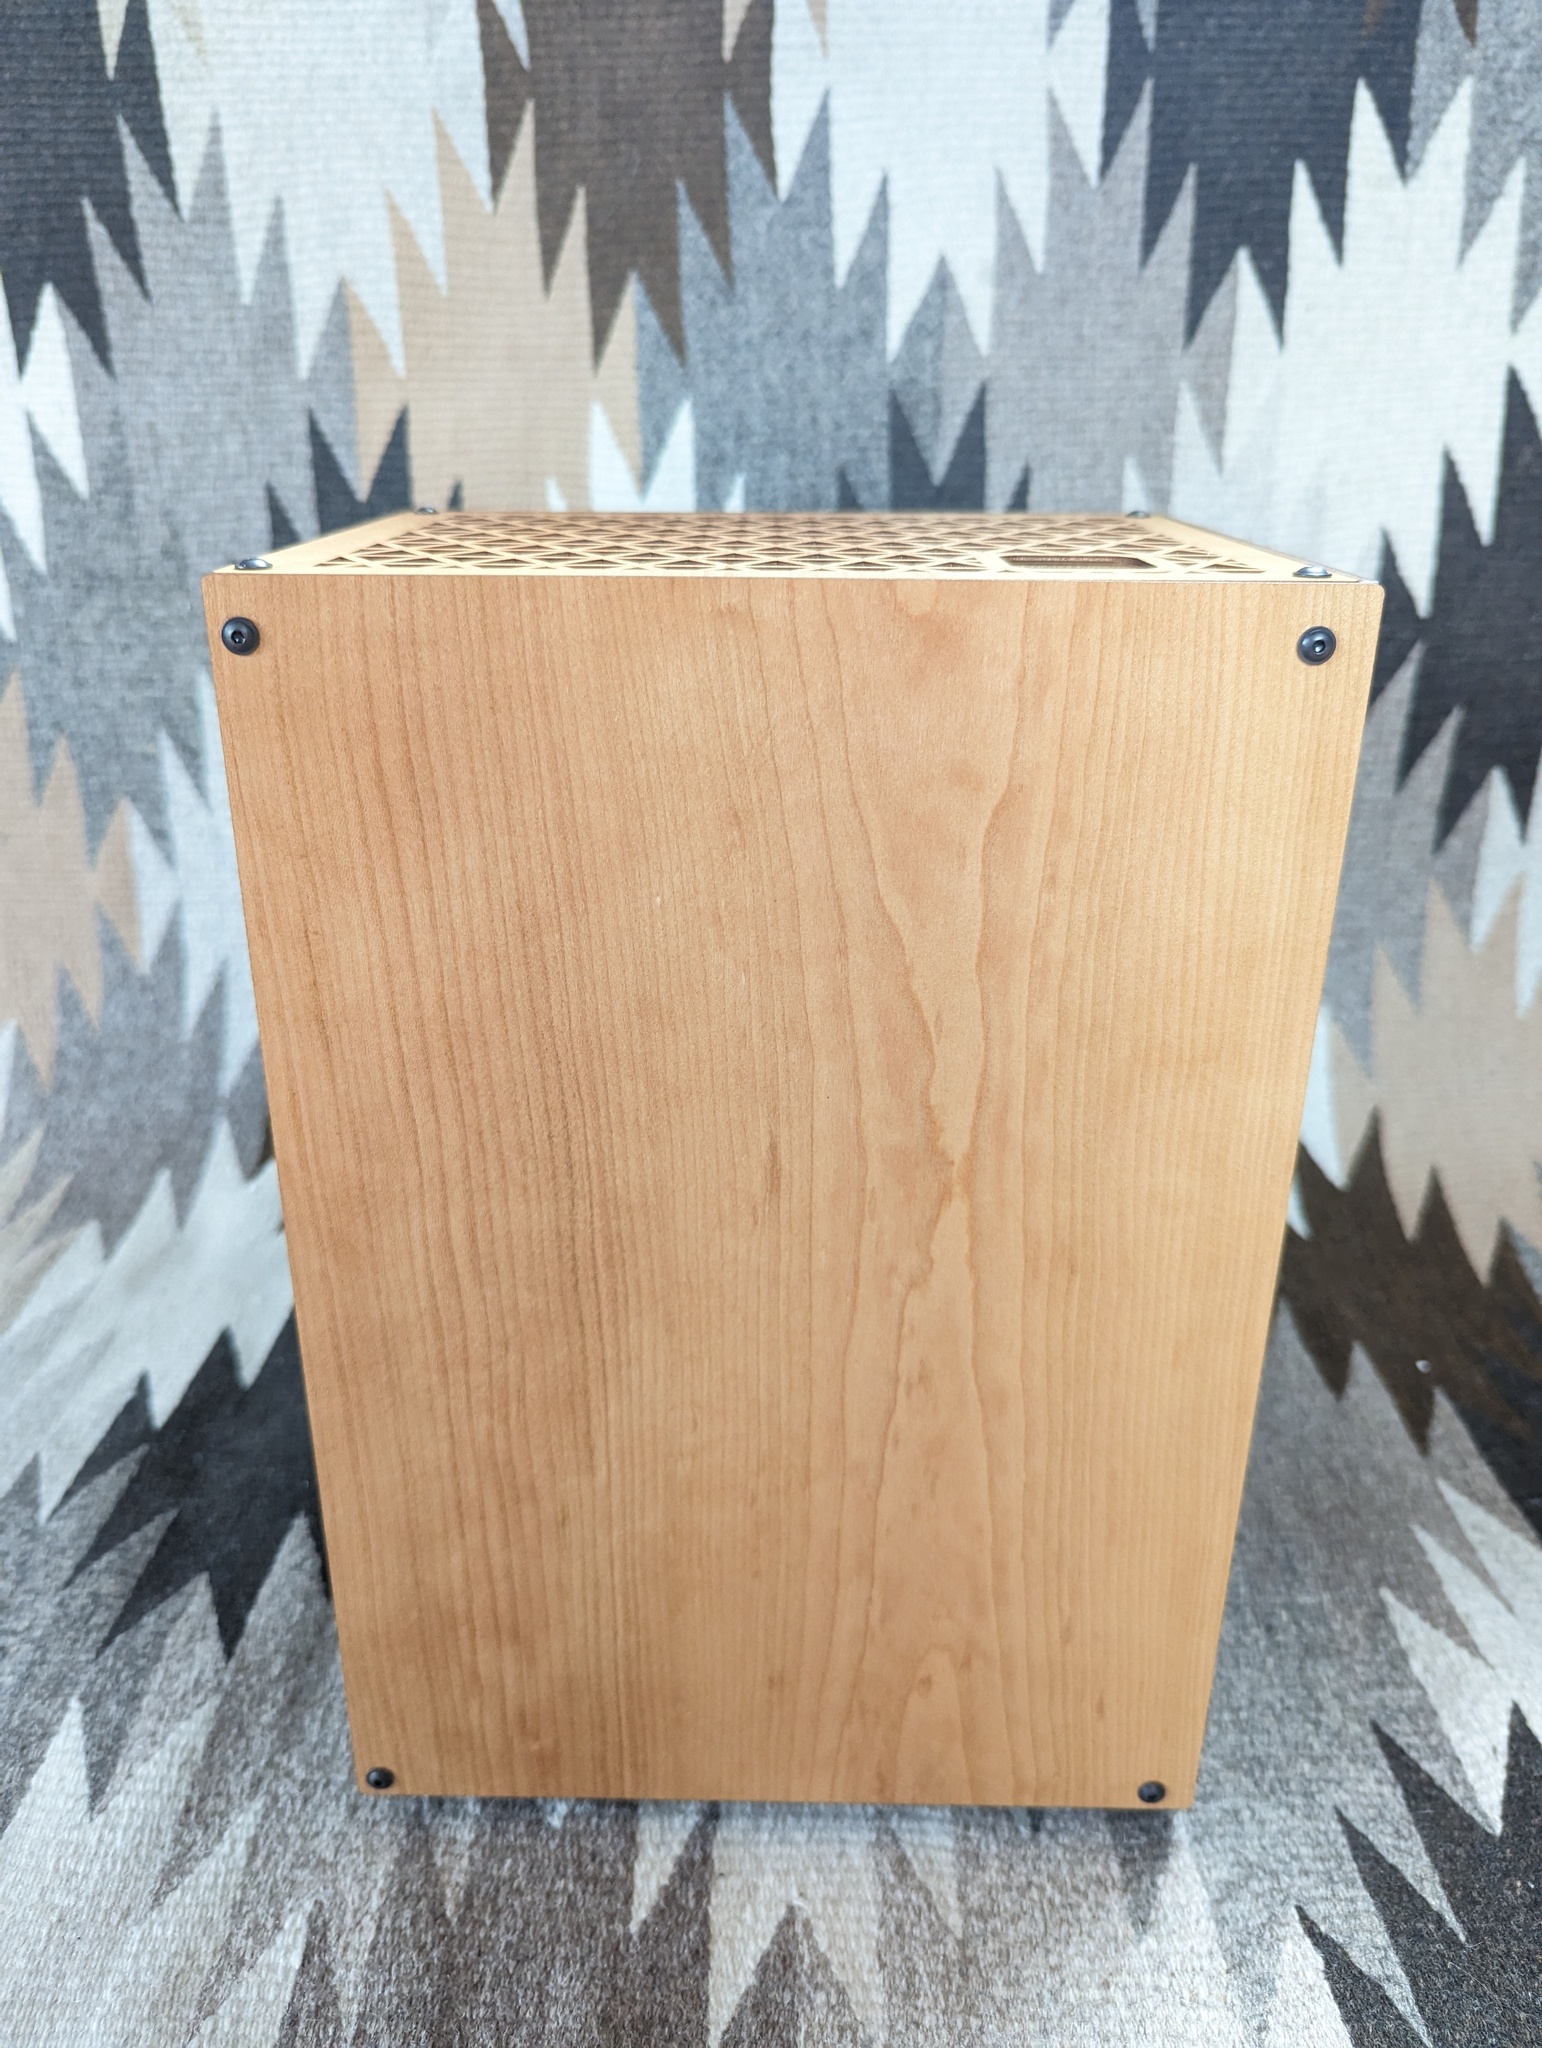
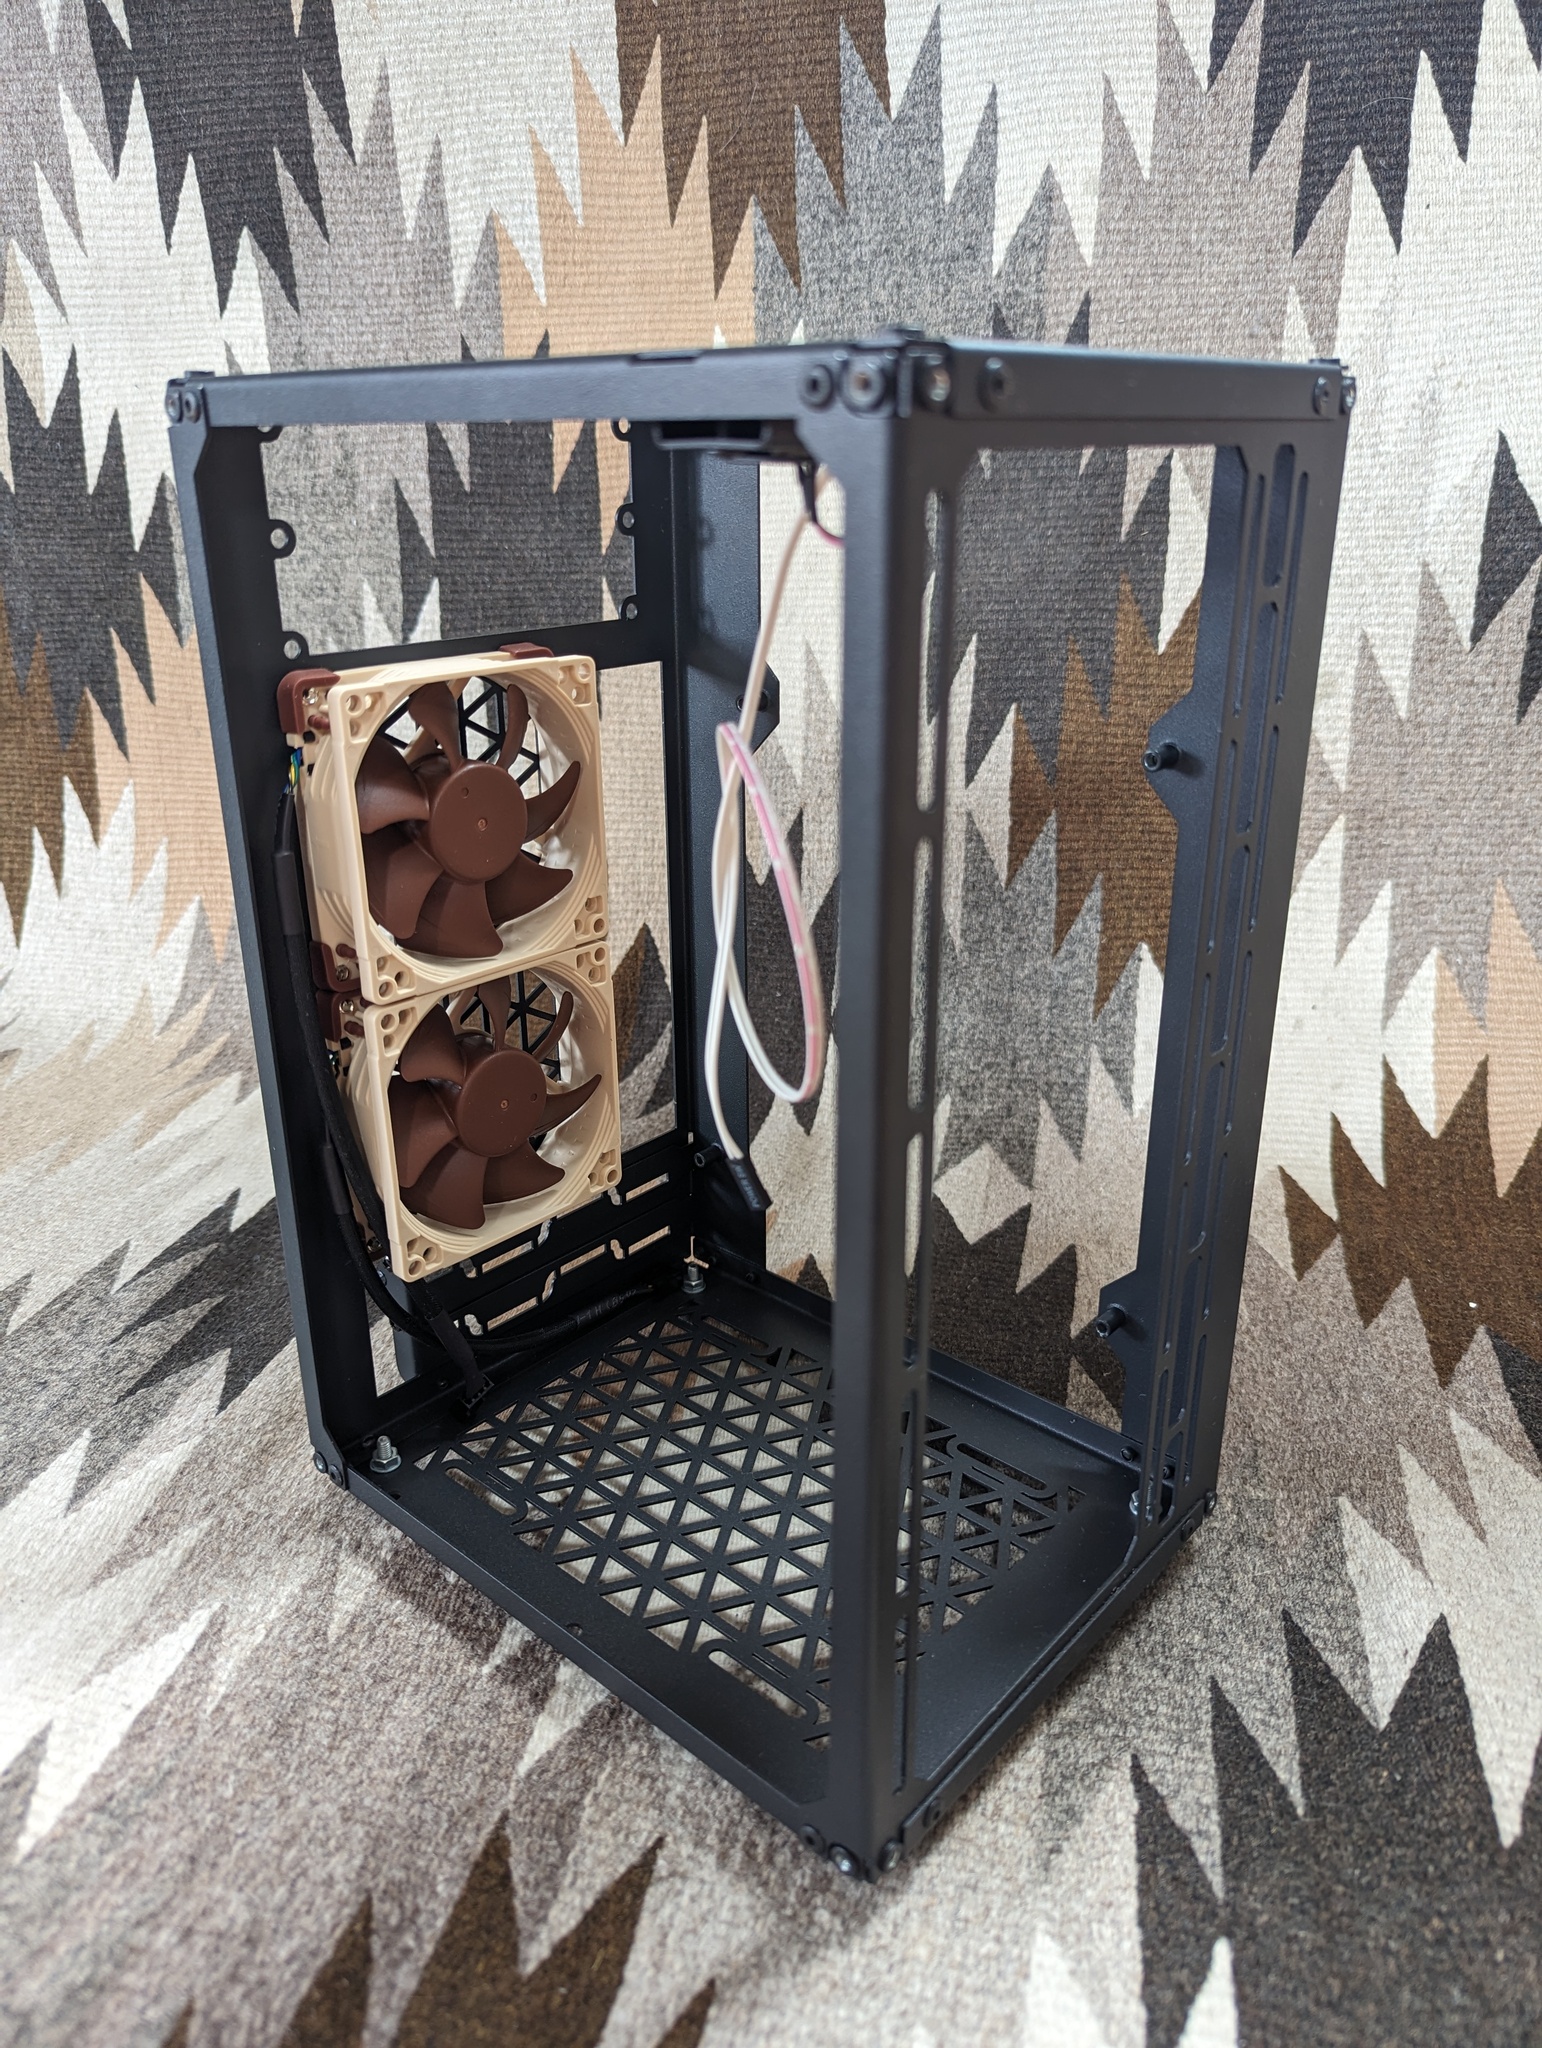
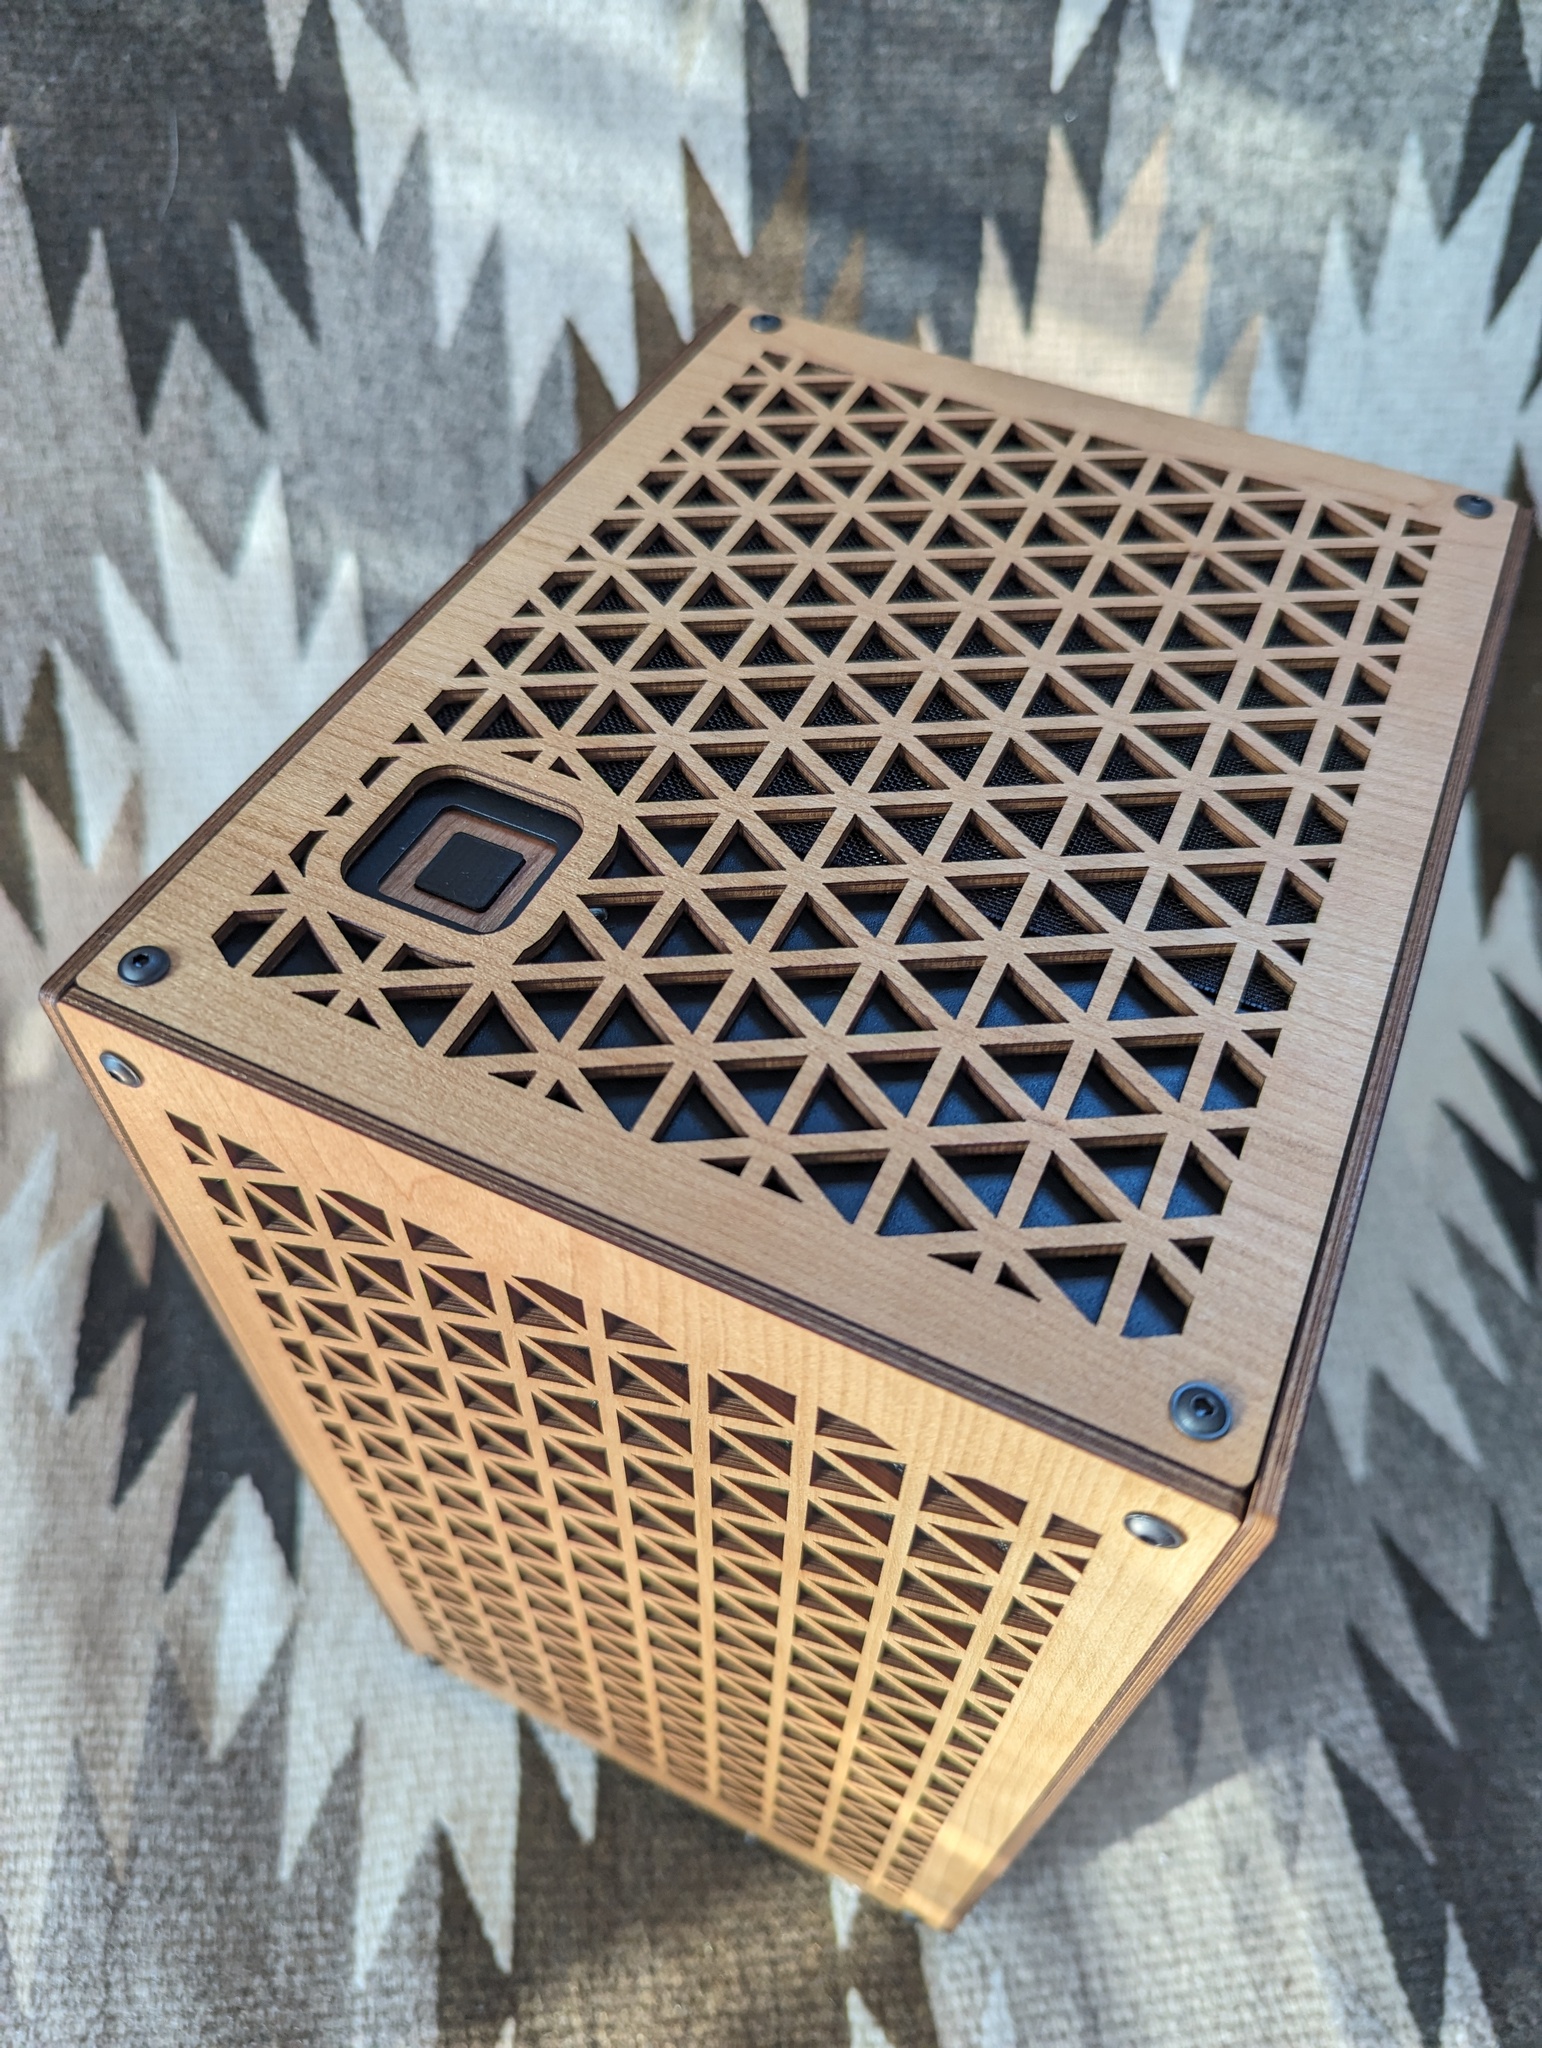
Here are some photos of the case more-or-less as it appears out of the box. This is the ‘cherry’ colourway for the side panels. Note that the apparent lightness of the panels will vary as some photos are exposure compensated for the black elements of the case.


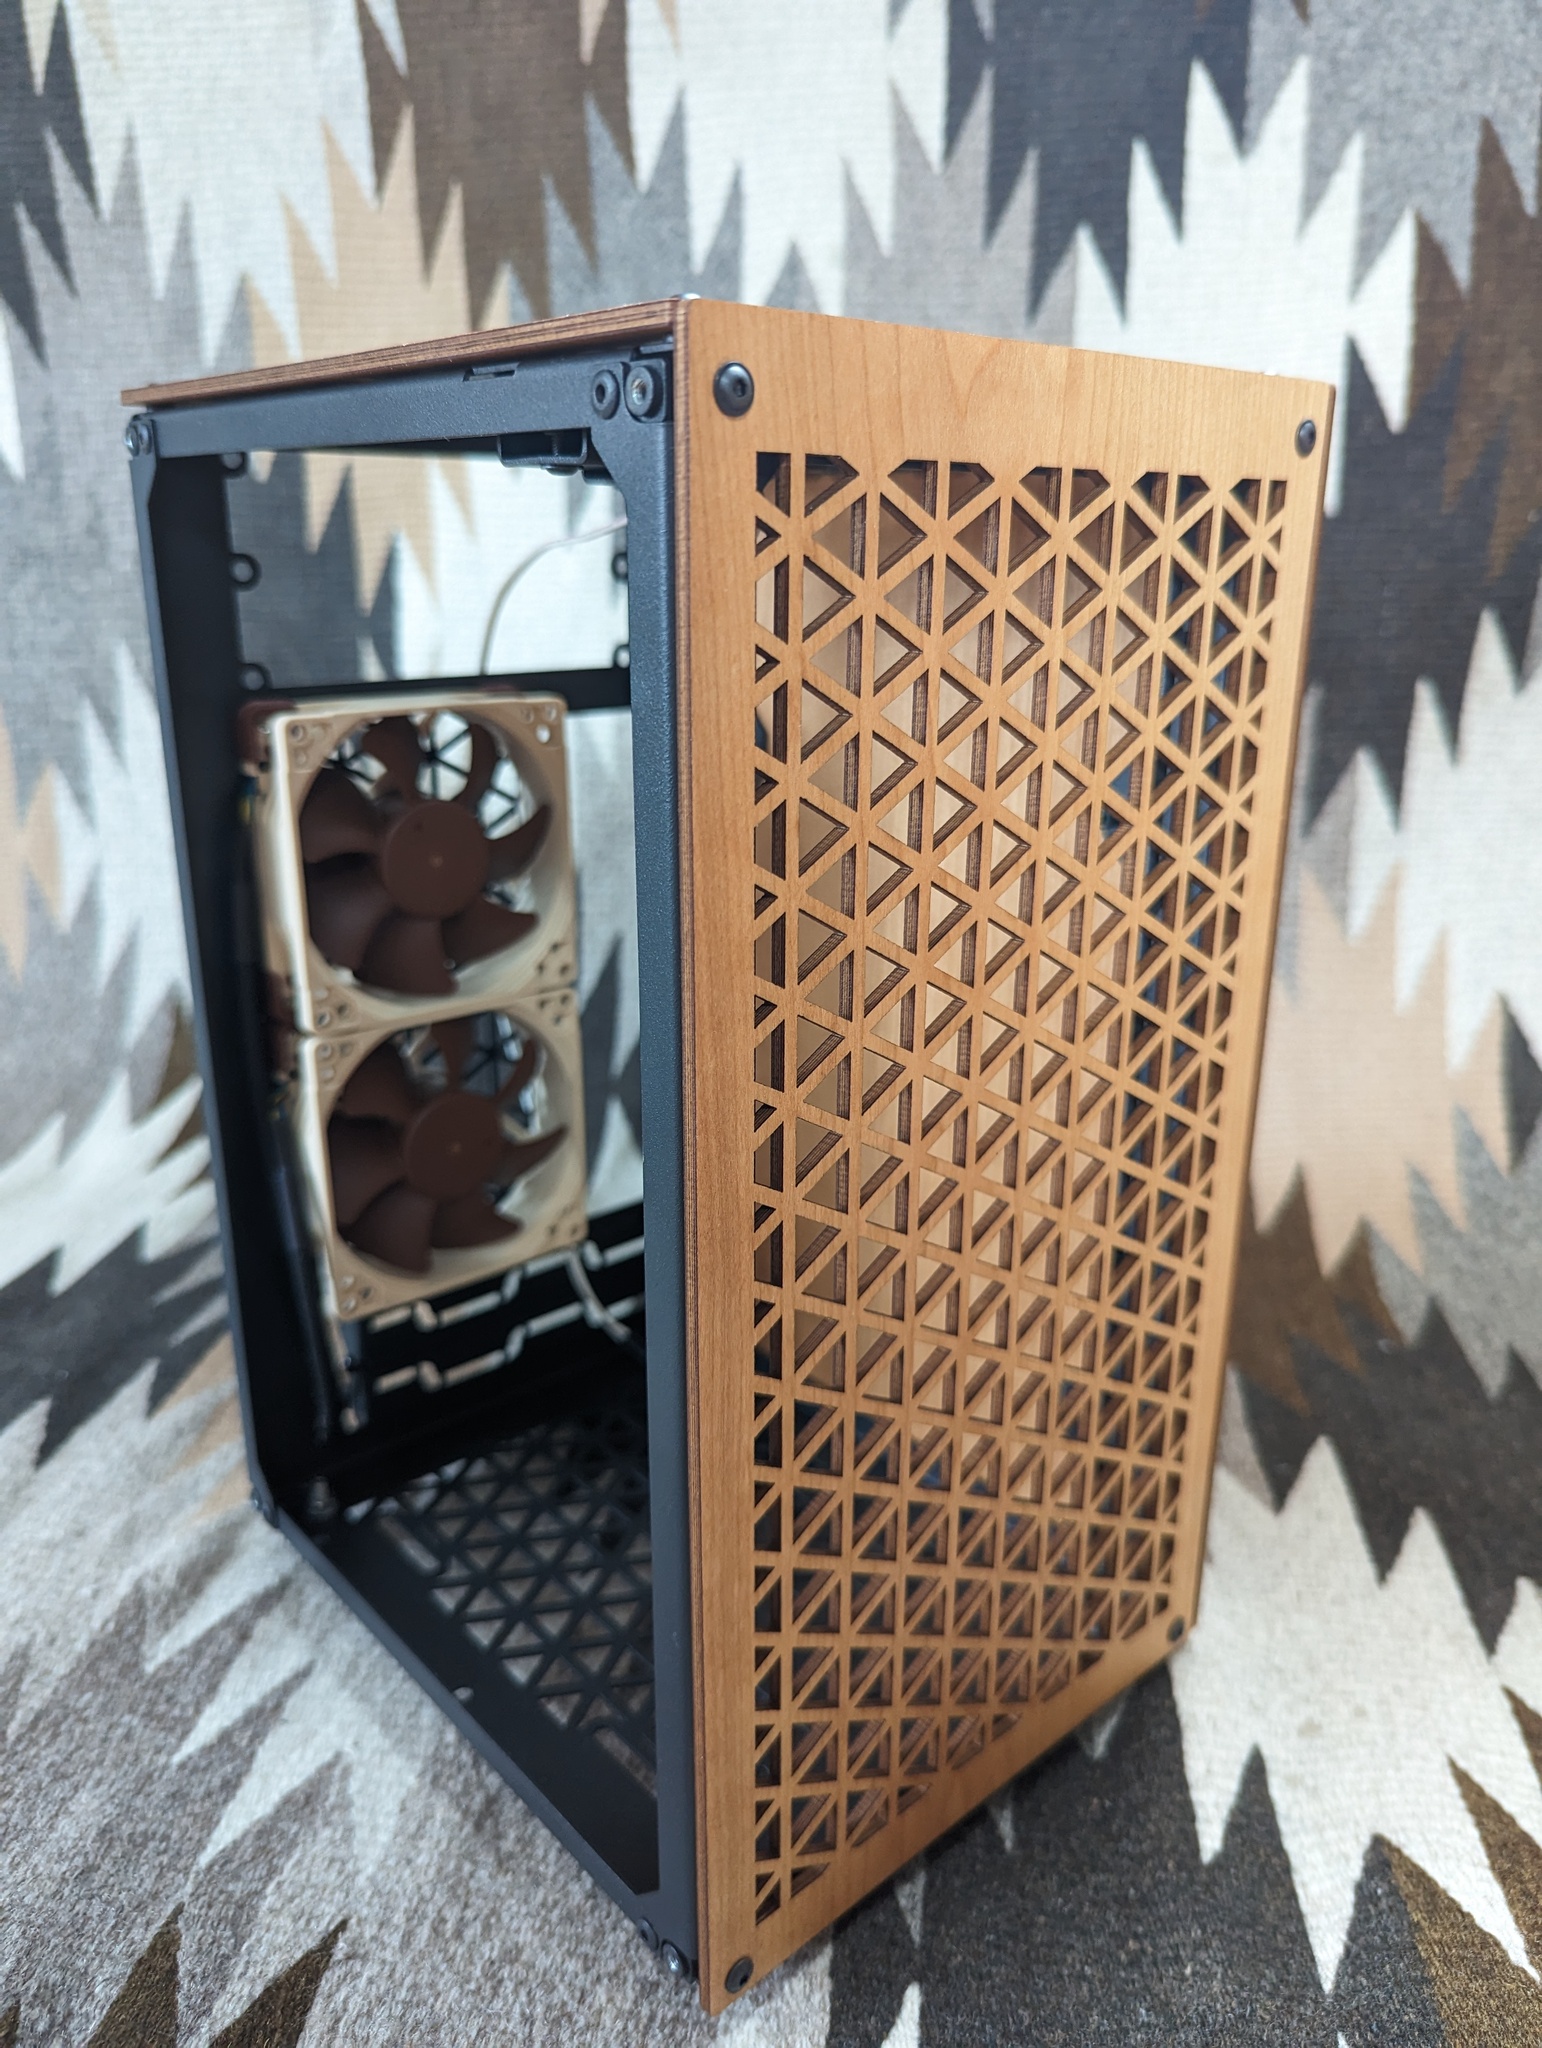
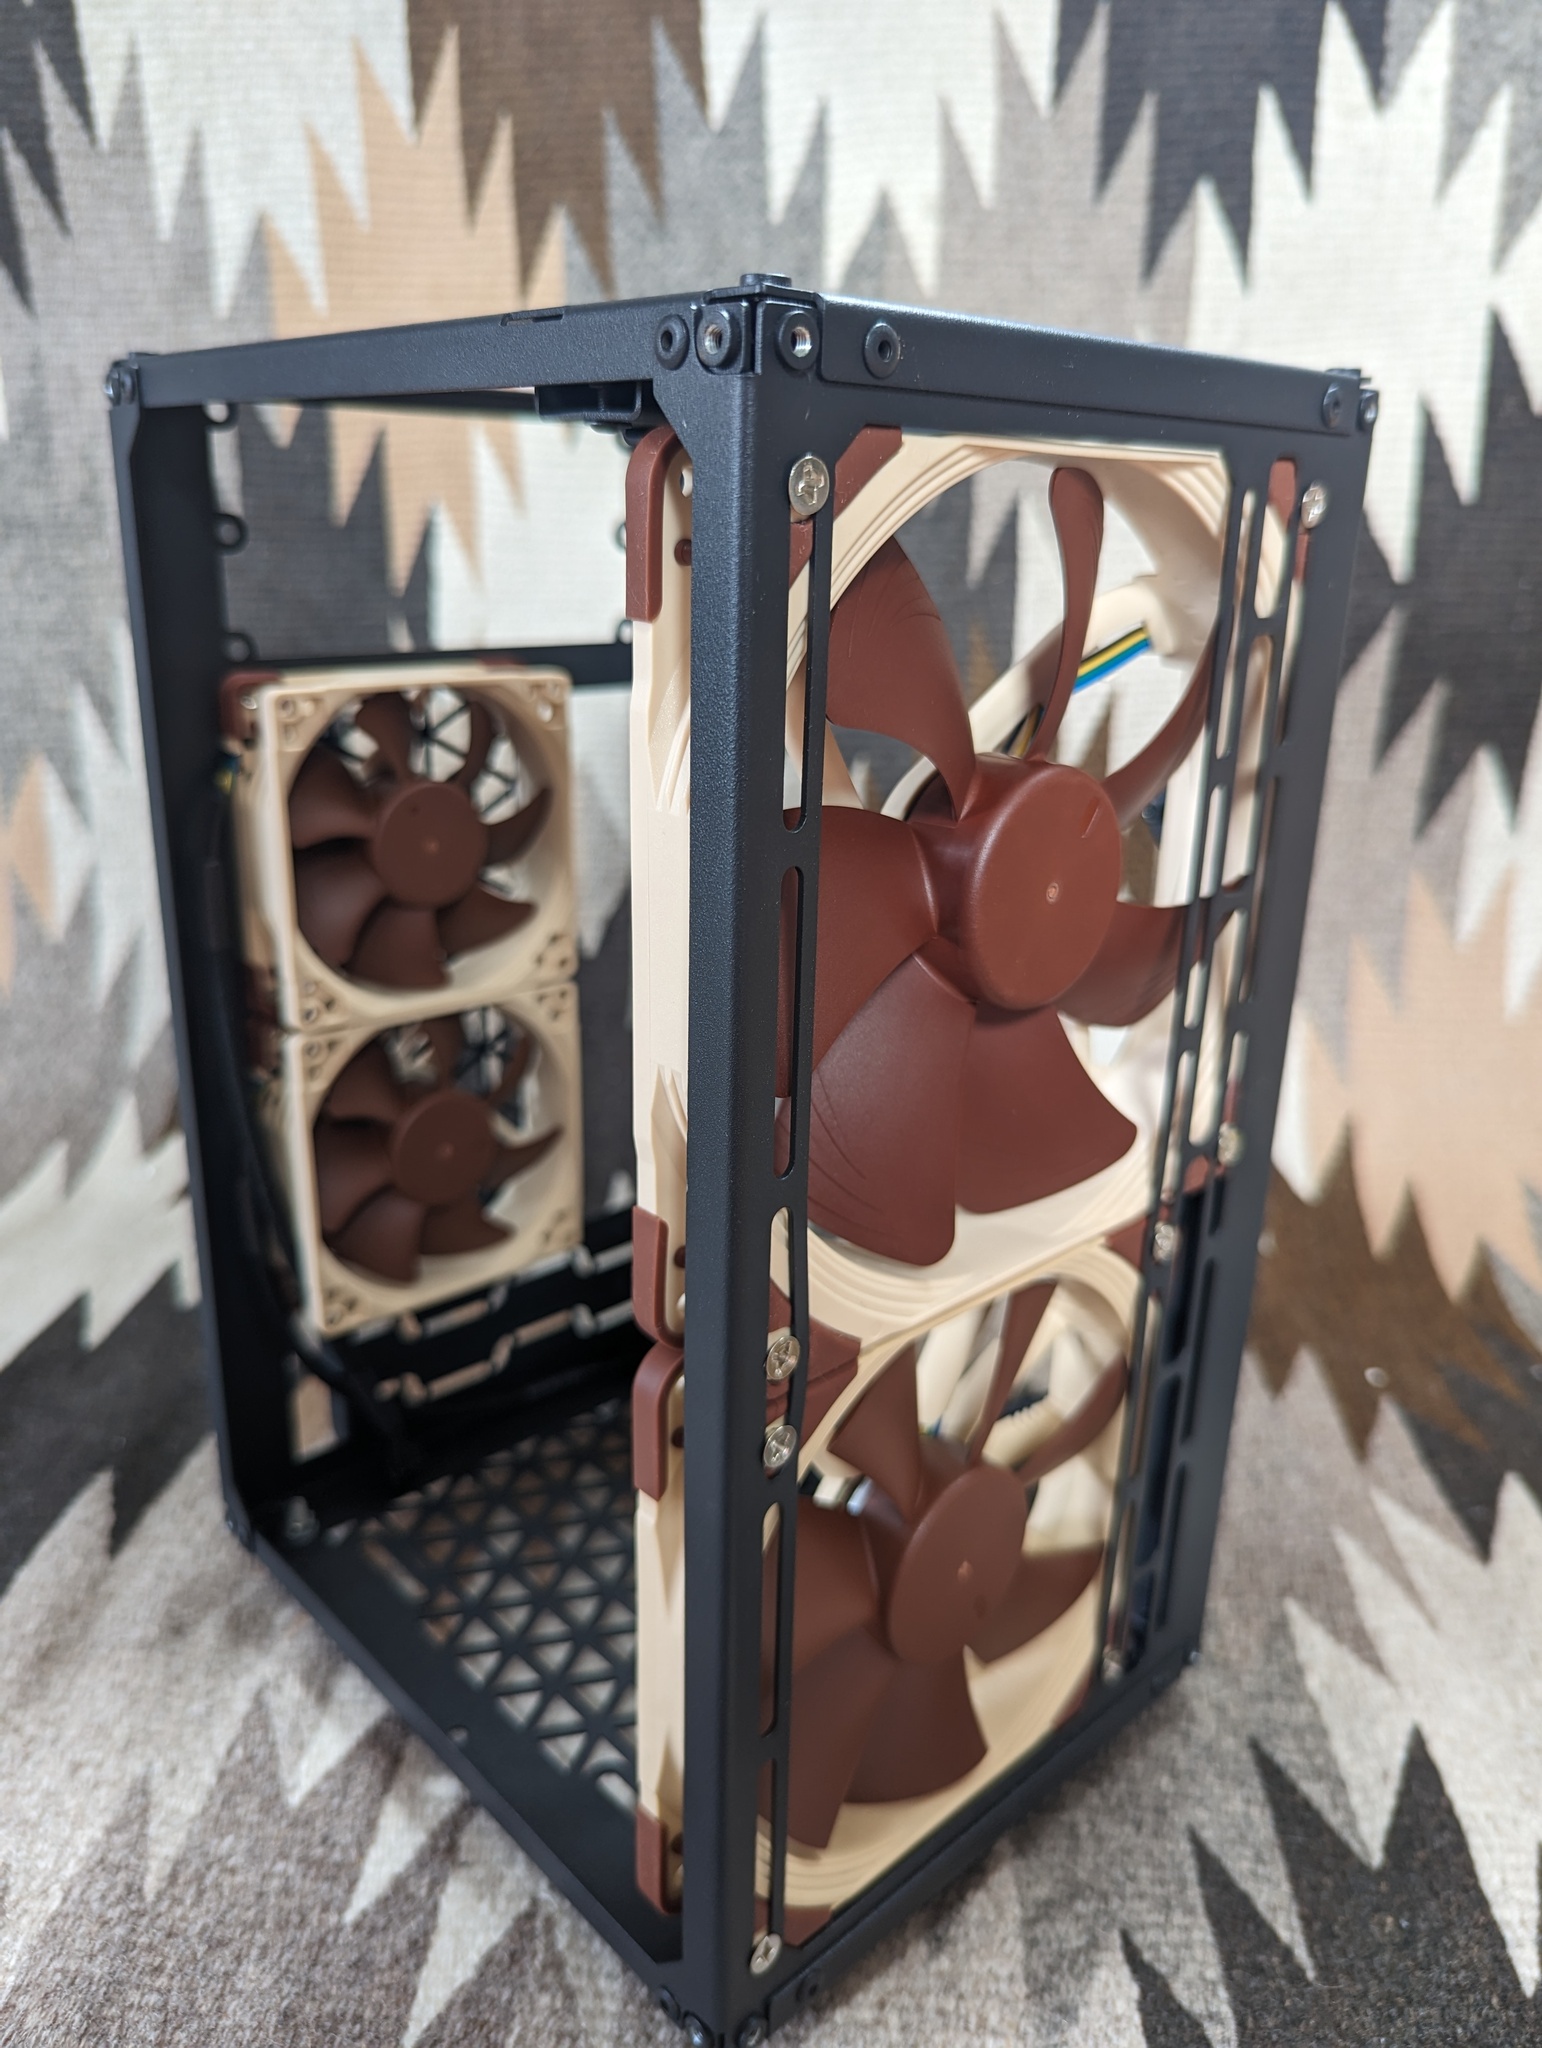
Initial Observations
- Shipping cost is pretty reasonable for international, but budget some time for delivery. I placed my order on July 10th, the case shipped on the 14th, and arrived on the 24th.
- Case arrived fully assembled and nicely packed. There were styrofoam plates on the top and bottom, and U-shaped spacers on the face and rear to ensure all sides were stood off from the shipping box. The entire box itself was also wrapped in some foam packaging material.
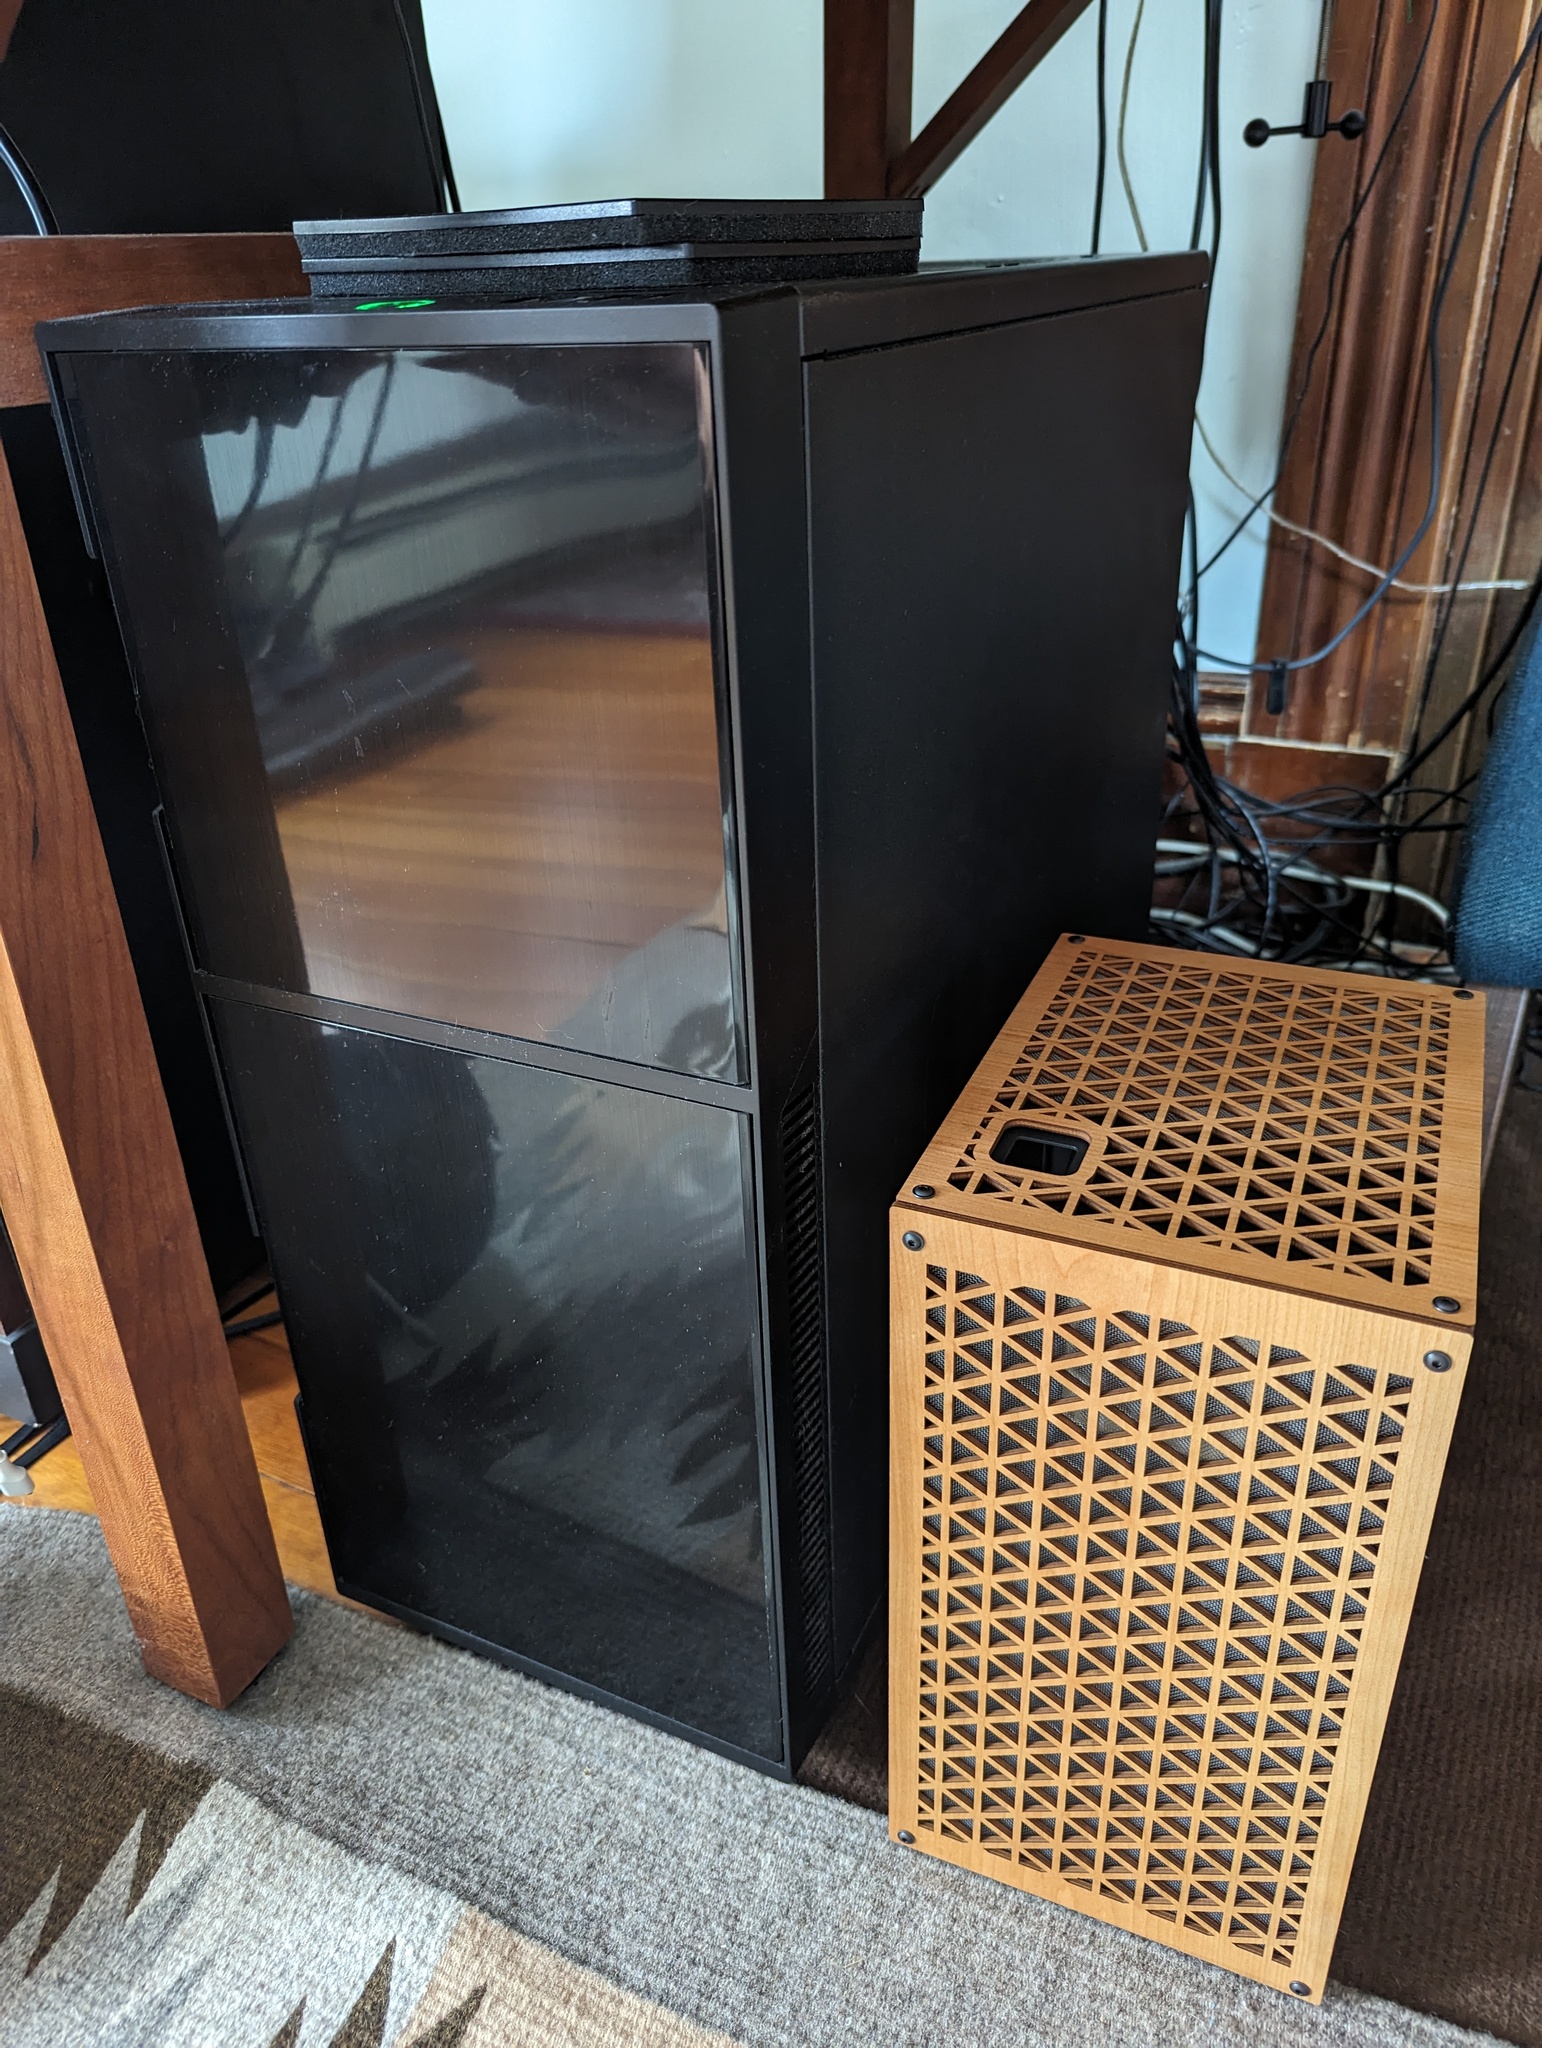
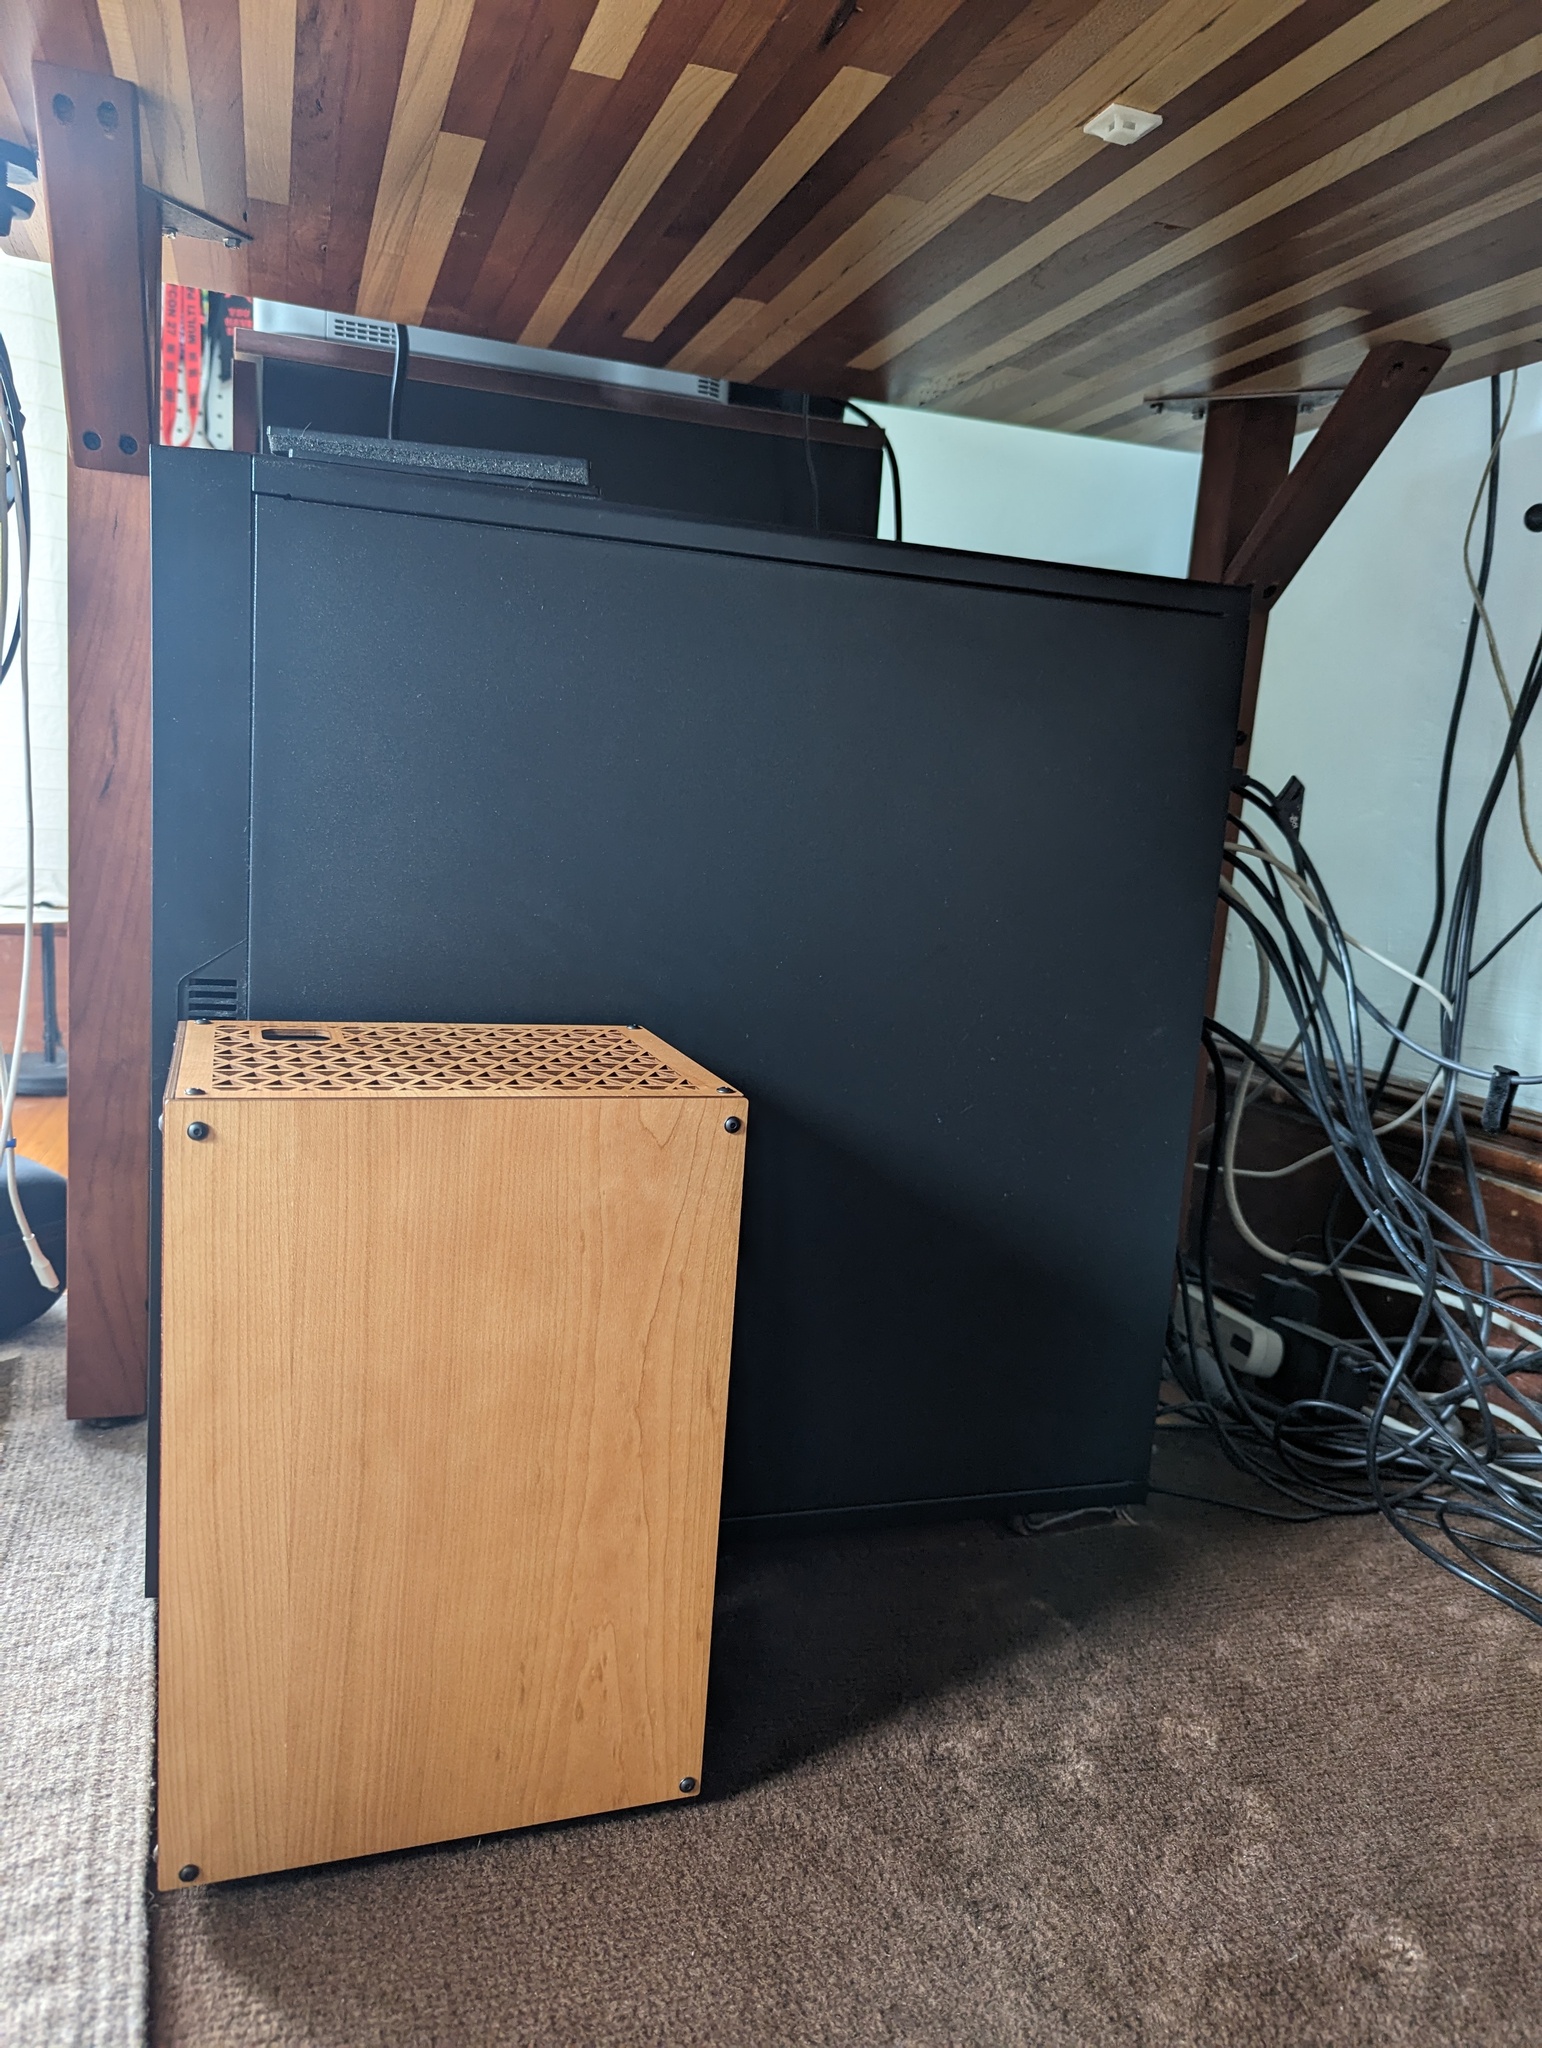
- This thing is tiny! Here’s the Aski 2 next to my existing PC, which is inside a Nanoxia Deep Silence 5, a case which is about 70L (compared to the Aski 2’s 10L).
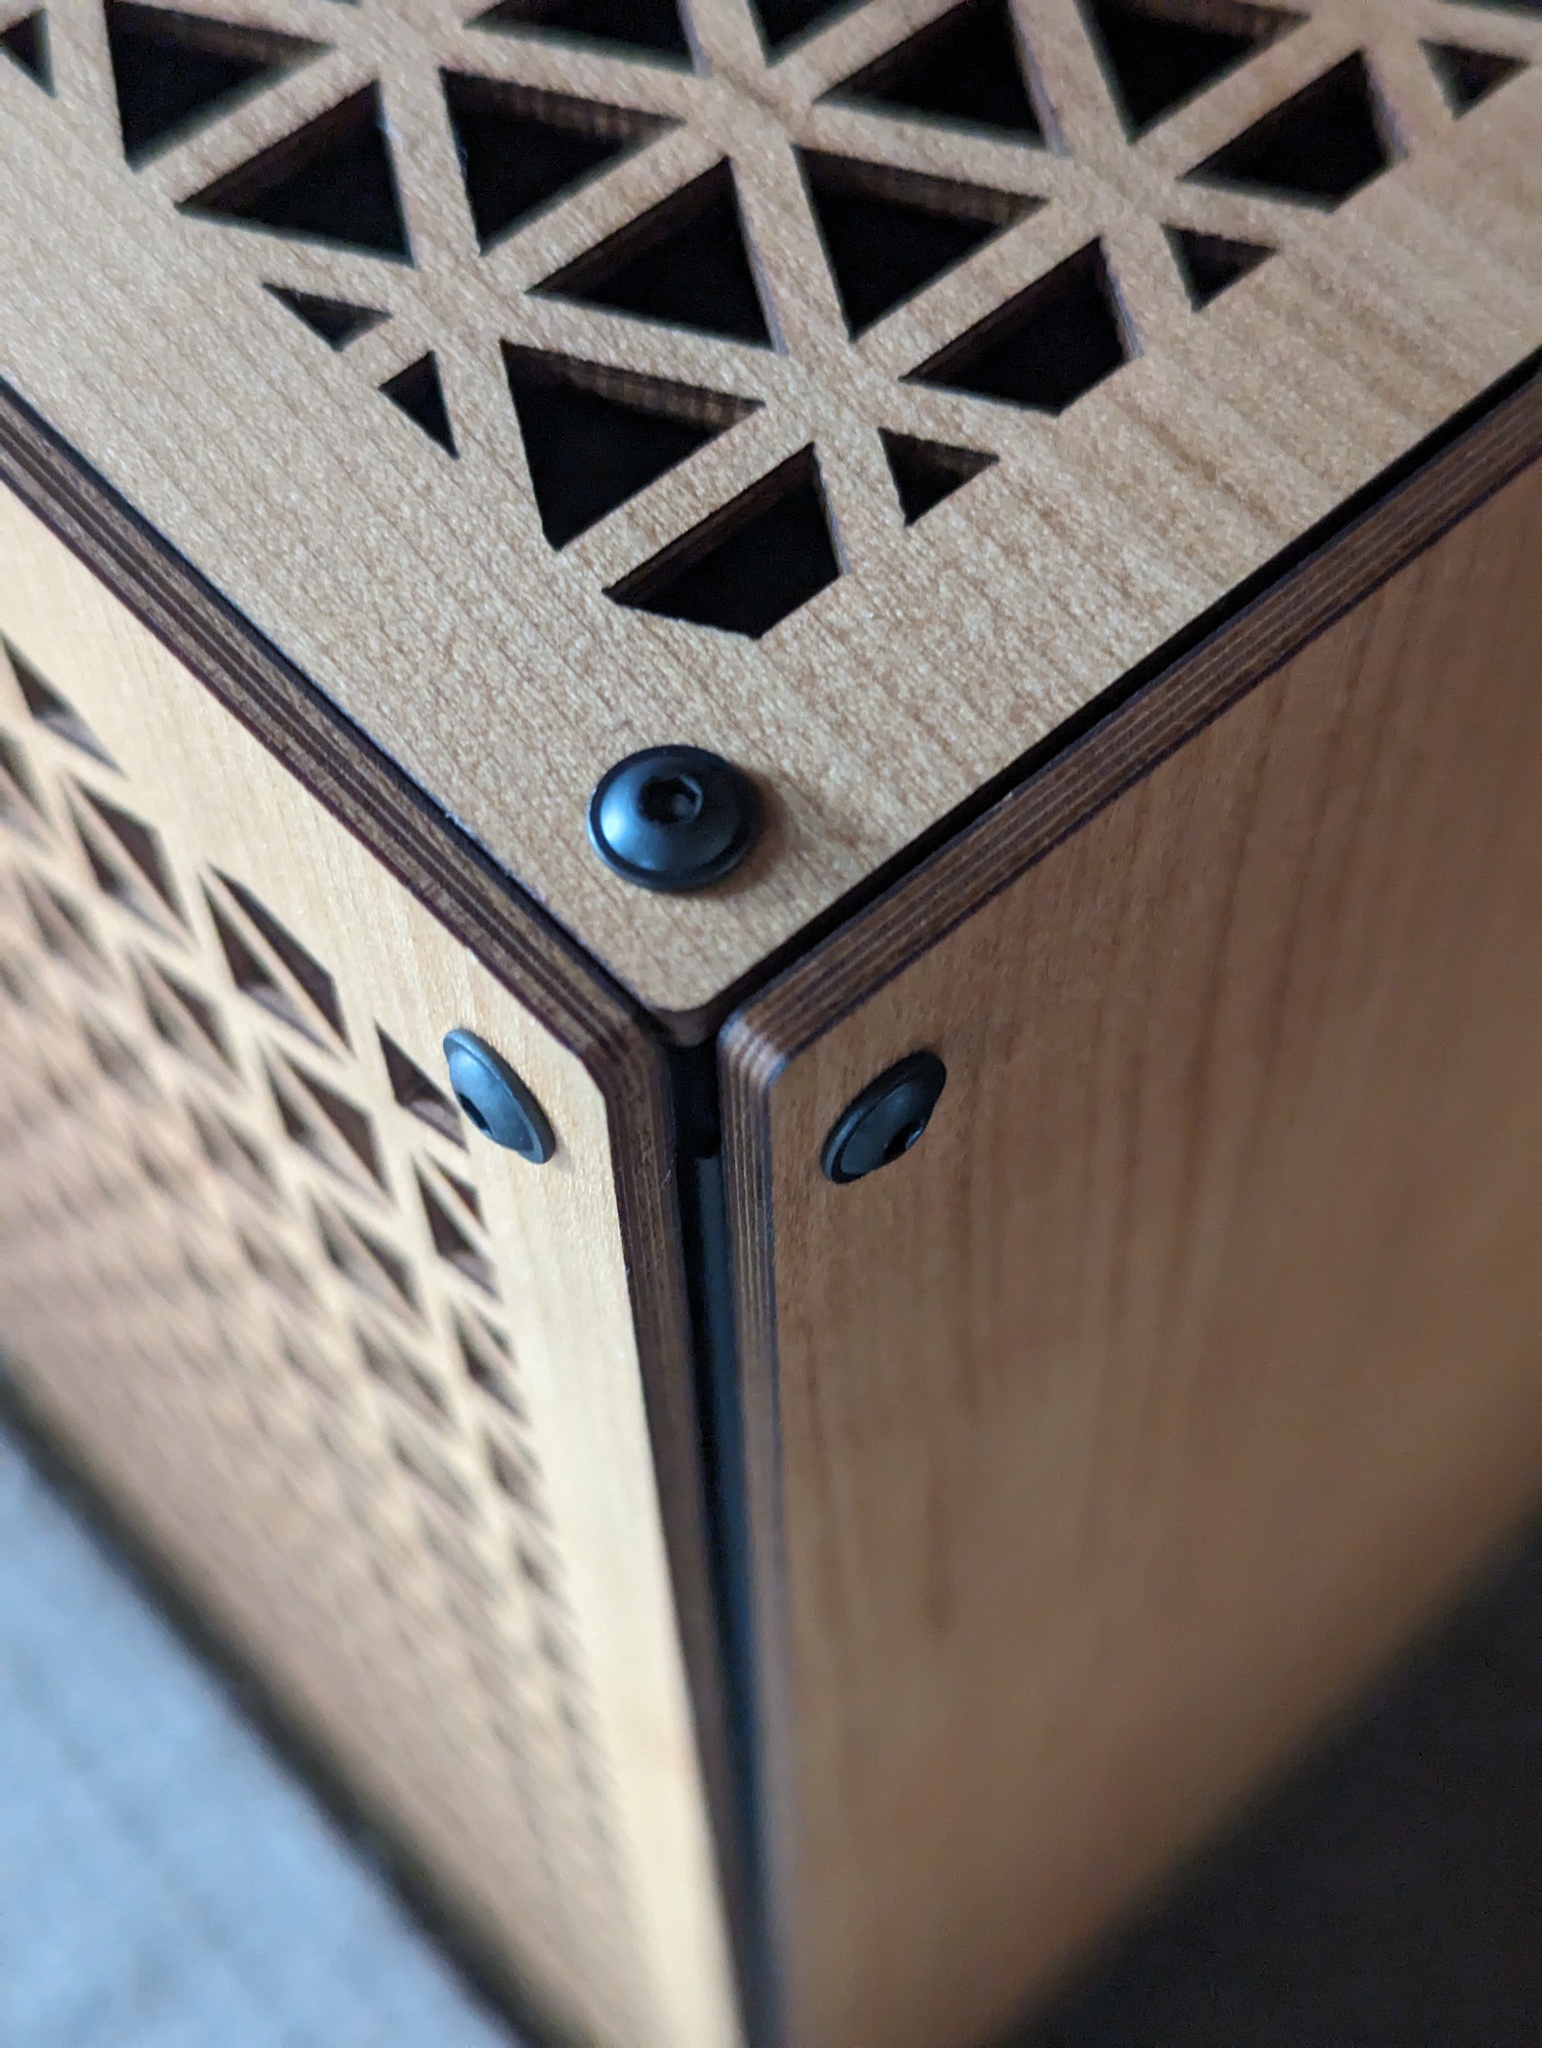
- Case panels are affixed with what look M3x6 black flanged button head screws, so you’ll need a 2mm Allen key. The power button also uses M3 screws, but slightly longer ones (M3x10). The power button can be easily removed if necessary to wrangle the PSU.
- The case doesn’t come with any motherboard mounting screws, and my motherboard only came with whatever thread screws come with ordinary ATX cases. The standoffs on the Aski 2 are M3 thread, though the thread starts surprisingly far down the standoff - there’s about 4mm of unthreaded lead-in. Not sure what purpose this serves, but I had some M3x12 button heads lying around, so I used 4 of these to secure the motherboard. The top of the standoffs are about 9mm from the top face of the internal metal panel, which leaves a little bit of room on the back for hiding cables.
- The internal metal structure feels very sturdy. No flex at all. Riveted construction.
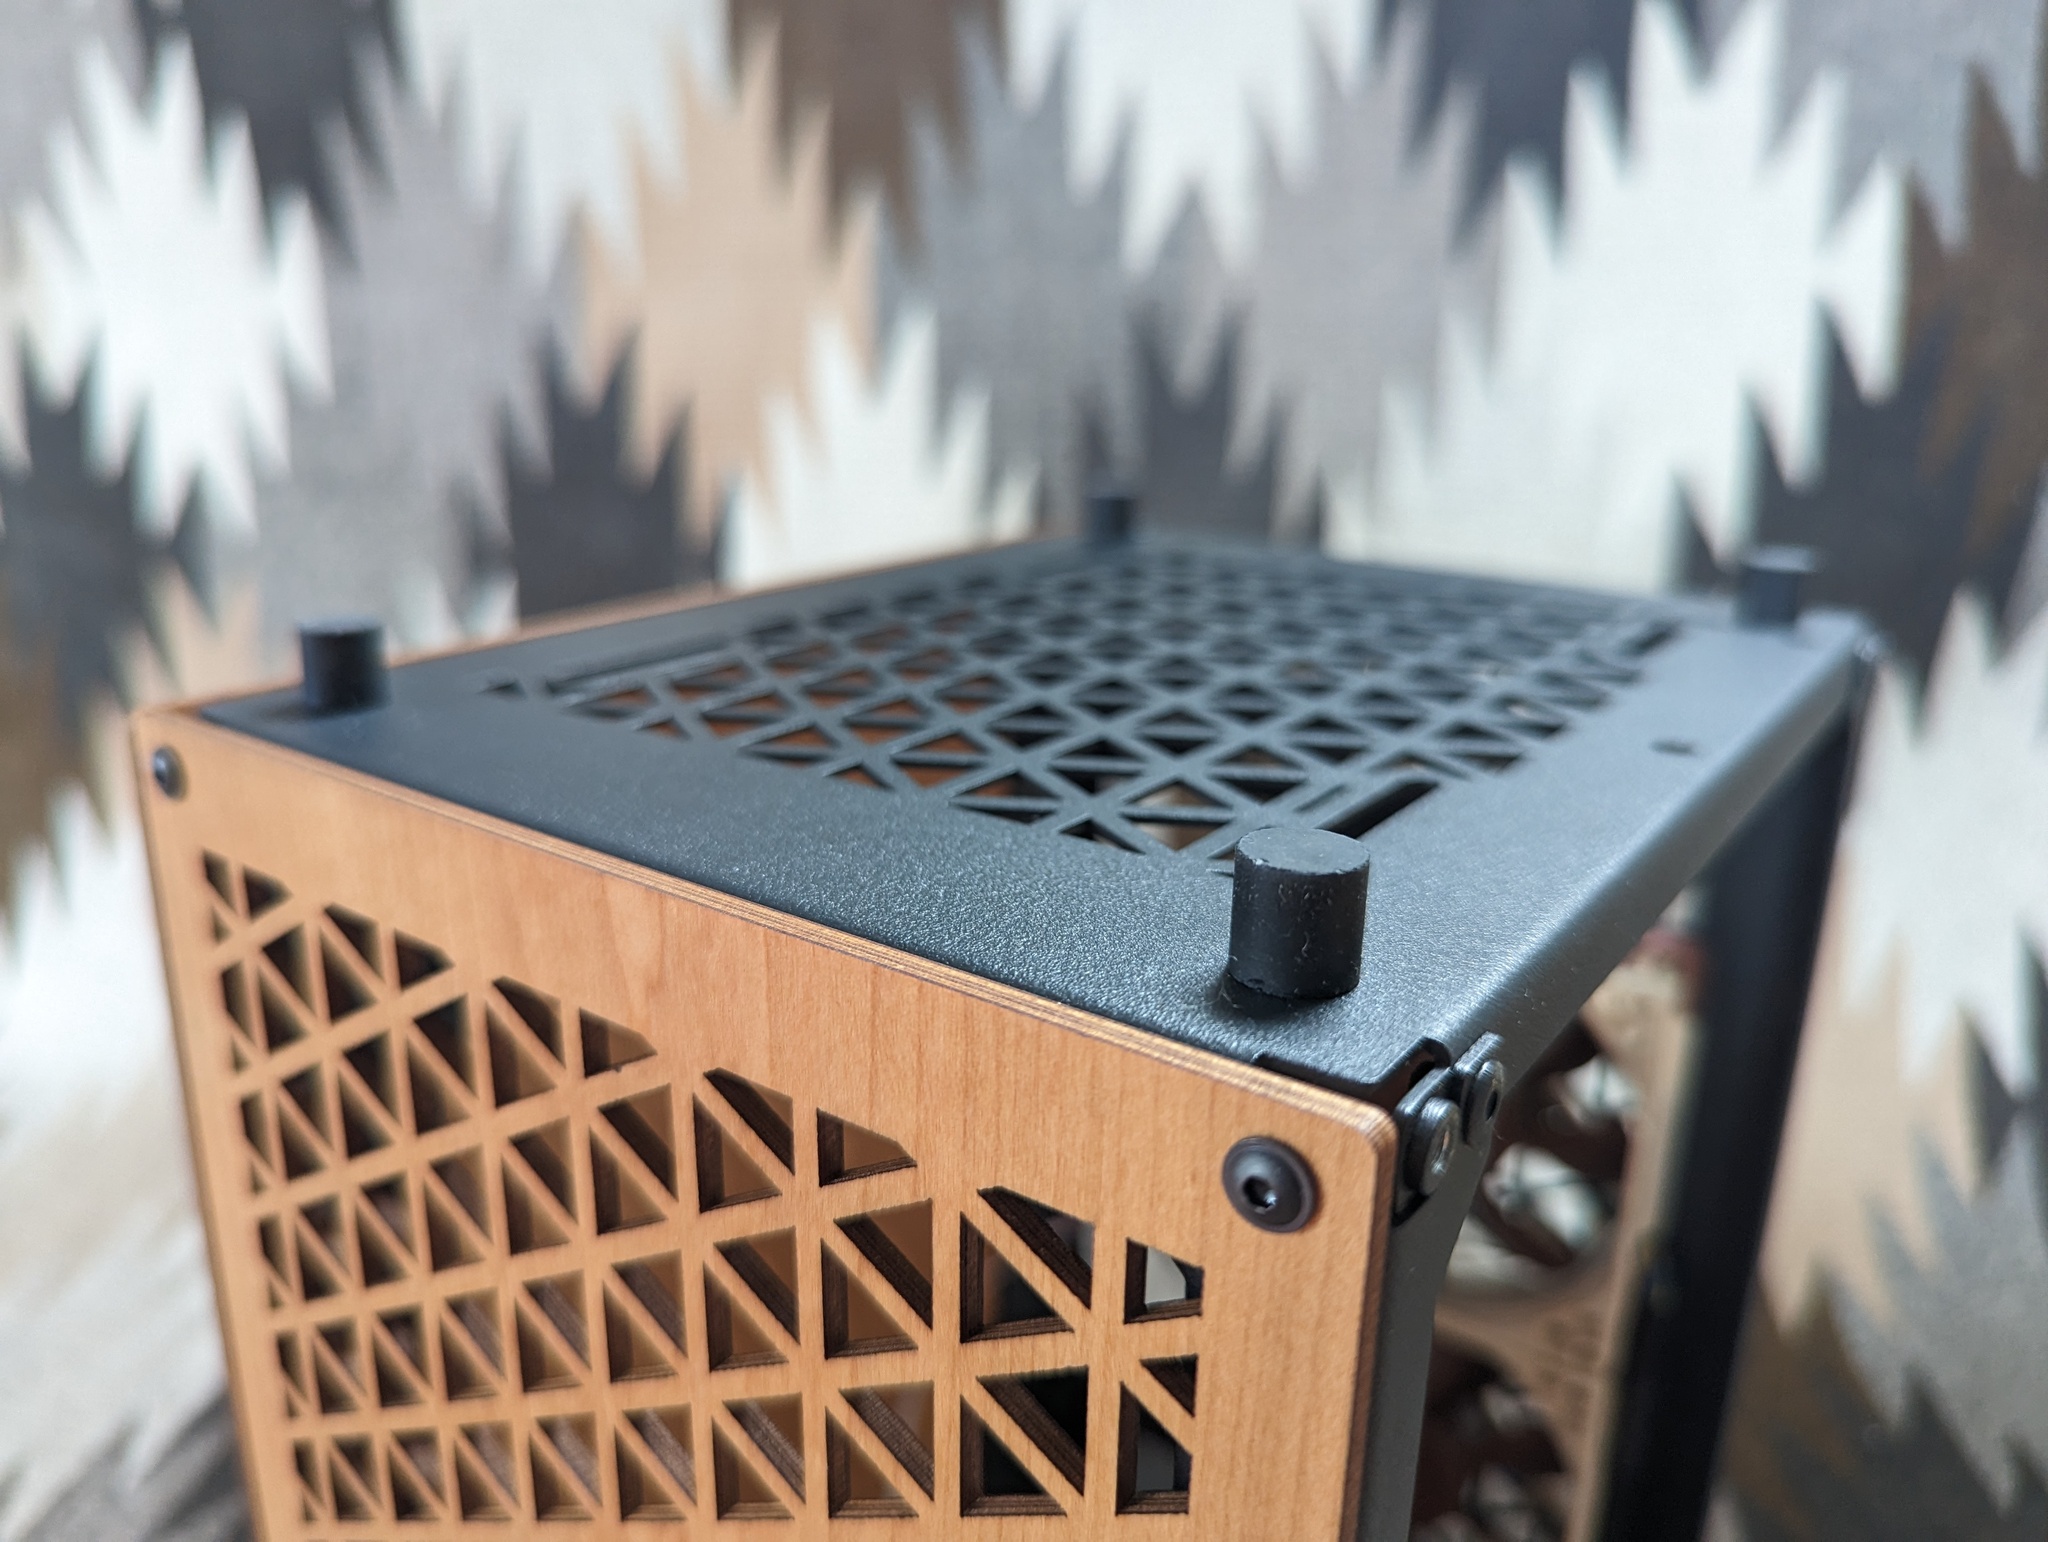
- I got the extended feet, which are 10mm of rubber with a 10mm M4 threaded screw. They’re attached with a washer and ordinary nut; I’m personally a lock nut person but I doubt these are going anywhere. The screw is a bit longer than necessary (10mm is just a standard size), but it’s not like they’re going to interfere with a GPU mount. You could get different feet off McMaster if you really wanted to (e.g. something like this, so you just have the head of your screw in the case instead of the thread), but the durometer on the provided ones feels pretty good for a PC foot.
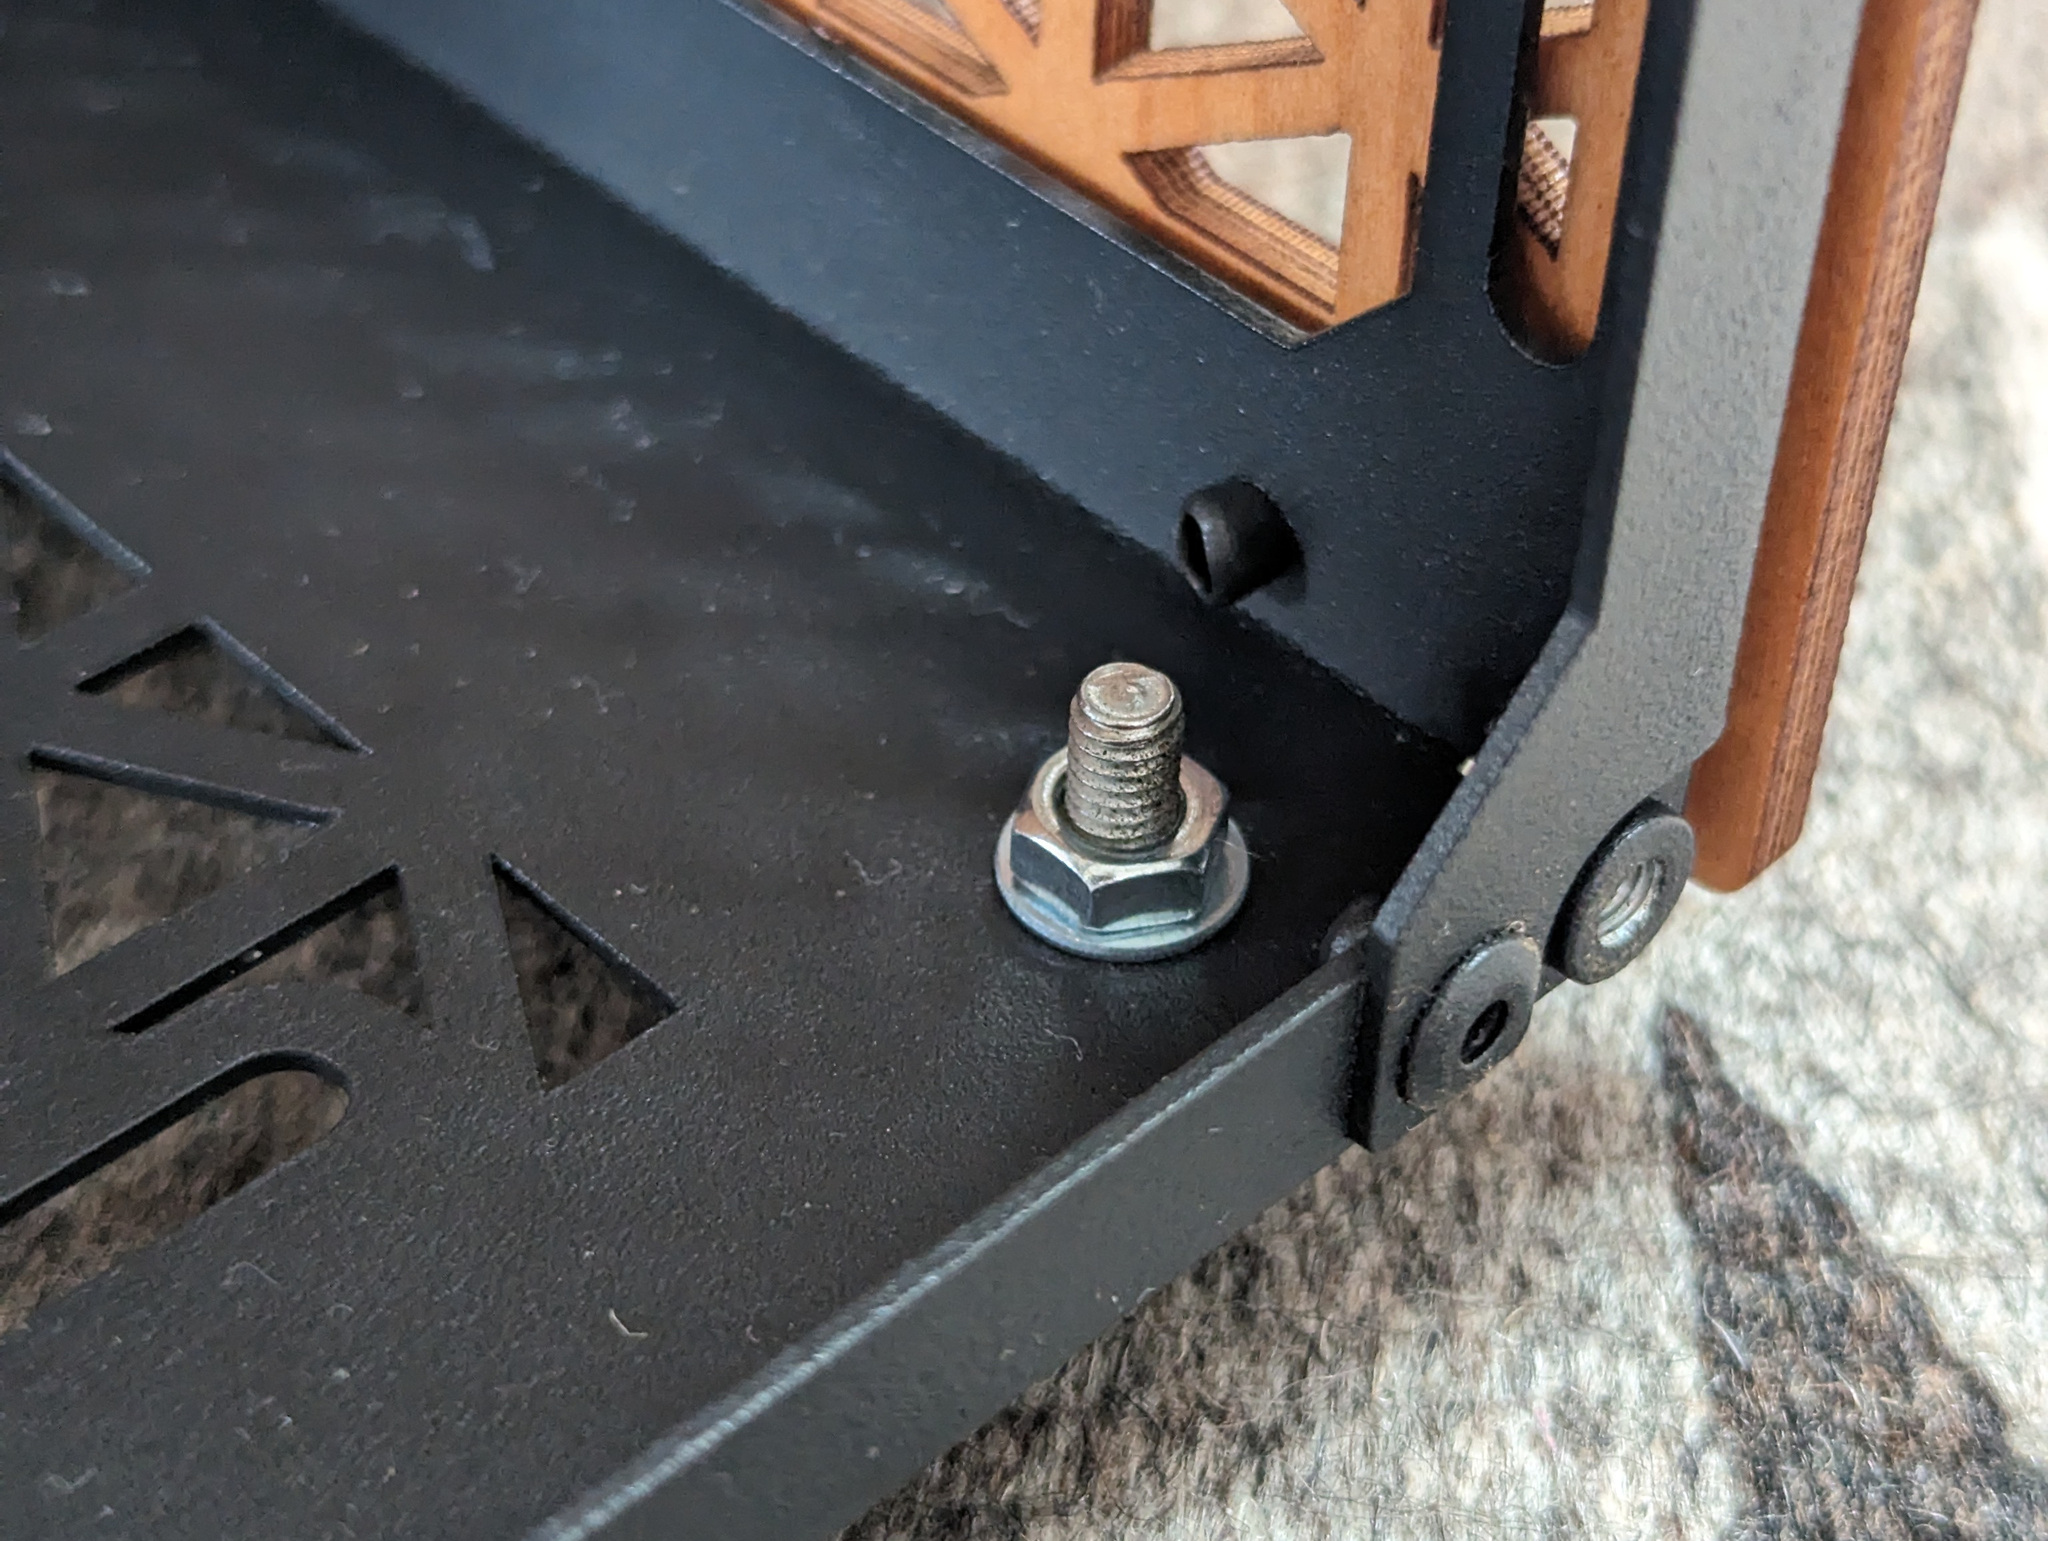
Foot thread extends into case slightly more than needed
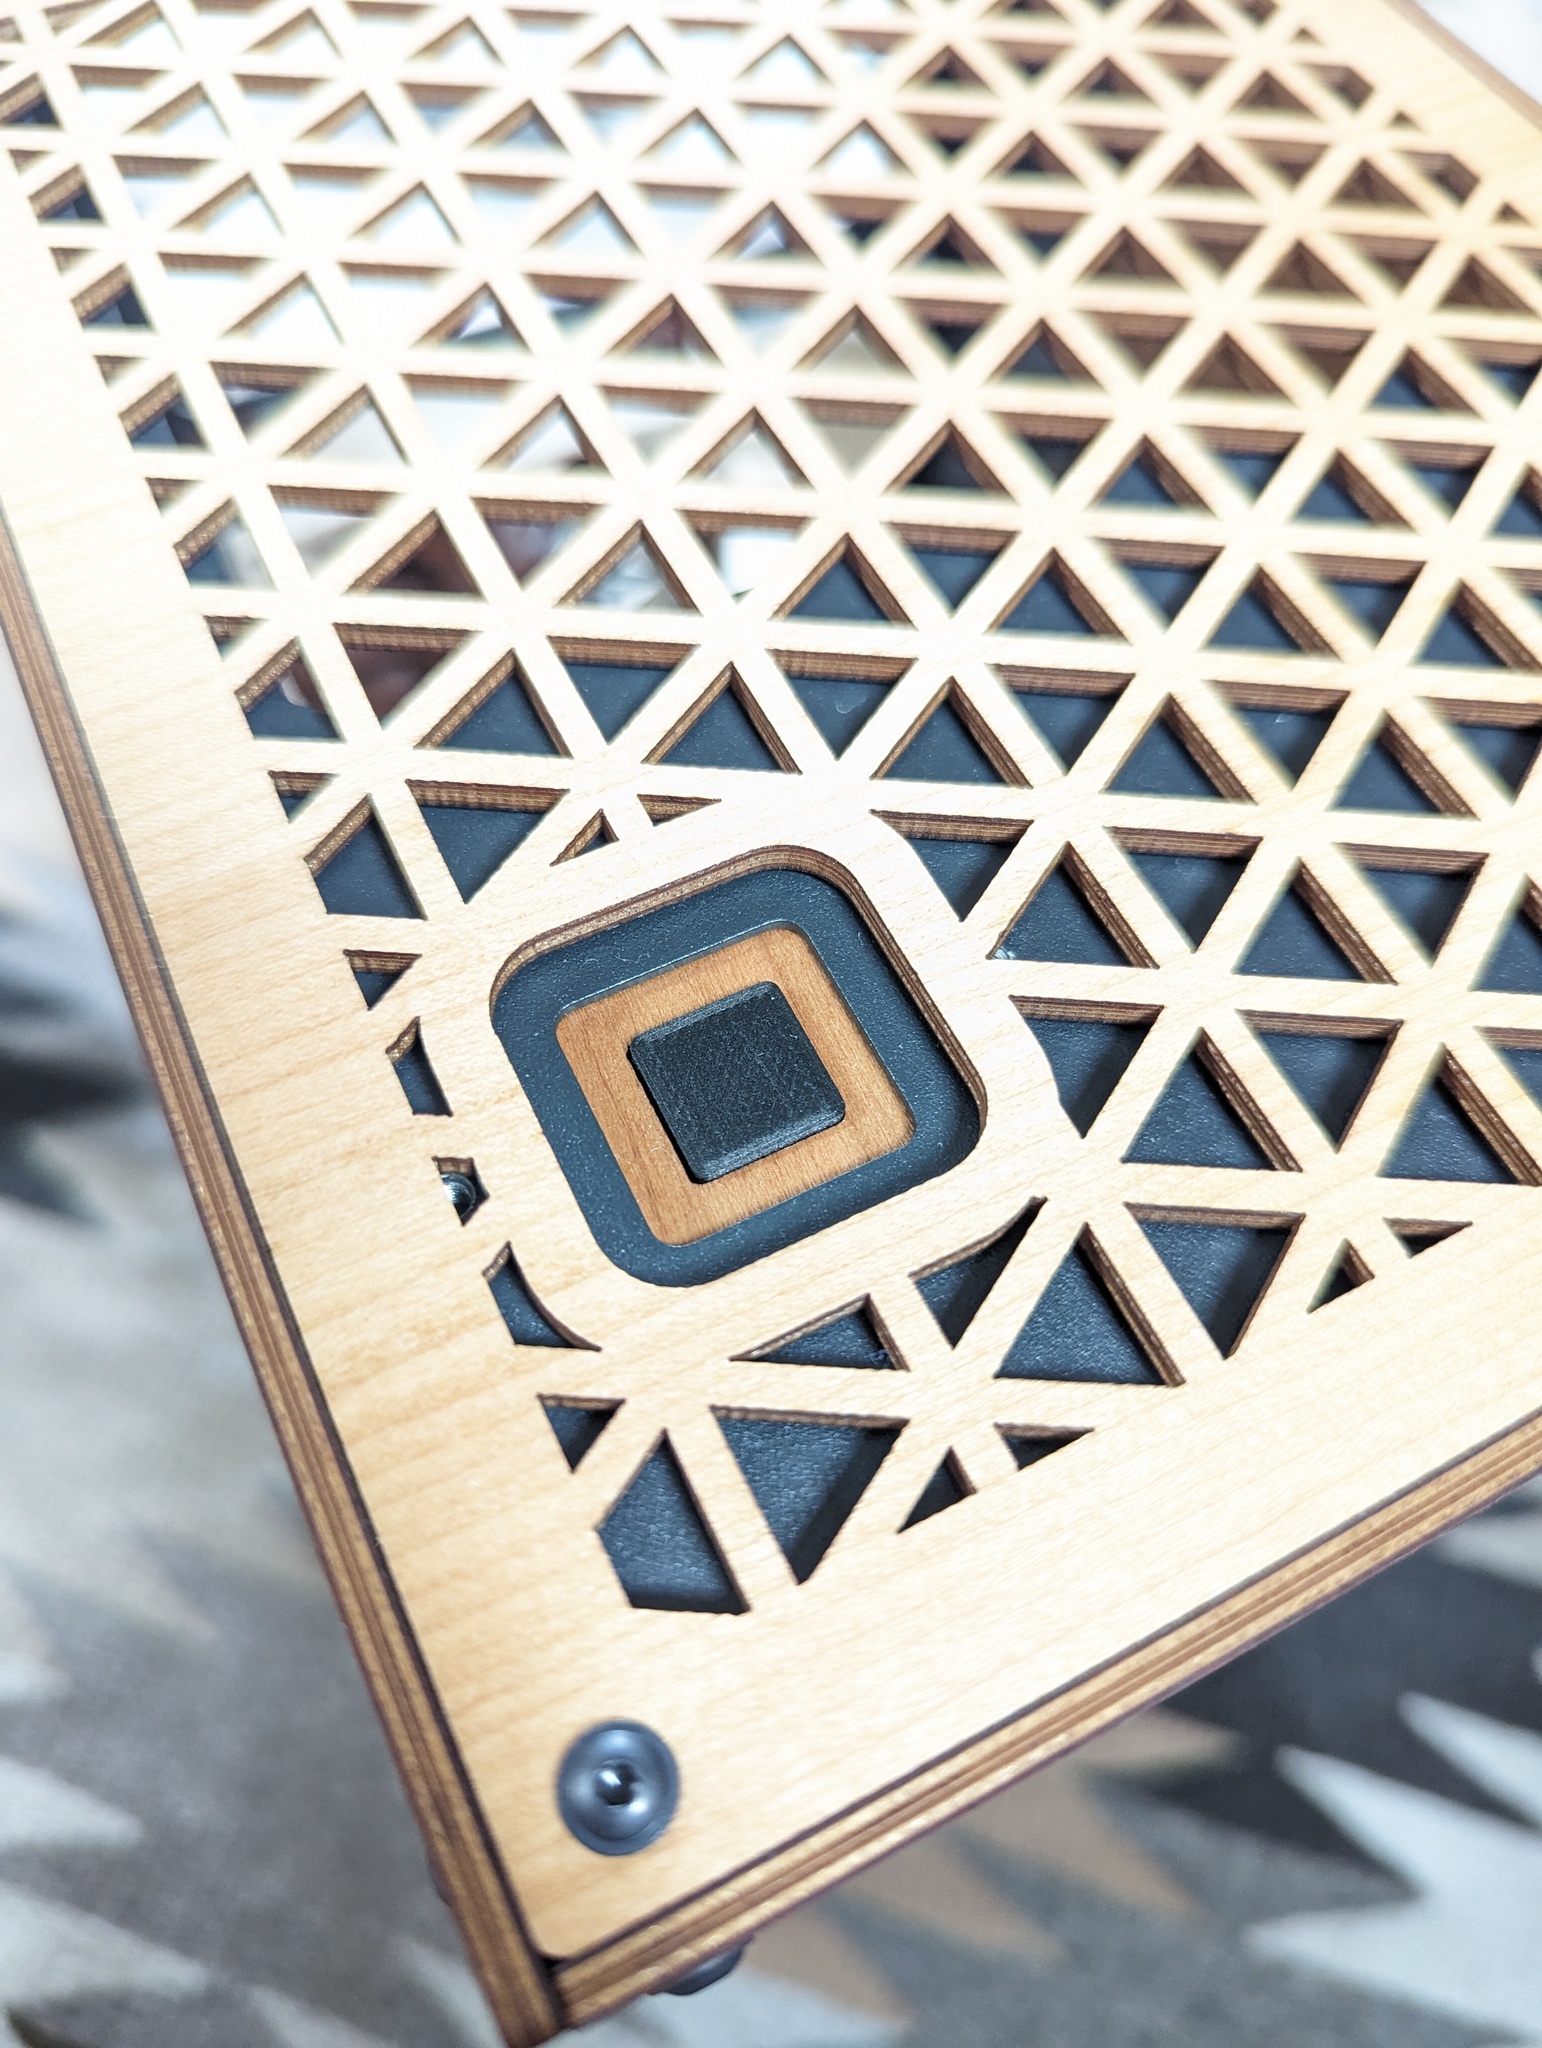
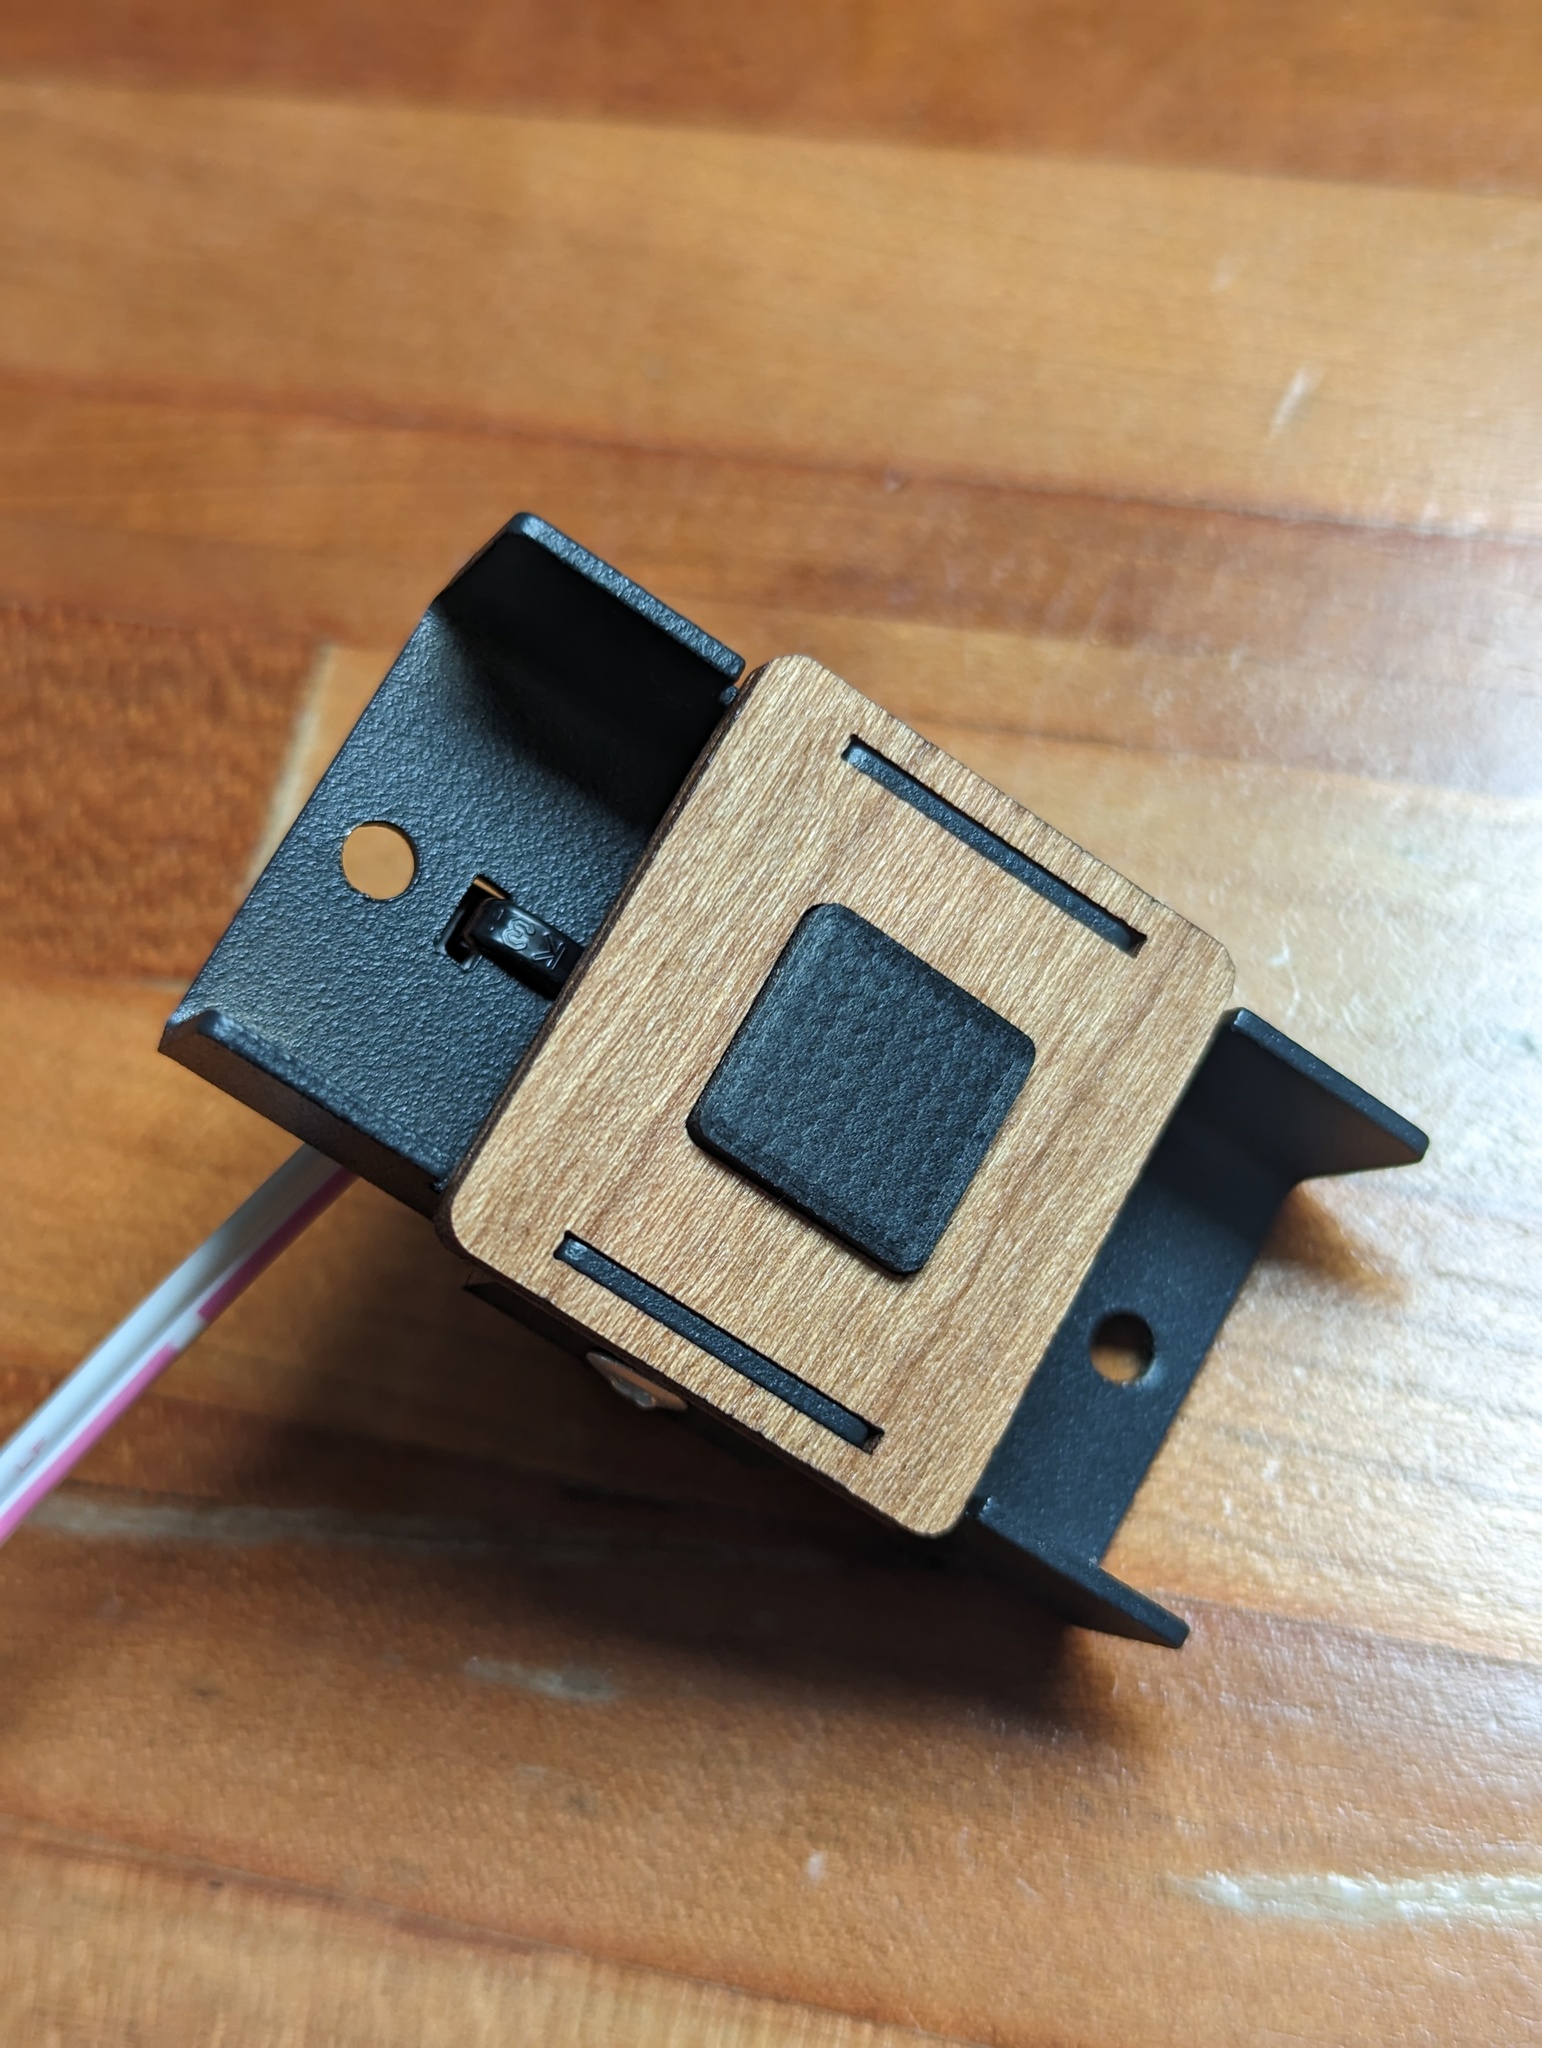
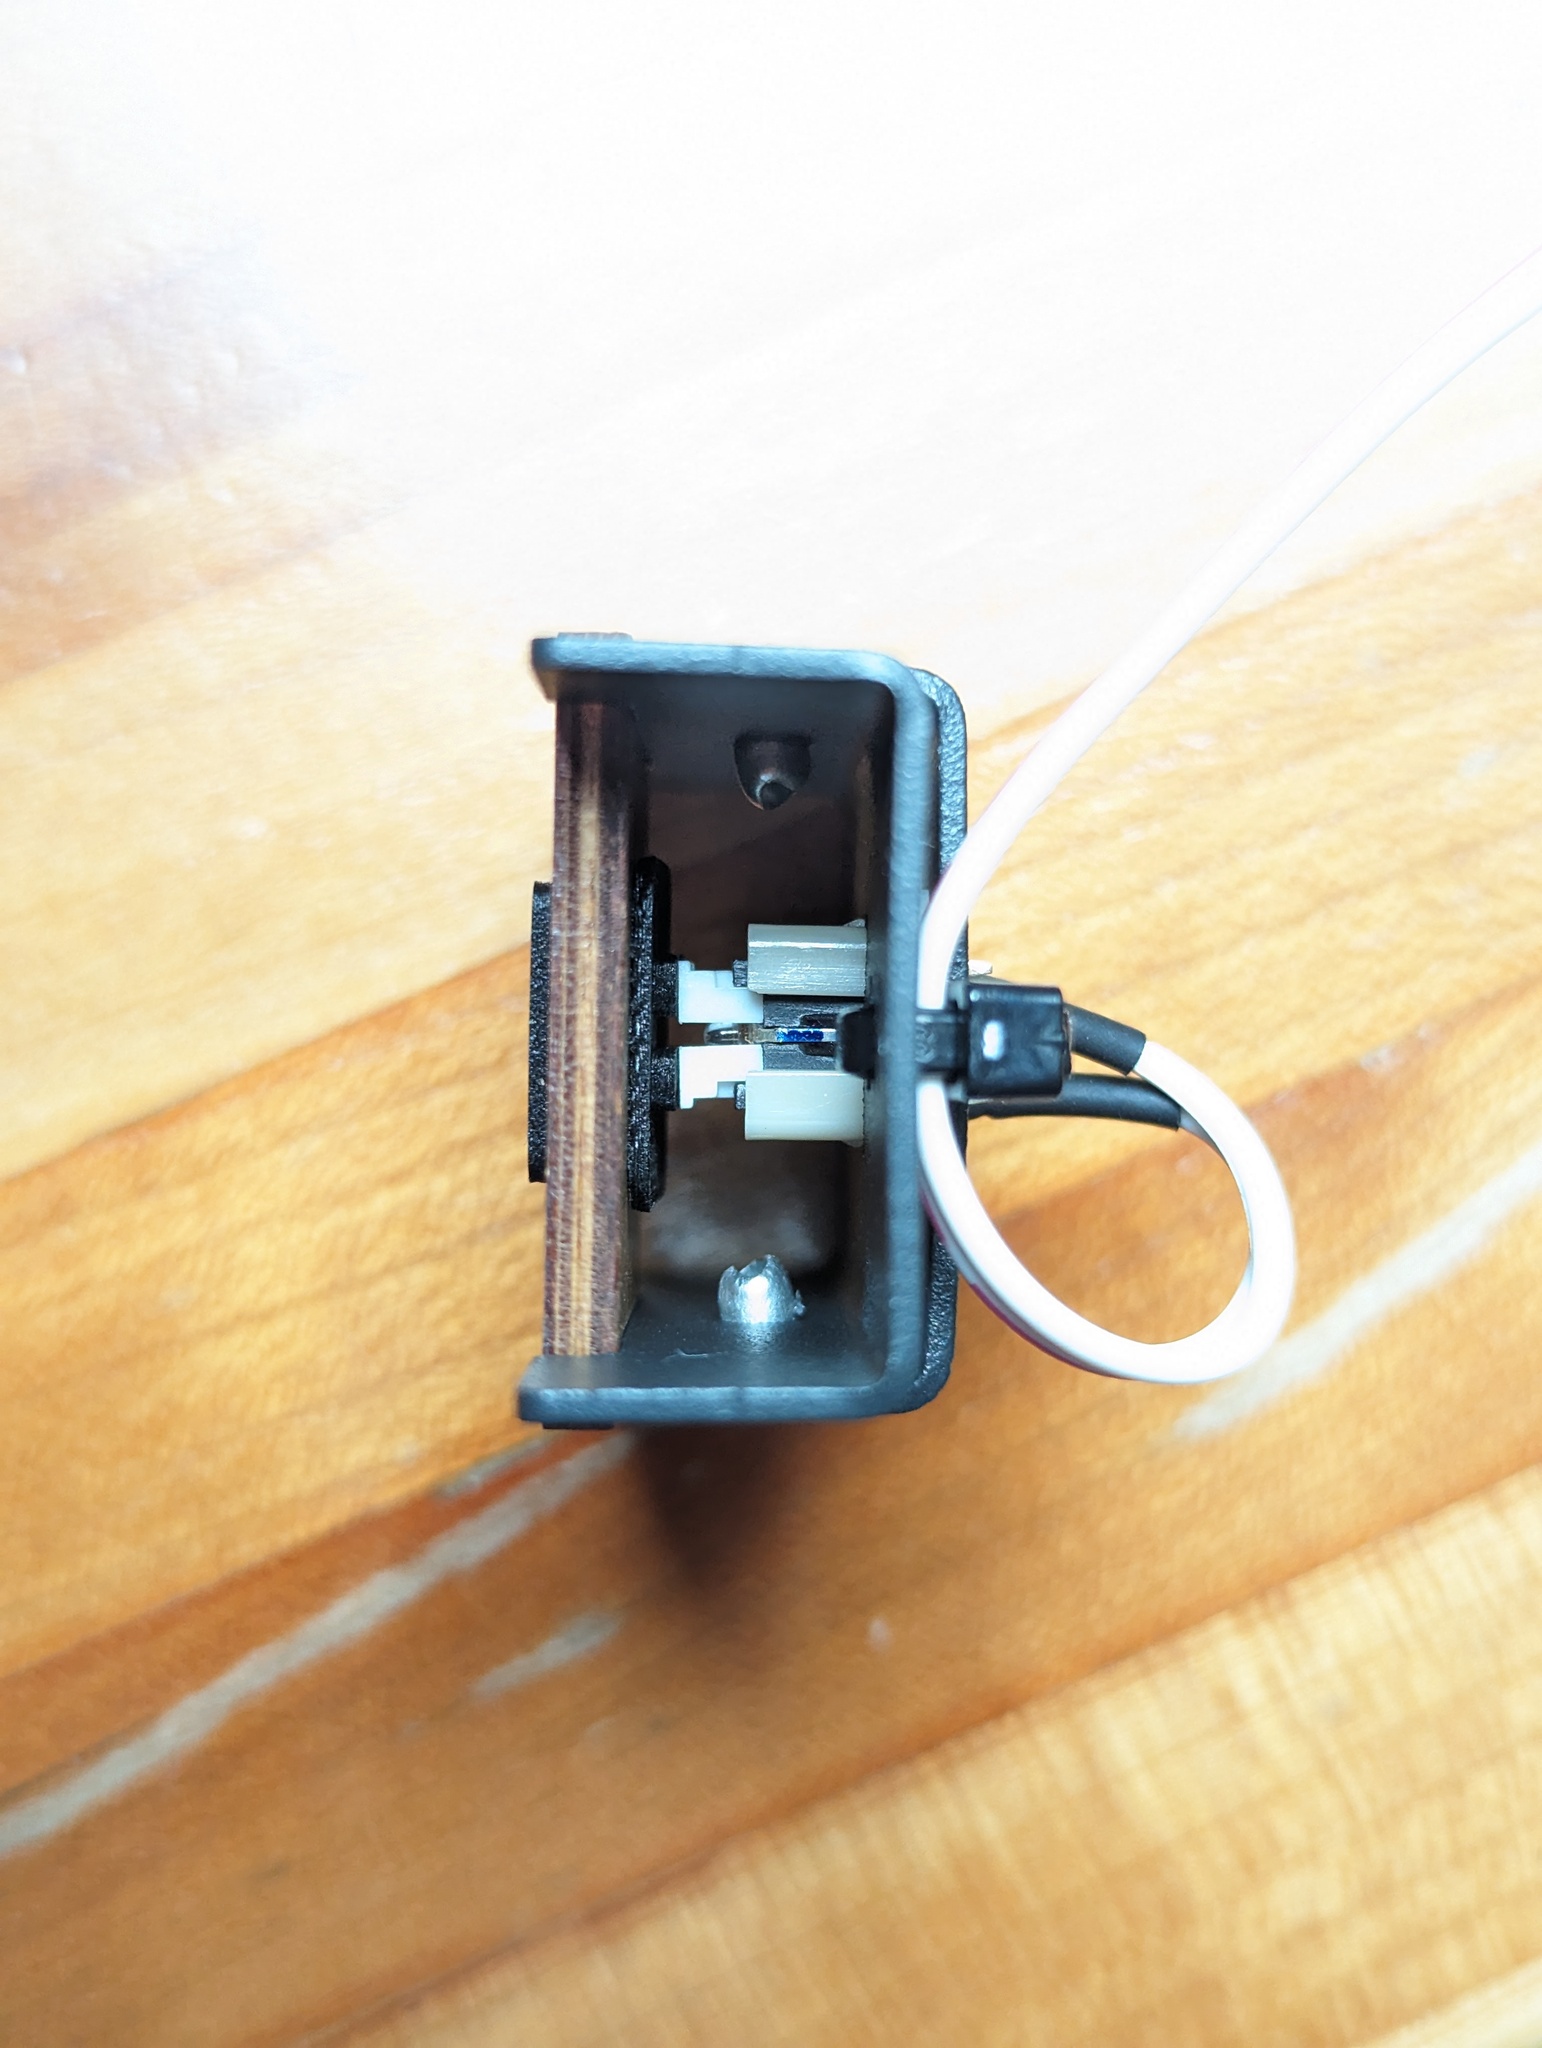
- The power button assembly is very cute. Comes off easily with two M3x10 screws. The physical actuator is 3d printed, but has a reasonably nice finish. We’ll see how it holds up; the fact that I can see the internal structure does make me worry it might delaminate or something with heavy use. That said, this is a button that’s getting pressed on the order of once a day. The switch itself is a tactile momentary switch that clips into the larger U-channel metal piece and then seems to be sandwiched by the smaller. Unfortunately this second piece is riveted in place, so replacing the tactile switch itself would be a little inconvenient, but again, very low duty part. The wood finish plate seems to be a press fit over the larger U-channel. Feels nice and snug now, though it’s a humid Boston summer, so possible that in a dry winter it may have more play with the lower humidity.
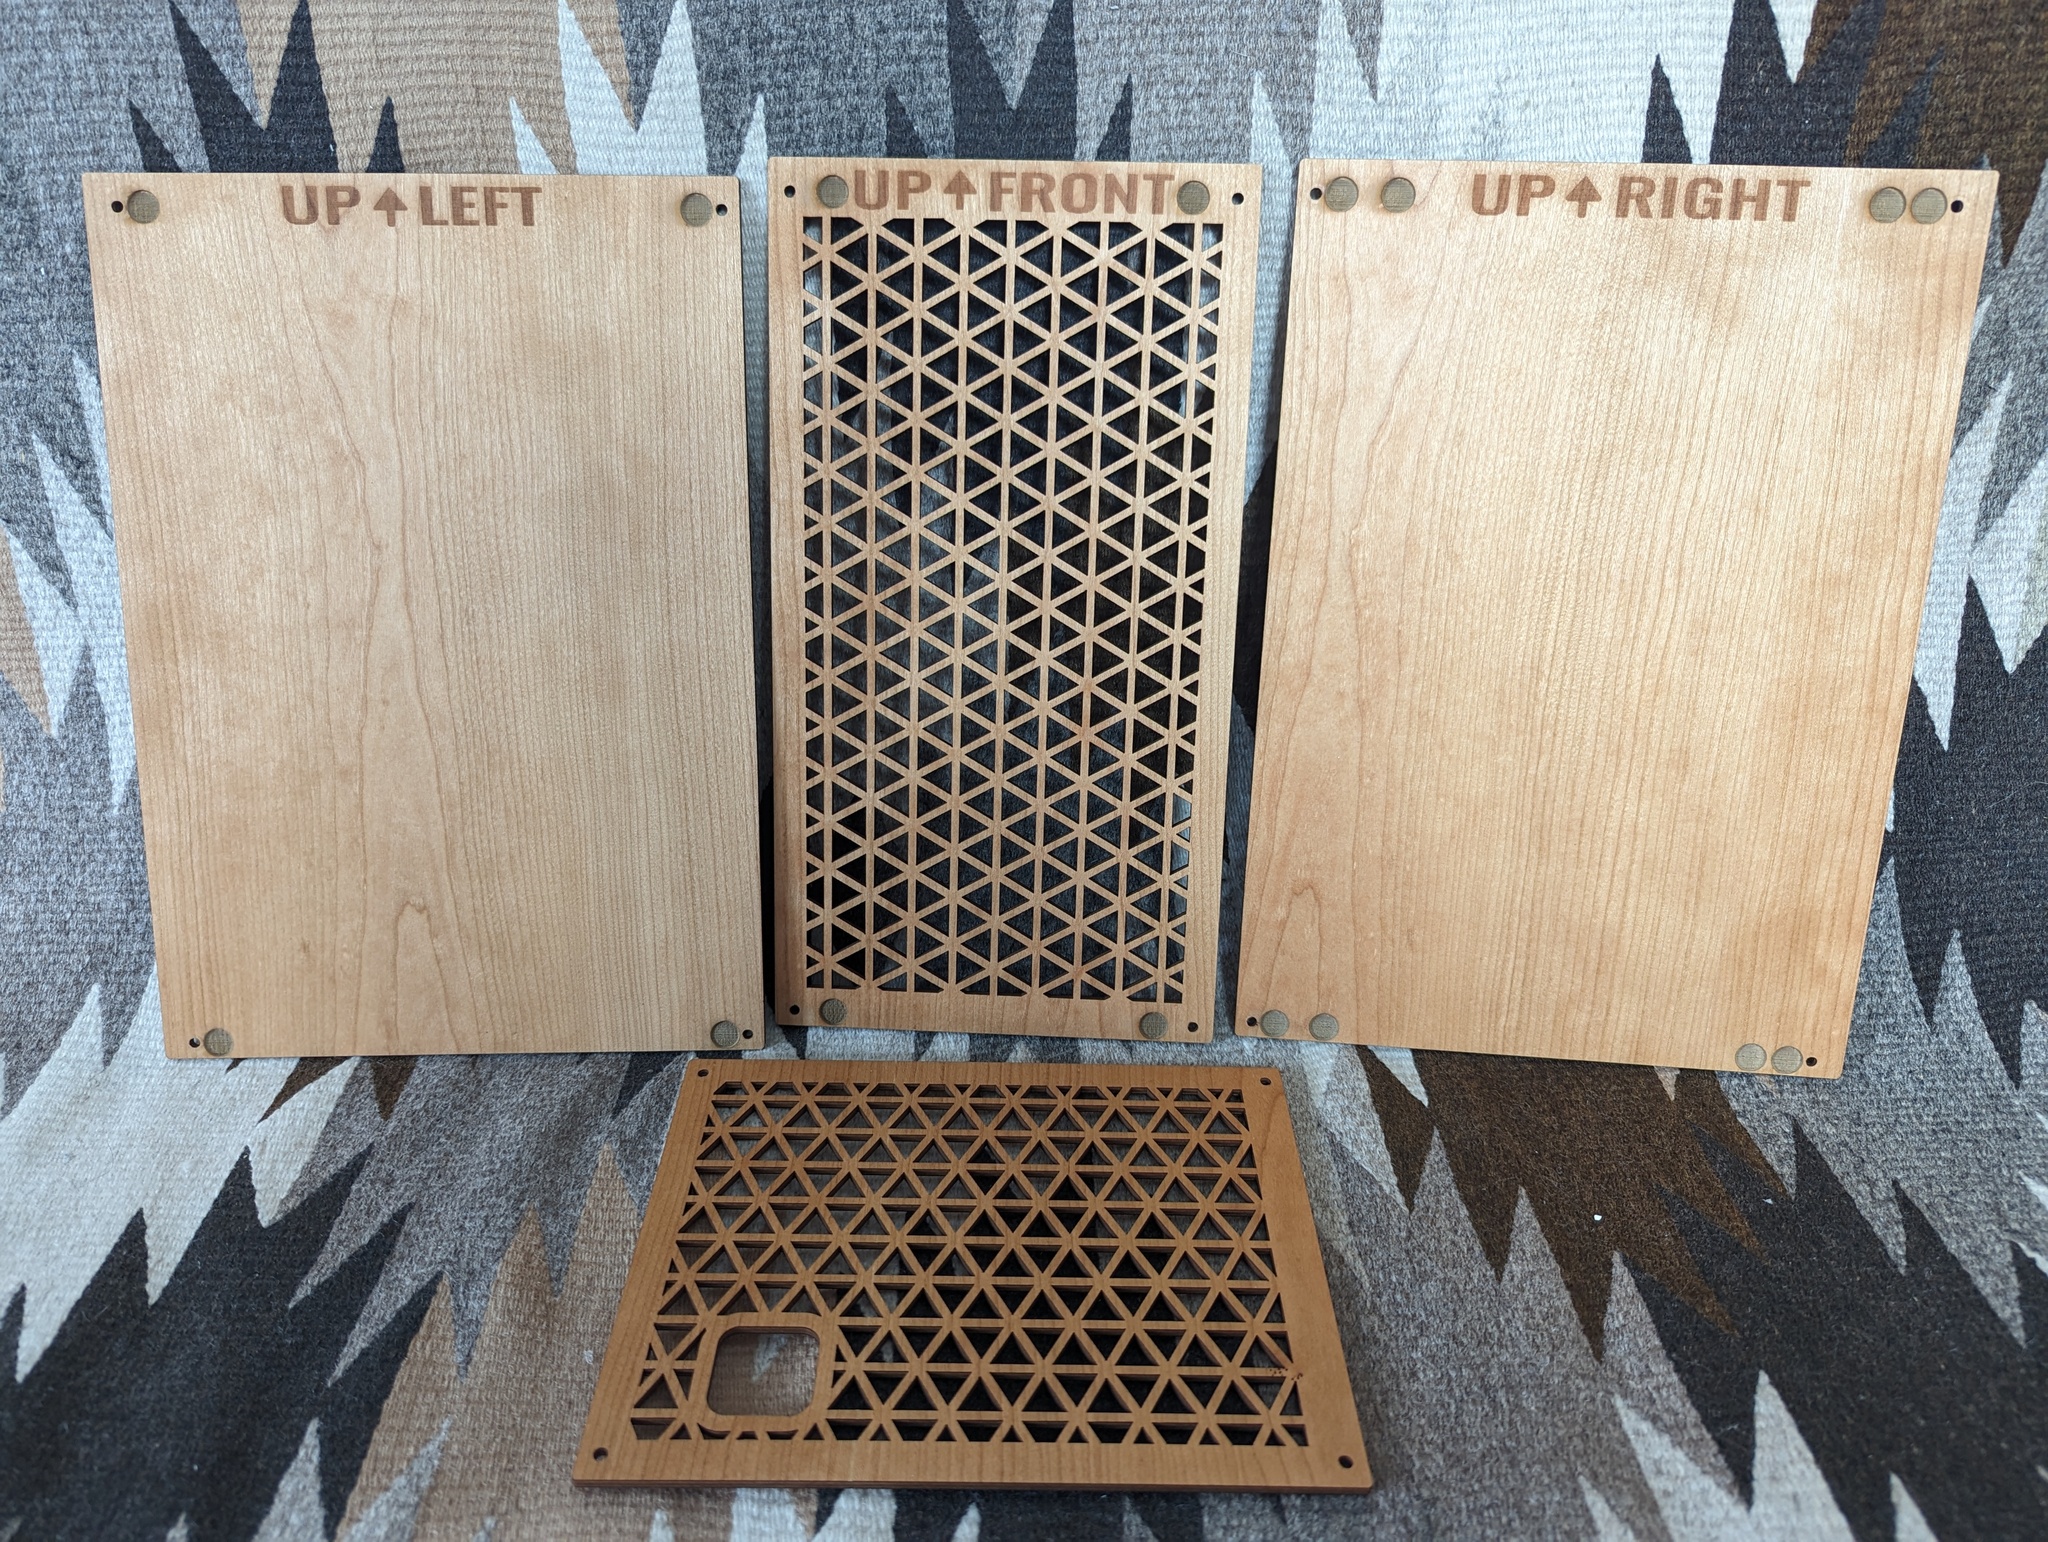
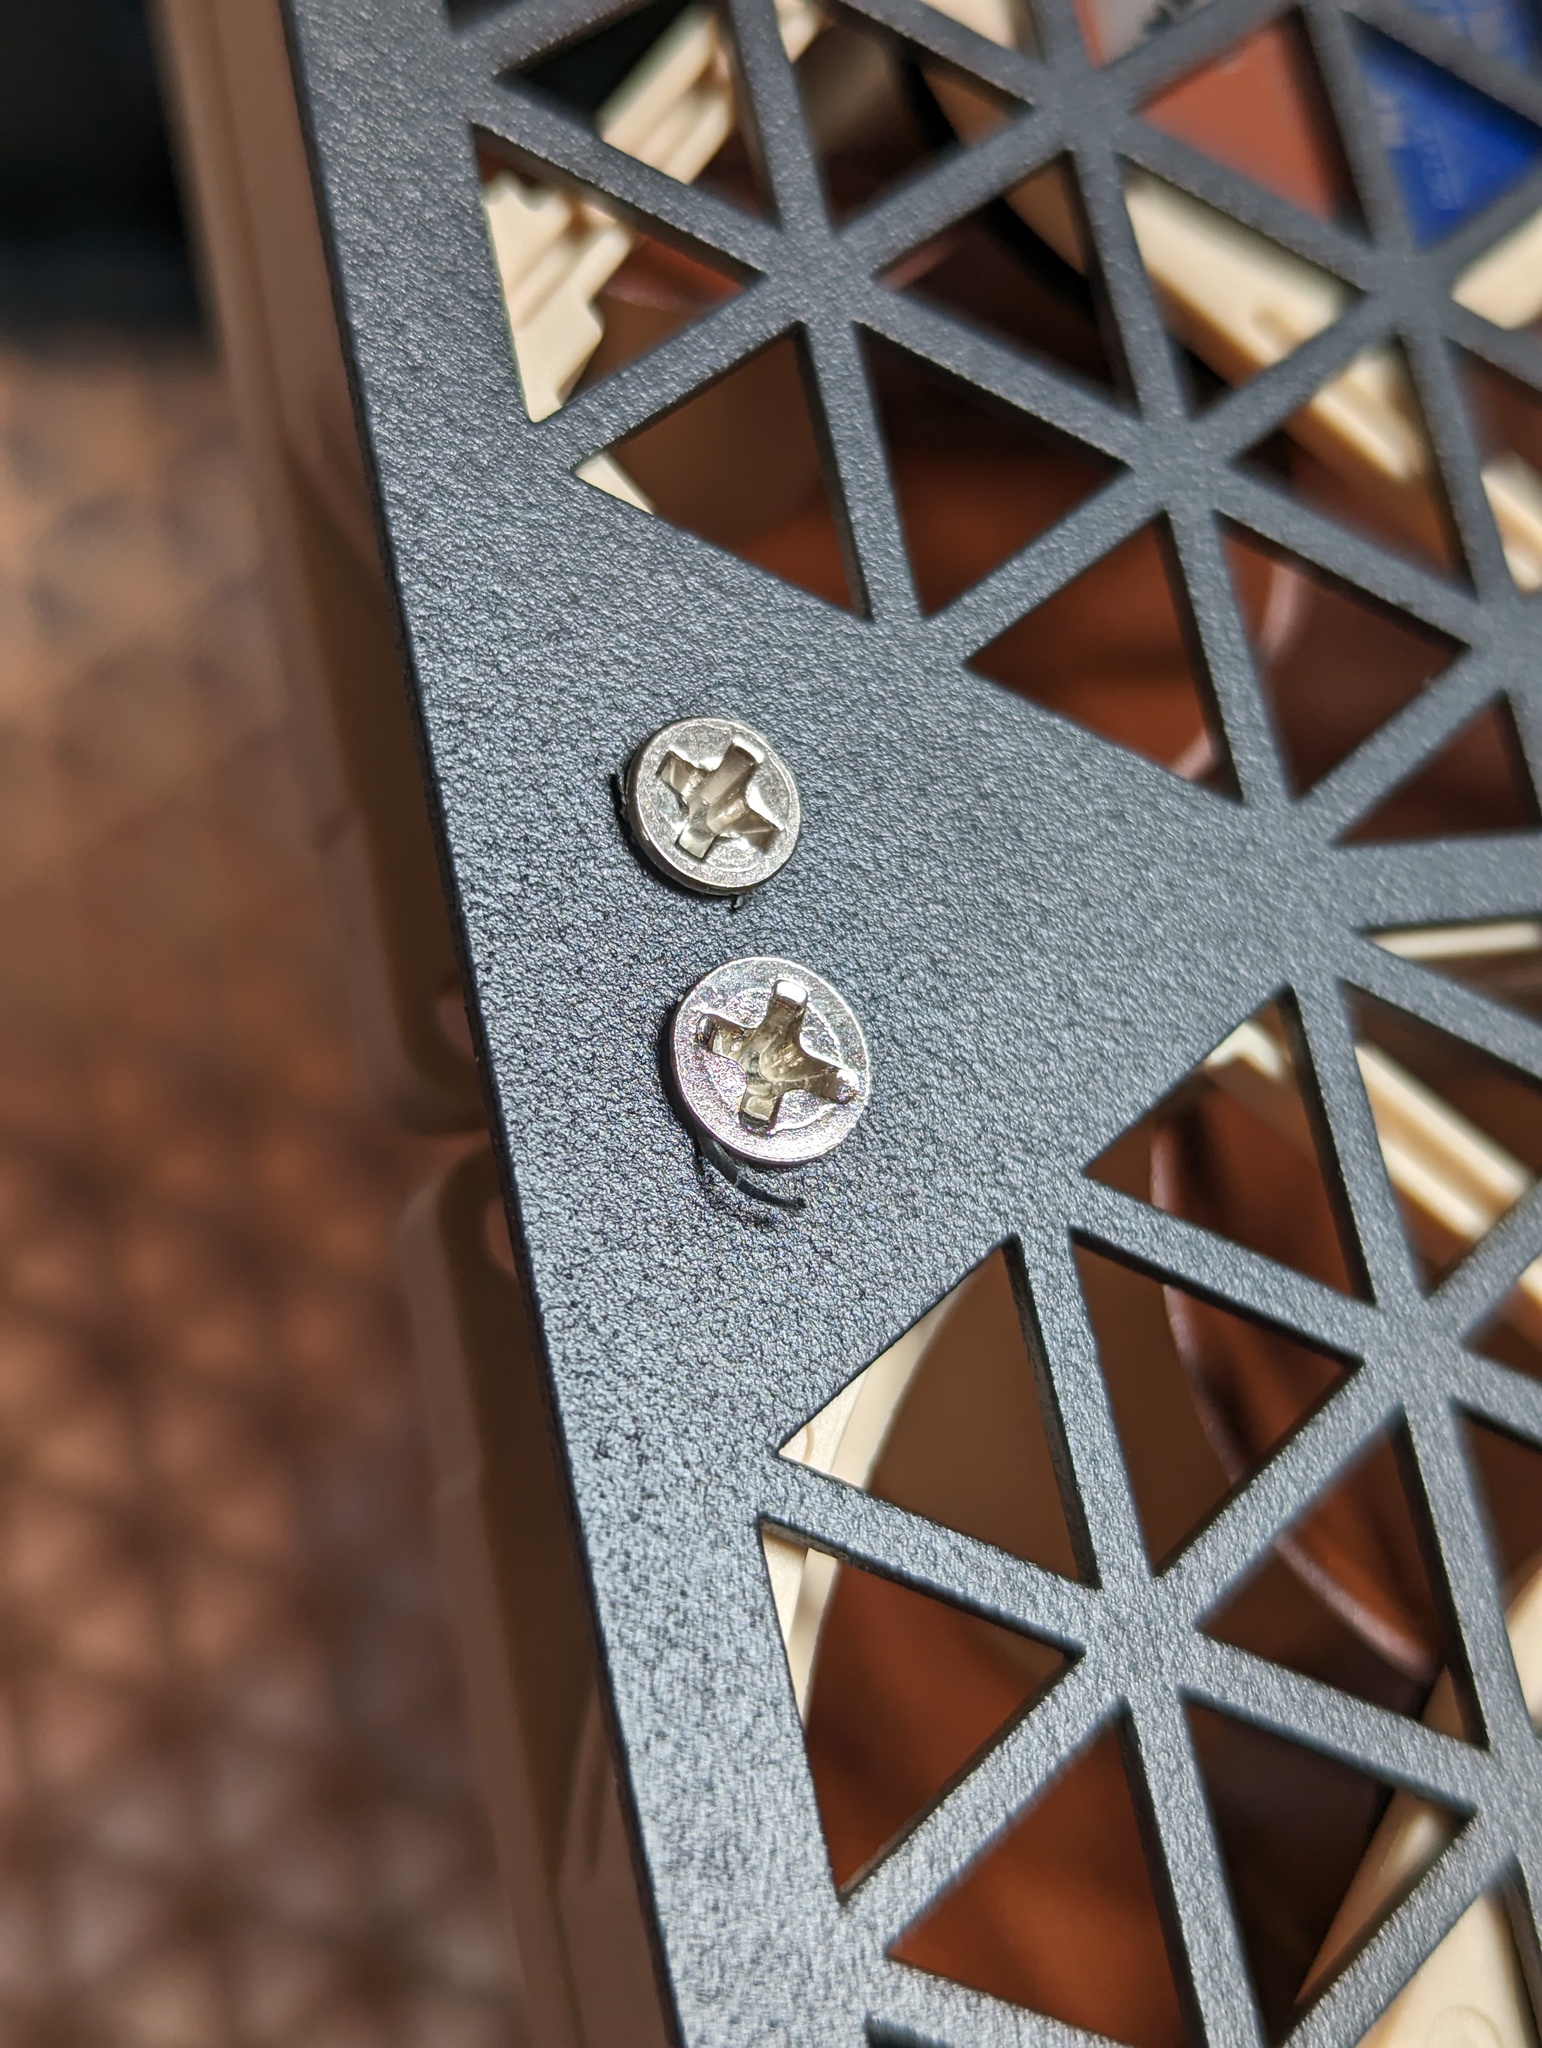
- Taking the wood panels off, you can see that they’ve all been cleanly labelled with which panel it is and which way is up. This is actually important, because the side panels aren’t identical - they will not line up perfectly if installed backwards (see photos). When correctly installed, the panels have very nice tight clearances to each other. The panels also have little half-lasered holes to avoid interference with the rivets, which is a lovely touch. You’ll also see in the first photo below that the screws do leave little marks on the wood, but this is obviously covered by the screw head when installed.

- One downside to this case is that it doesn’t come with any fan filters - luckily it ended up being fairly straightforward to add some in after the fact, but some sort of integrated solution might be nice for those that live with pets.
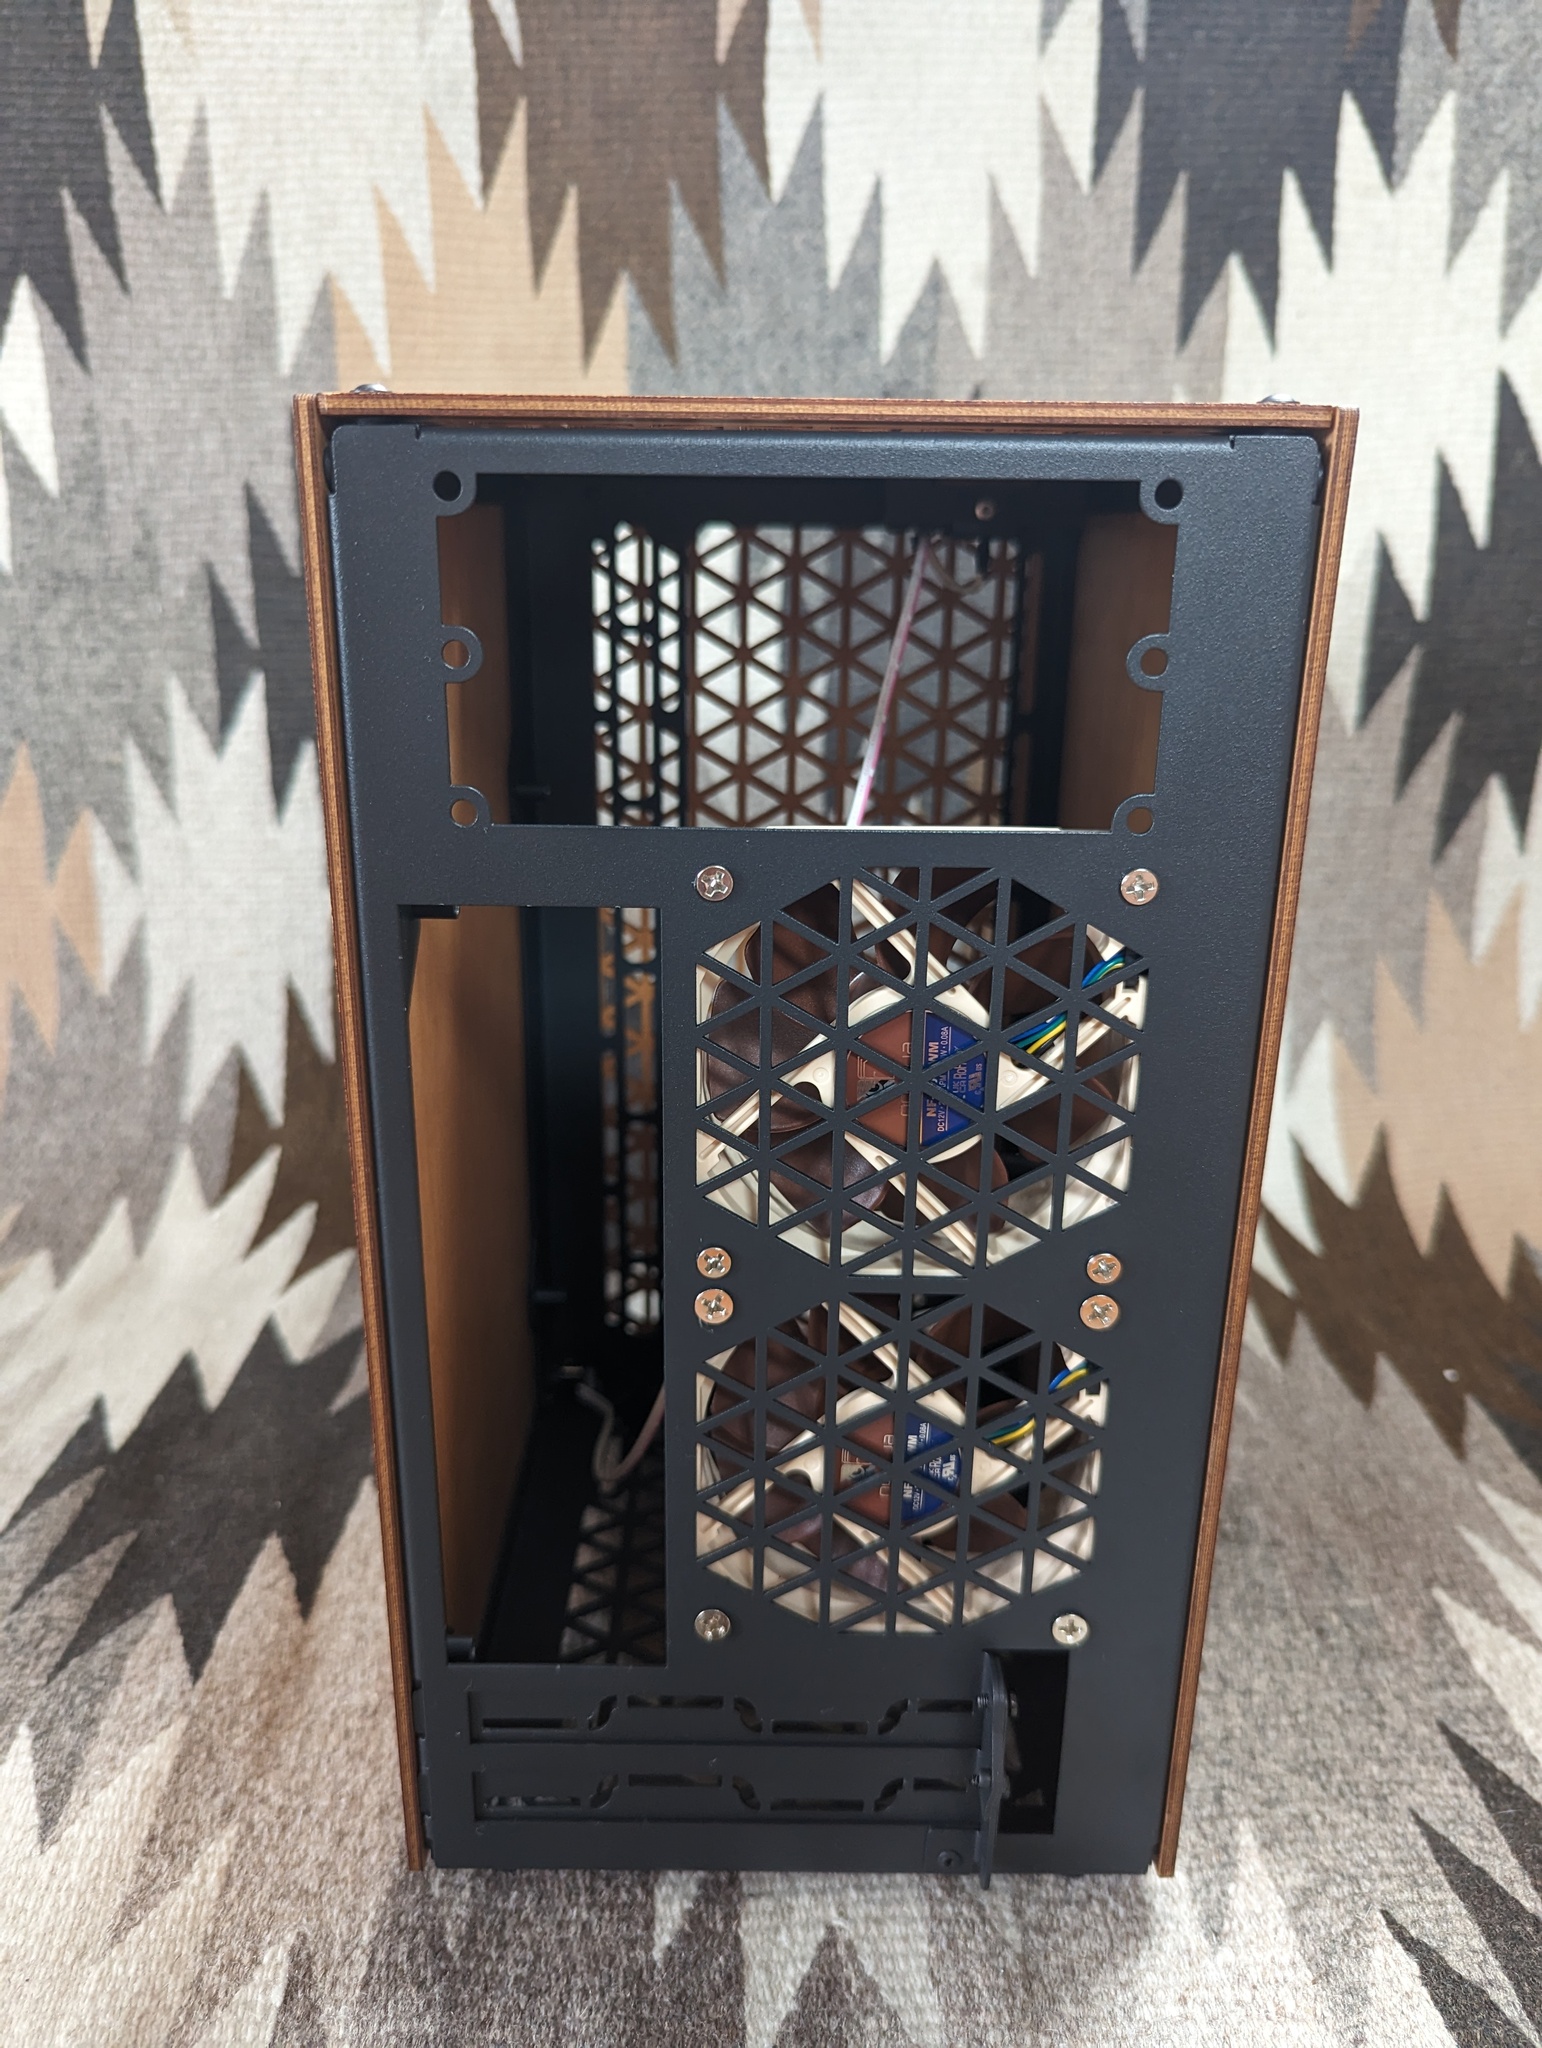
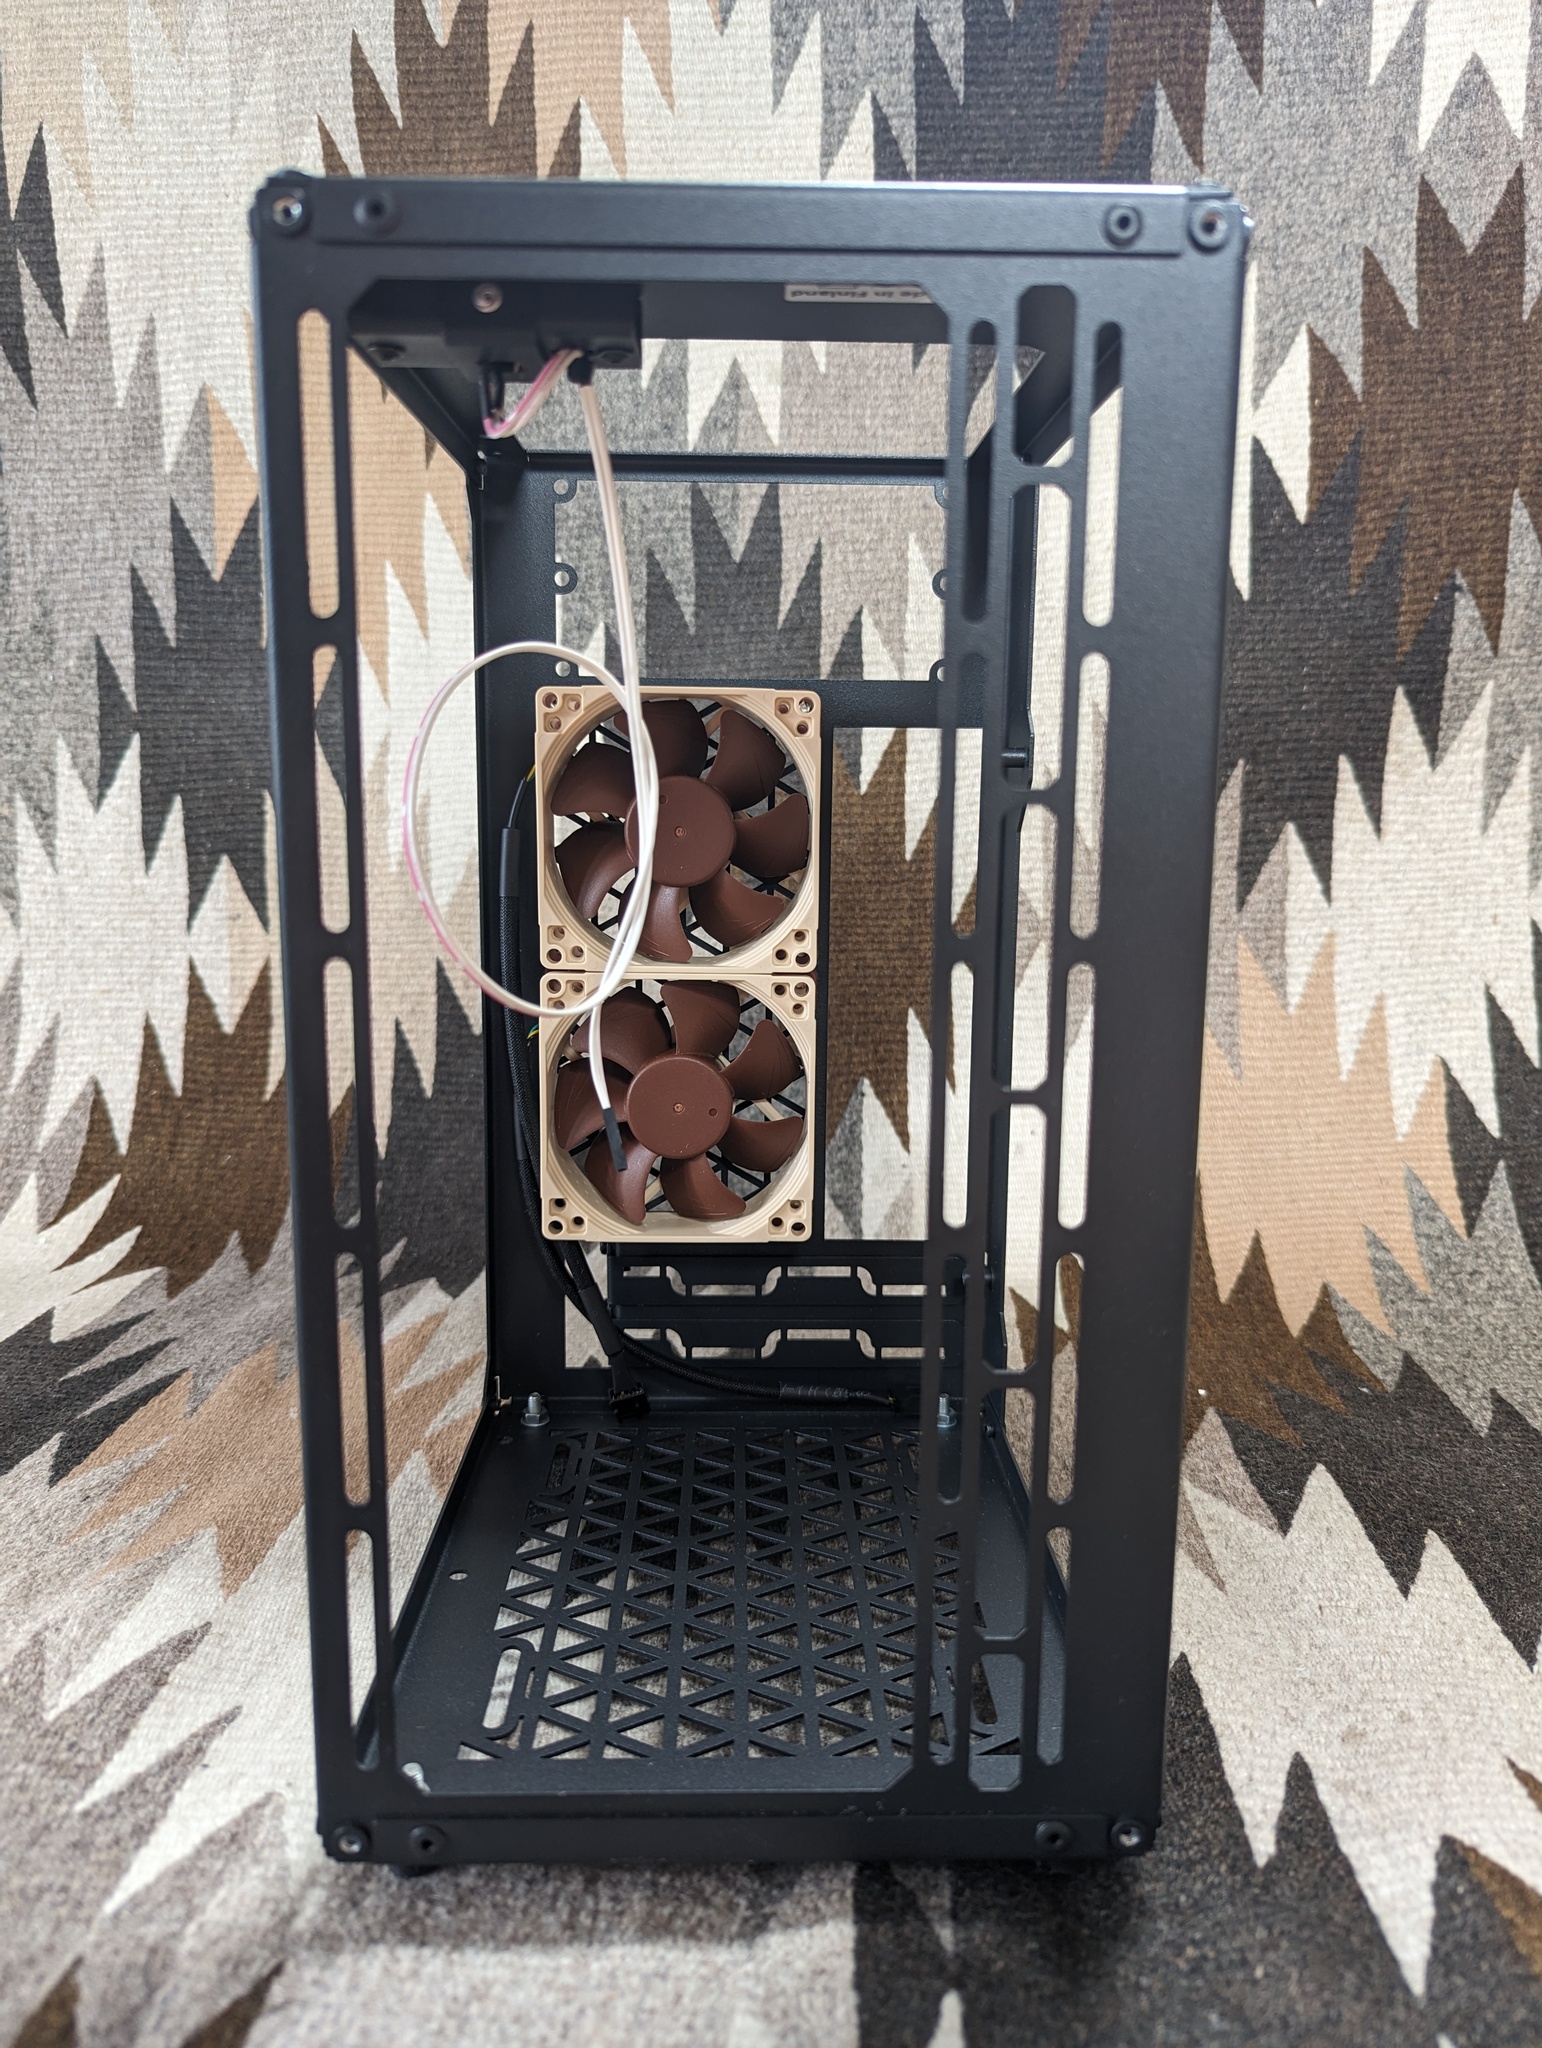
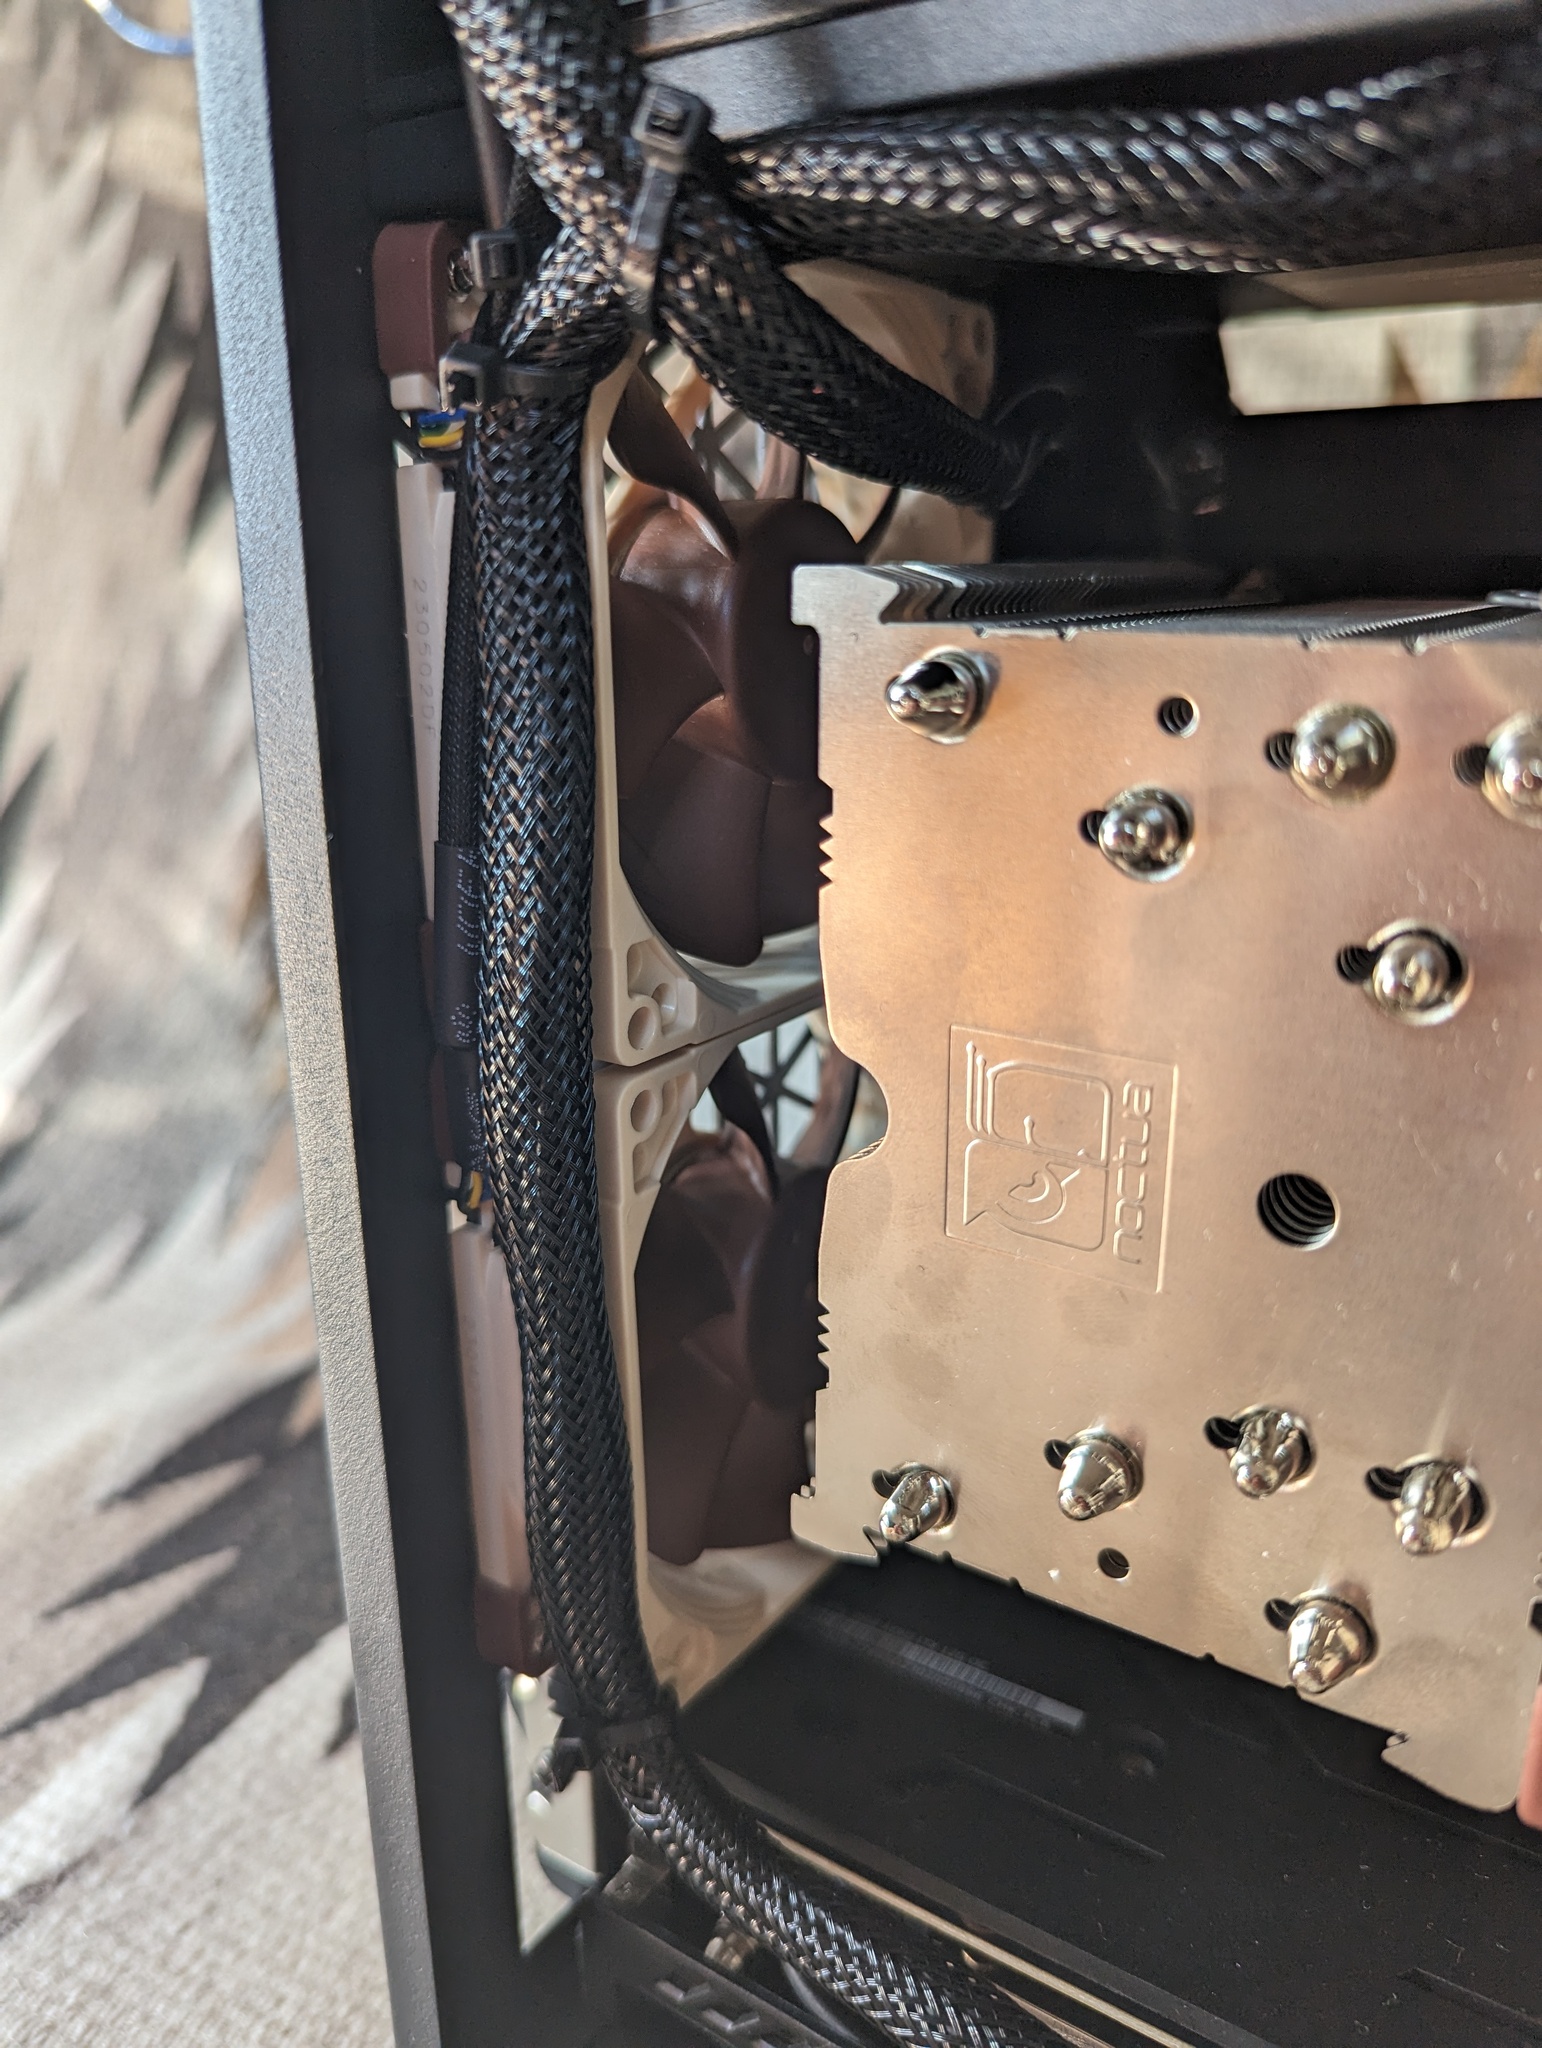
- The rear 80mm fan mounting holes are a little tight - not sure if it’s just the powdercoat, but attaching the rear fans generated a fair few metal chips that people might want to keep an eye out for, especially if mounting fans after mounting the motherboard. In addition, the two sets of mounting holes are quite close together - so close that the silicone dampers on Noctua fans will actually interfere slightly. On the case-side of the fan, the mounting tension is enough to pull them in line most of the way, but I had to remove them from the internal side of the fan since otherwise they would not seat nicely.
- Possibly a user error, but the front fan rail did deform somewhat after snugly installing a 140mm fan in the top front of the case. Possibly an adversarial positioning since this results in the screw being right in the middle of the cutout, rather than at one of the more supported ends.
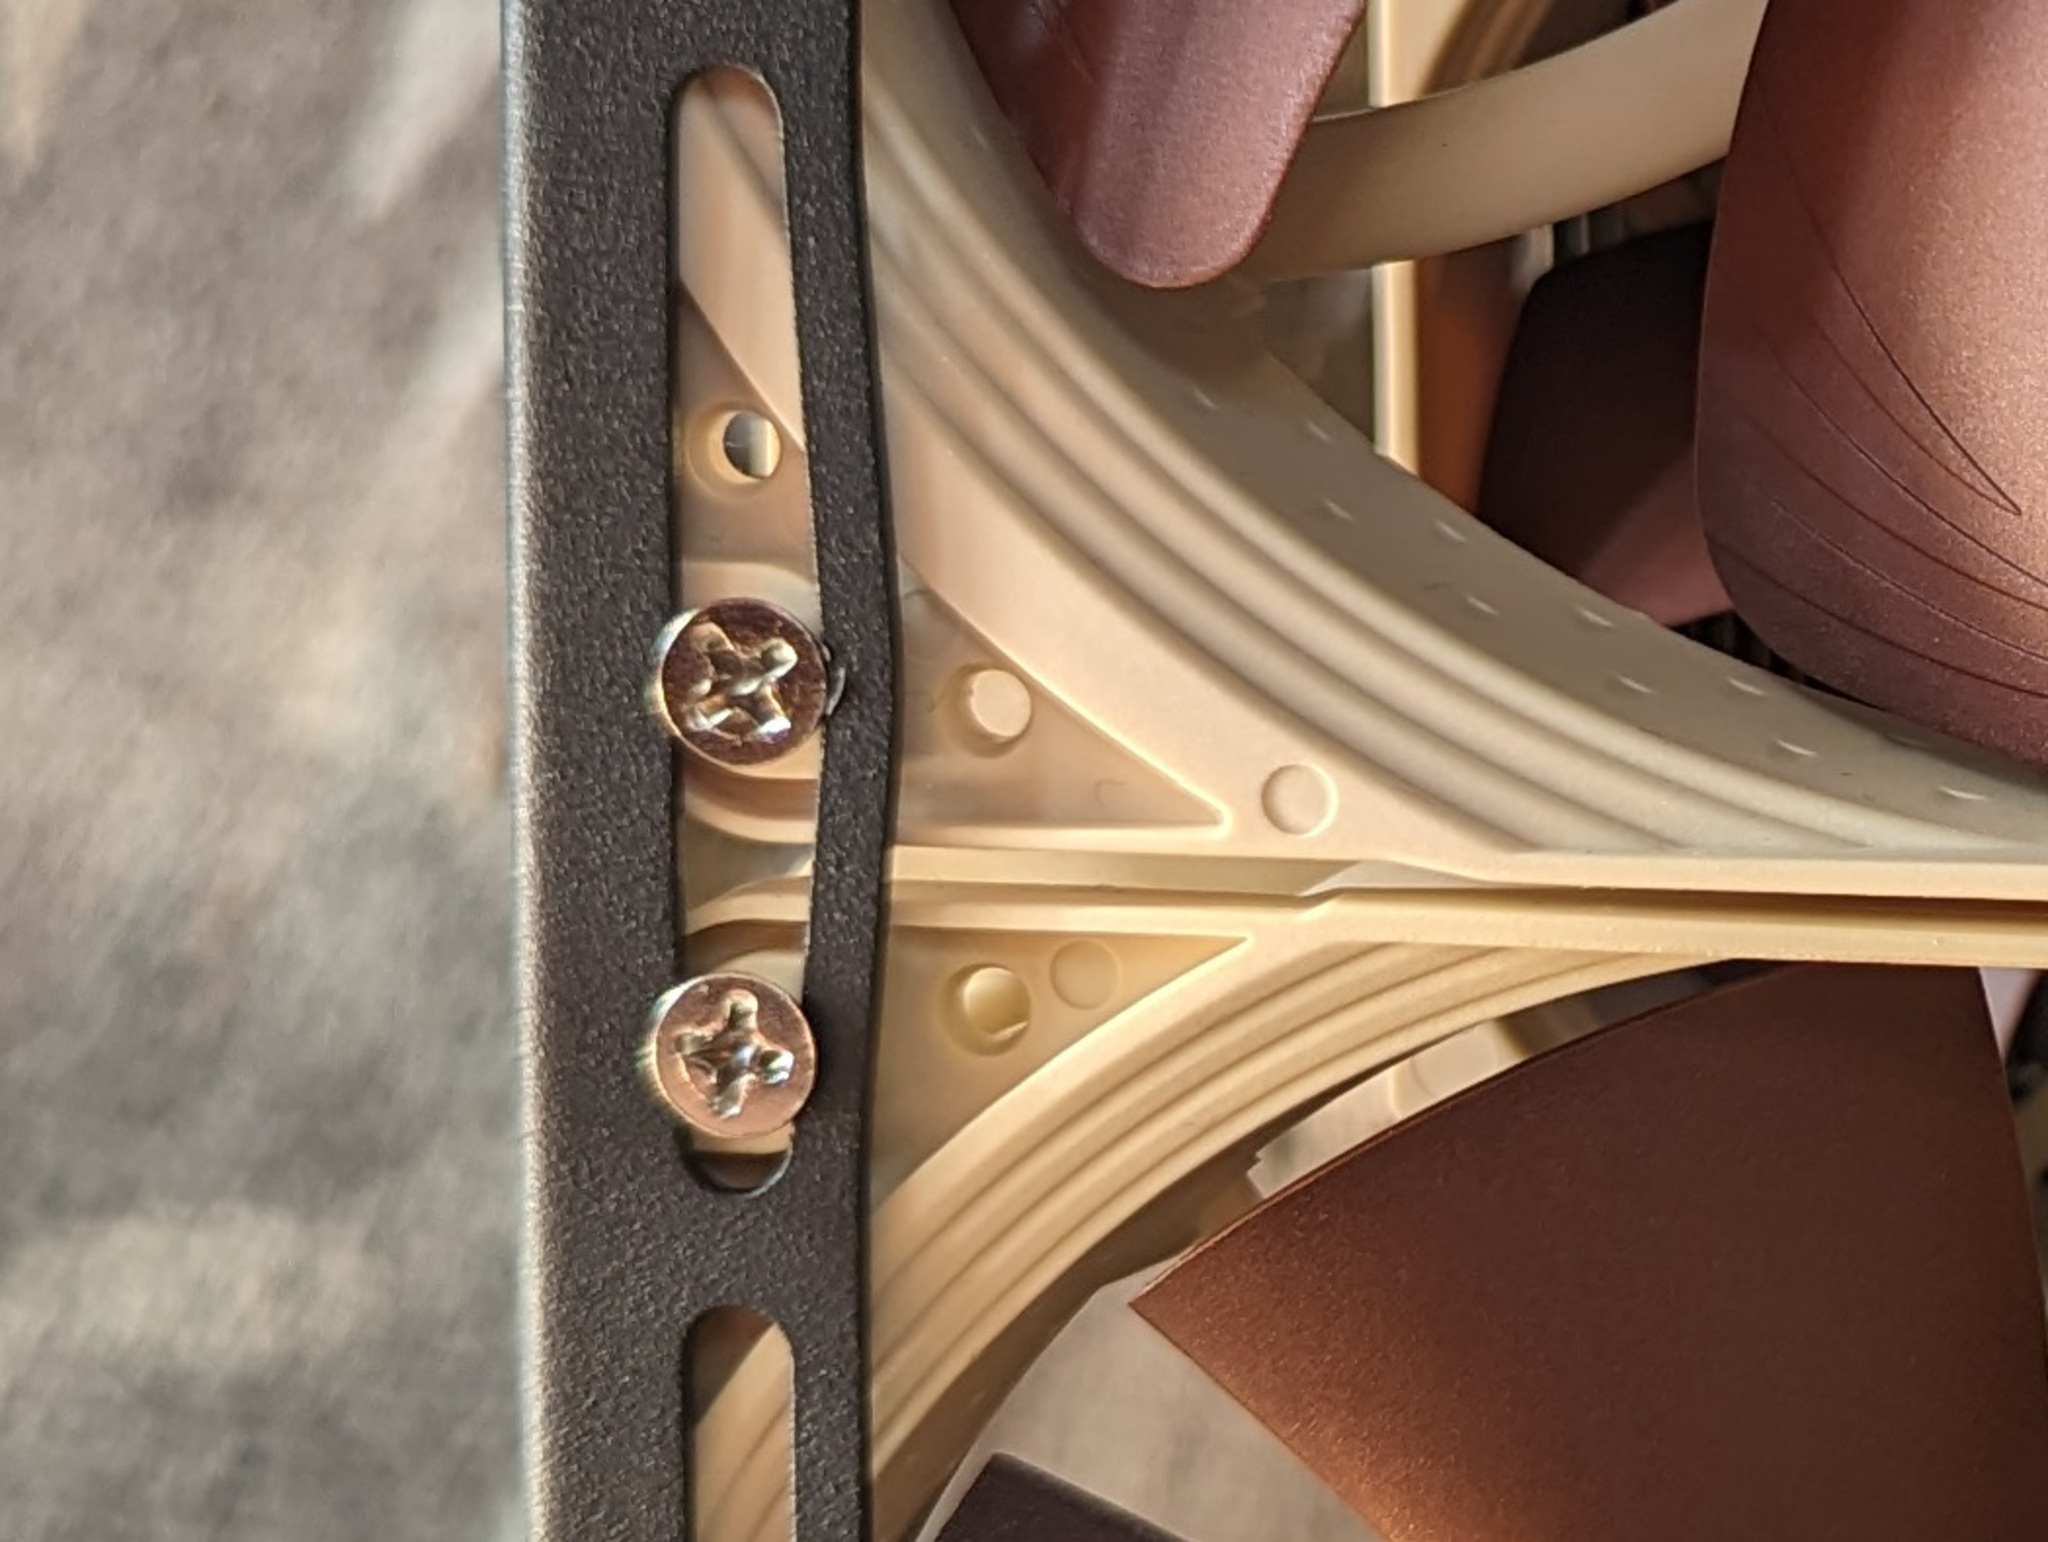
Mount deformation on snug fan install
- This isn’t a flaw of the case per se, but be warned that the tolerances for front fans with a GPU mounted is extremely tight! Even with one of the smallest GPUs I could find, the fit was so close I had to remove the silicone dampers on the fan in order to gain the extra fraction of a mm needed for it to fit cleanly. Looking at it the other way though, this case is exactly as big as it needs to be in this dimension.
Dust filters
As someone who lives around a lot of pet hair and general dander, dust filters are pretty crucial on any computer equipment to at least try and keep the inside clean. Unfortunately the Aski 2 doesn’t come with any, but I was able to cobble some reasonable ones together using some parts off McMaster (cheaper sources almost certainly exist). Namely,
- A one foot square of 1⁄32” Flexible Magnet
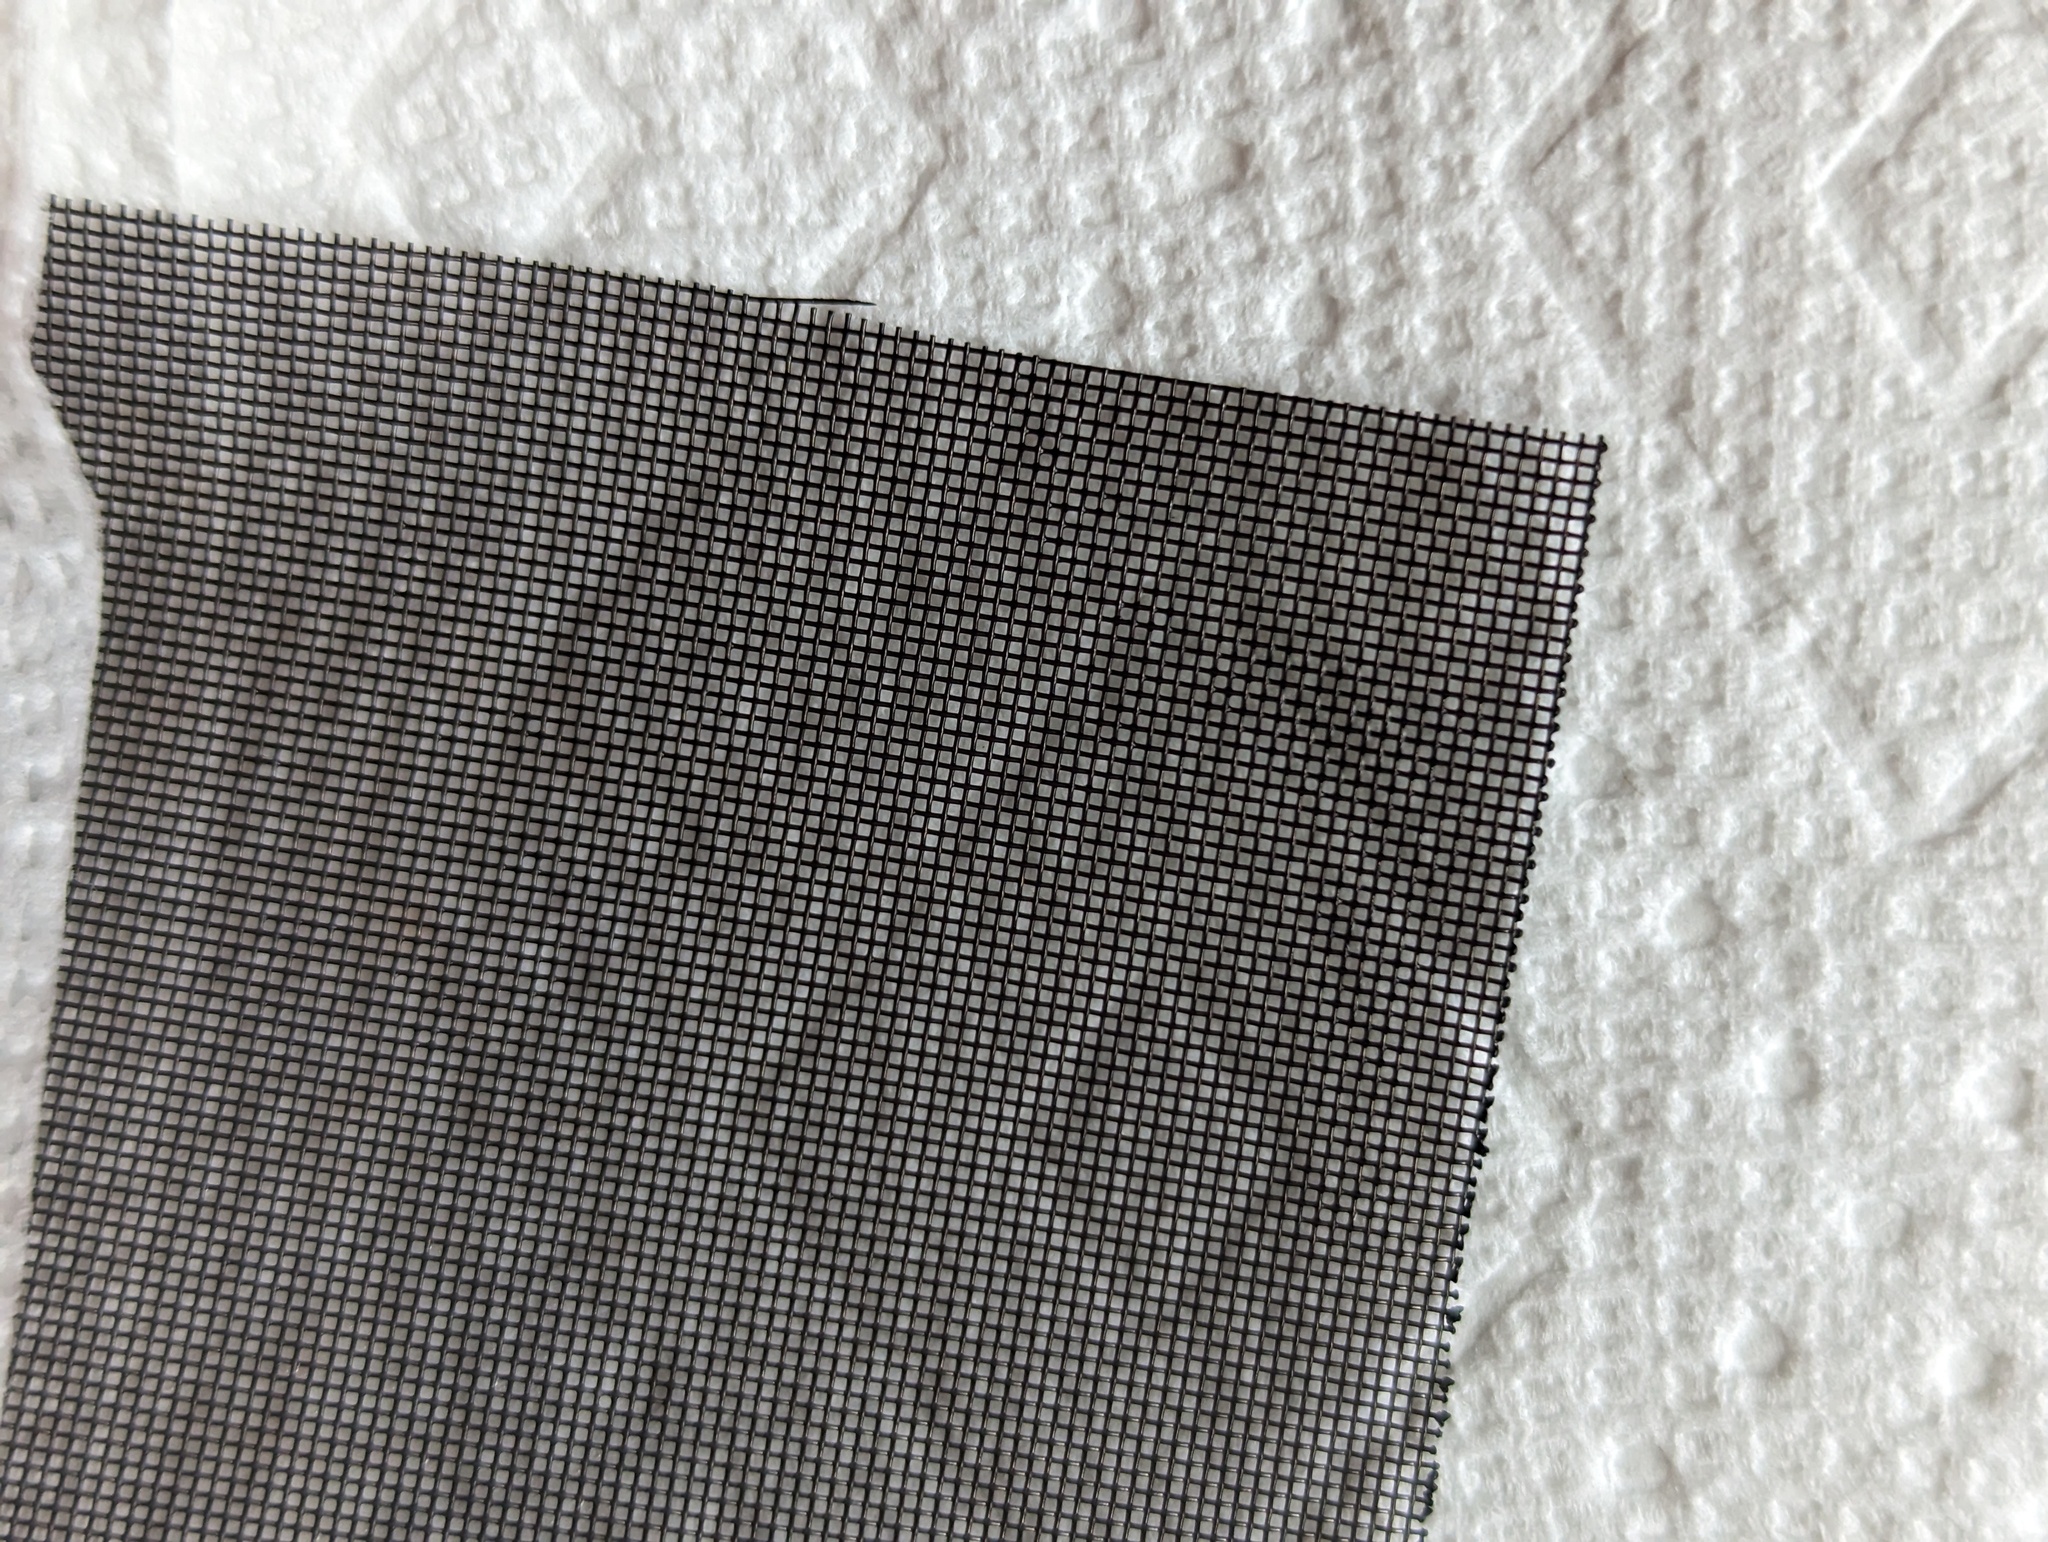
- A couple feet of 30x30 Nylon Mesh
- If doing this again I might opt for a smaller mesh, though you still want it to be fairly open so you don’t restrict flow. The 61x61 mesh on McM is also a 50%+ open area option, so that’s probably a good bet.
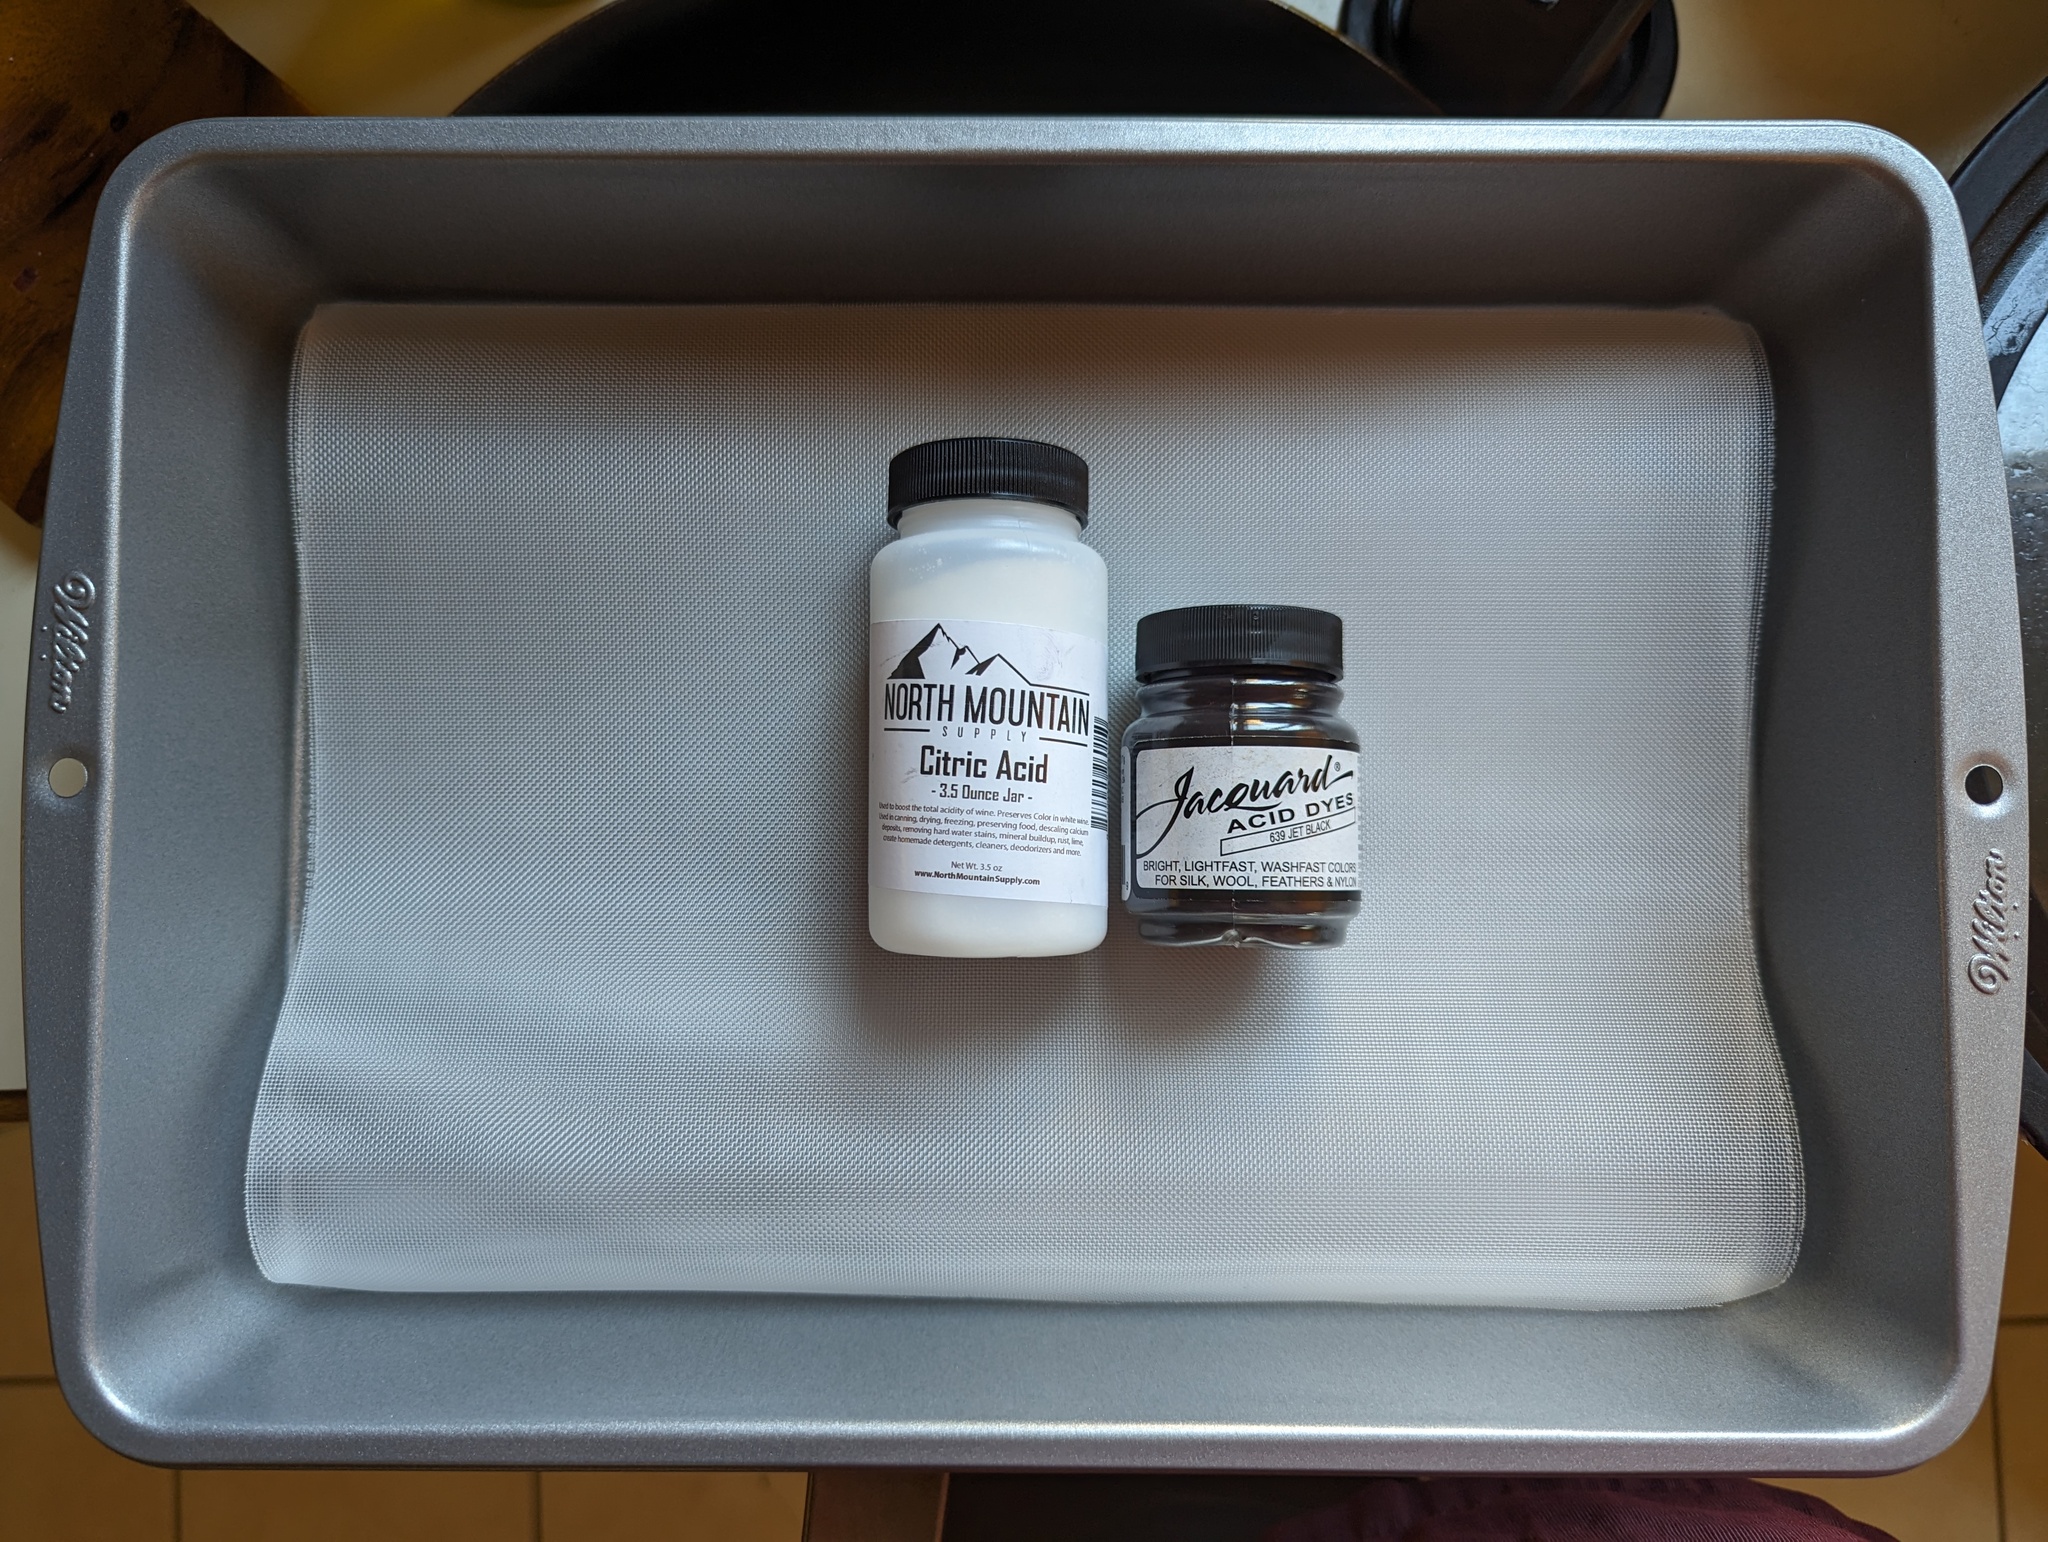
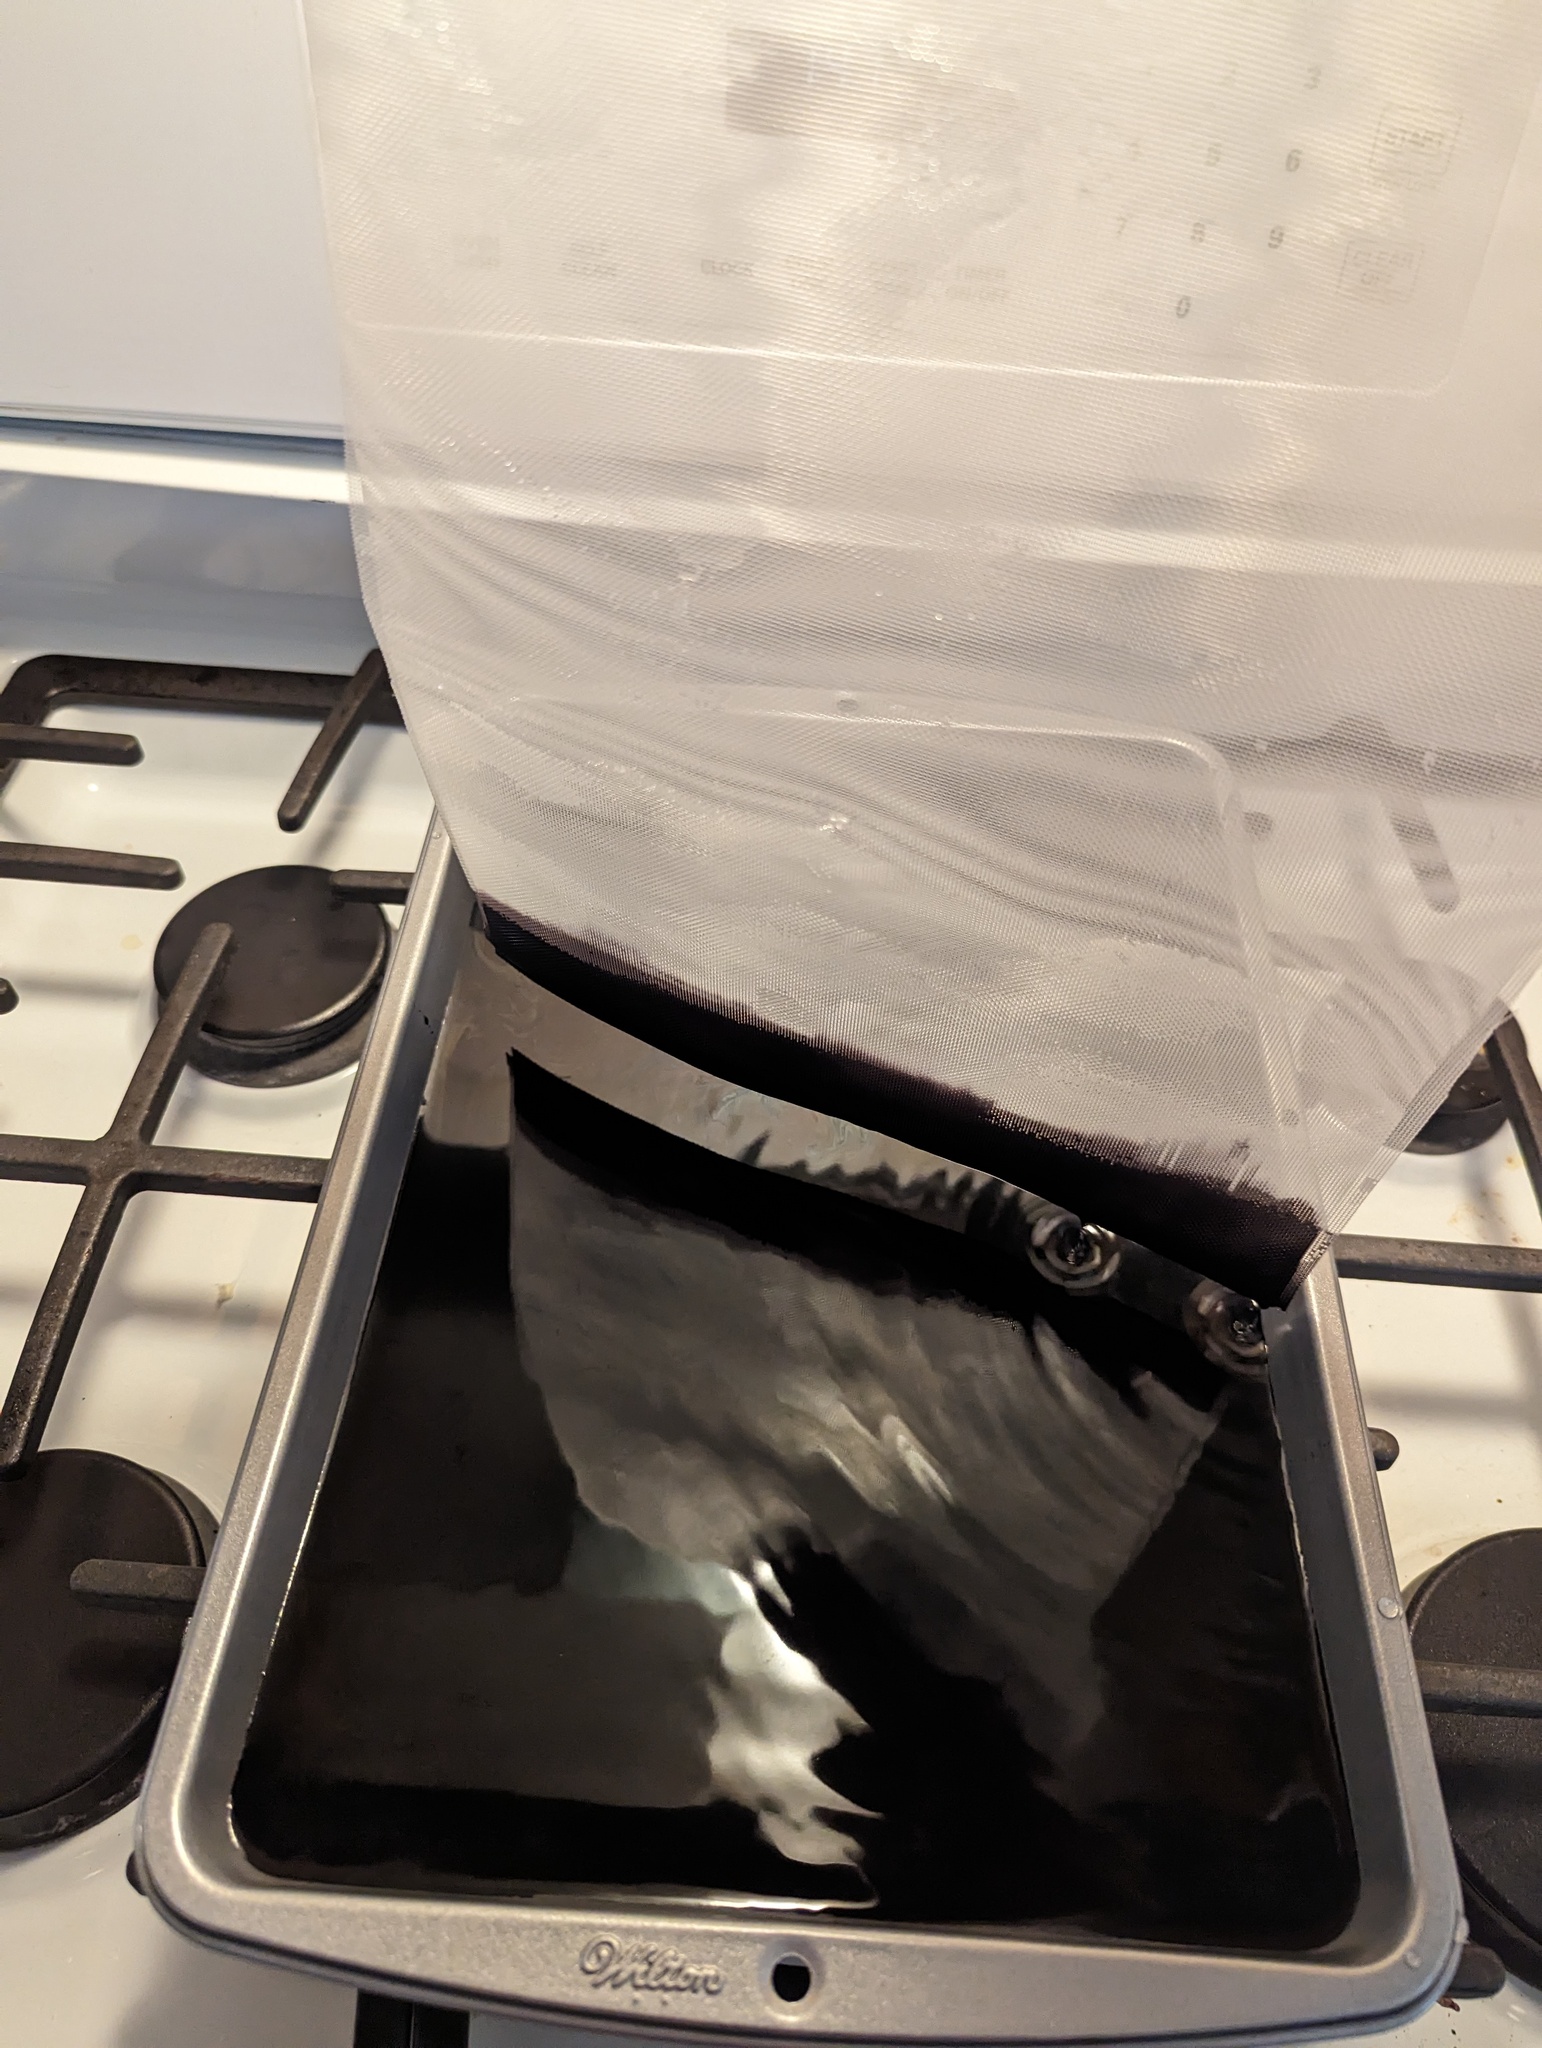
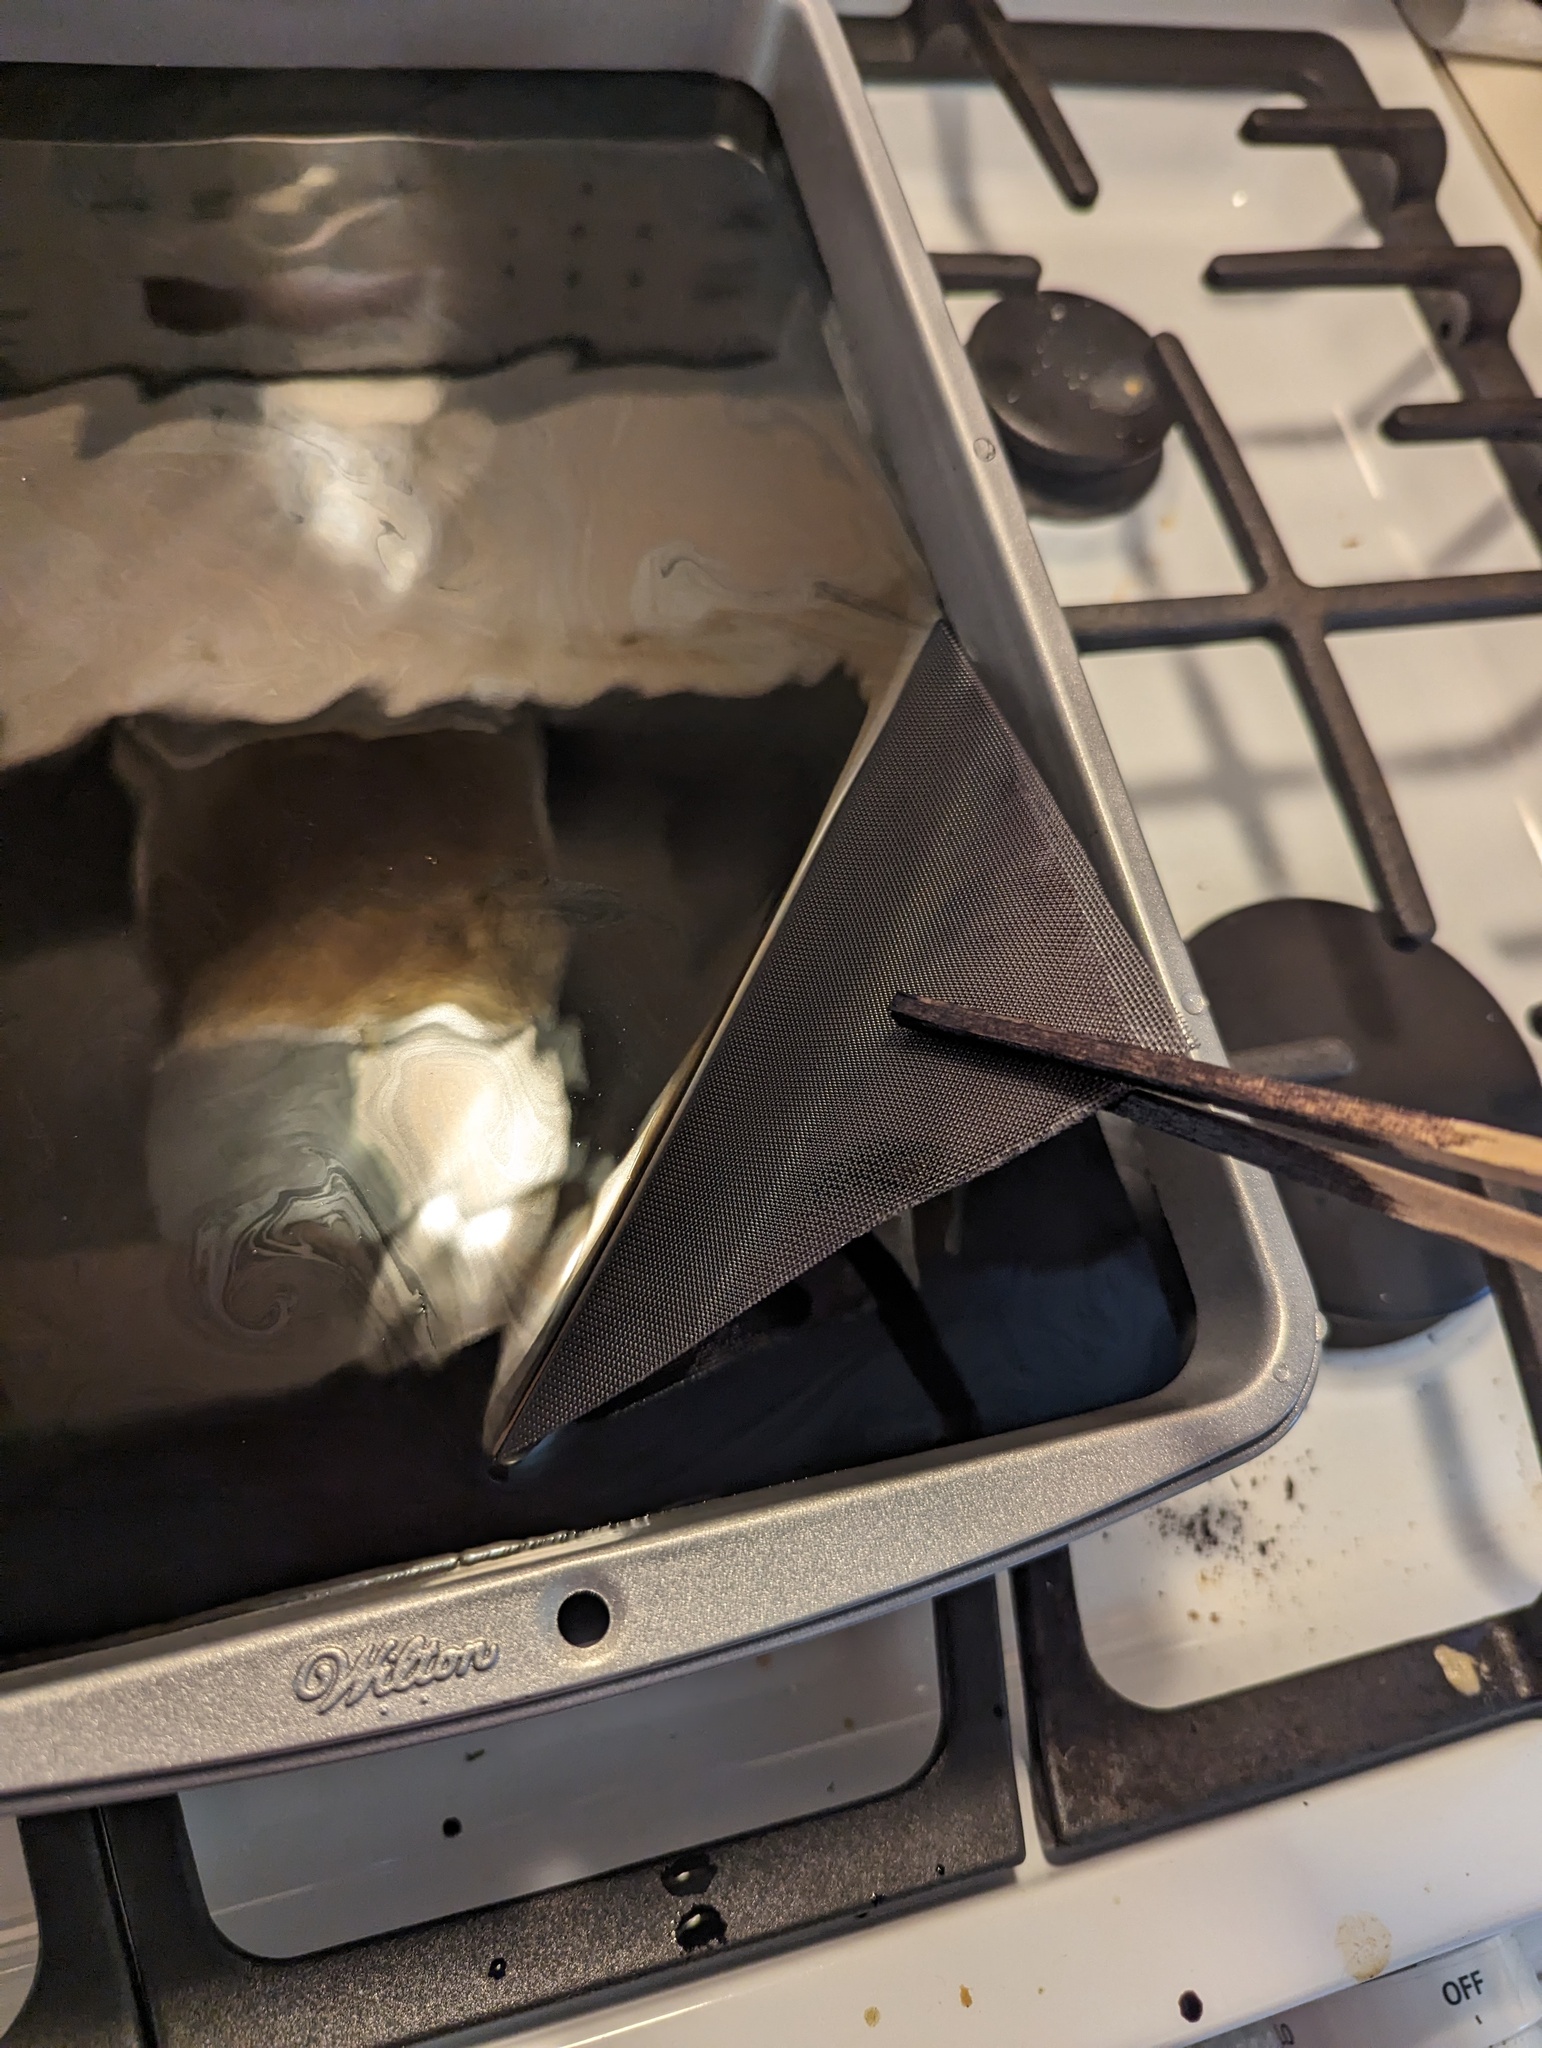
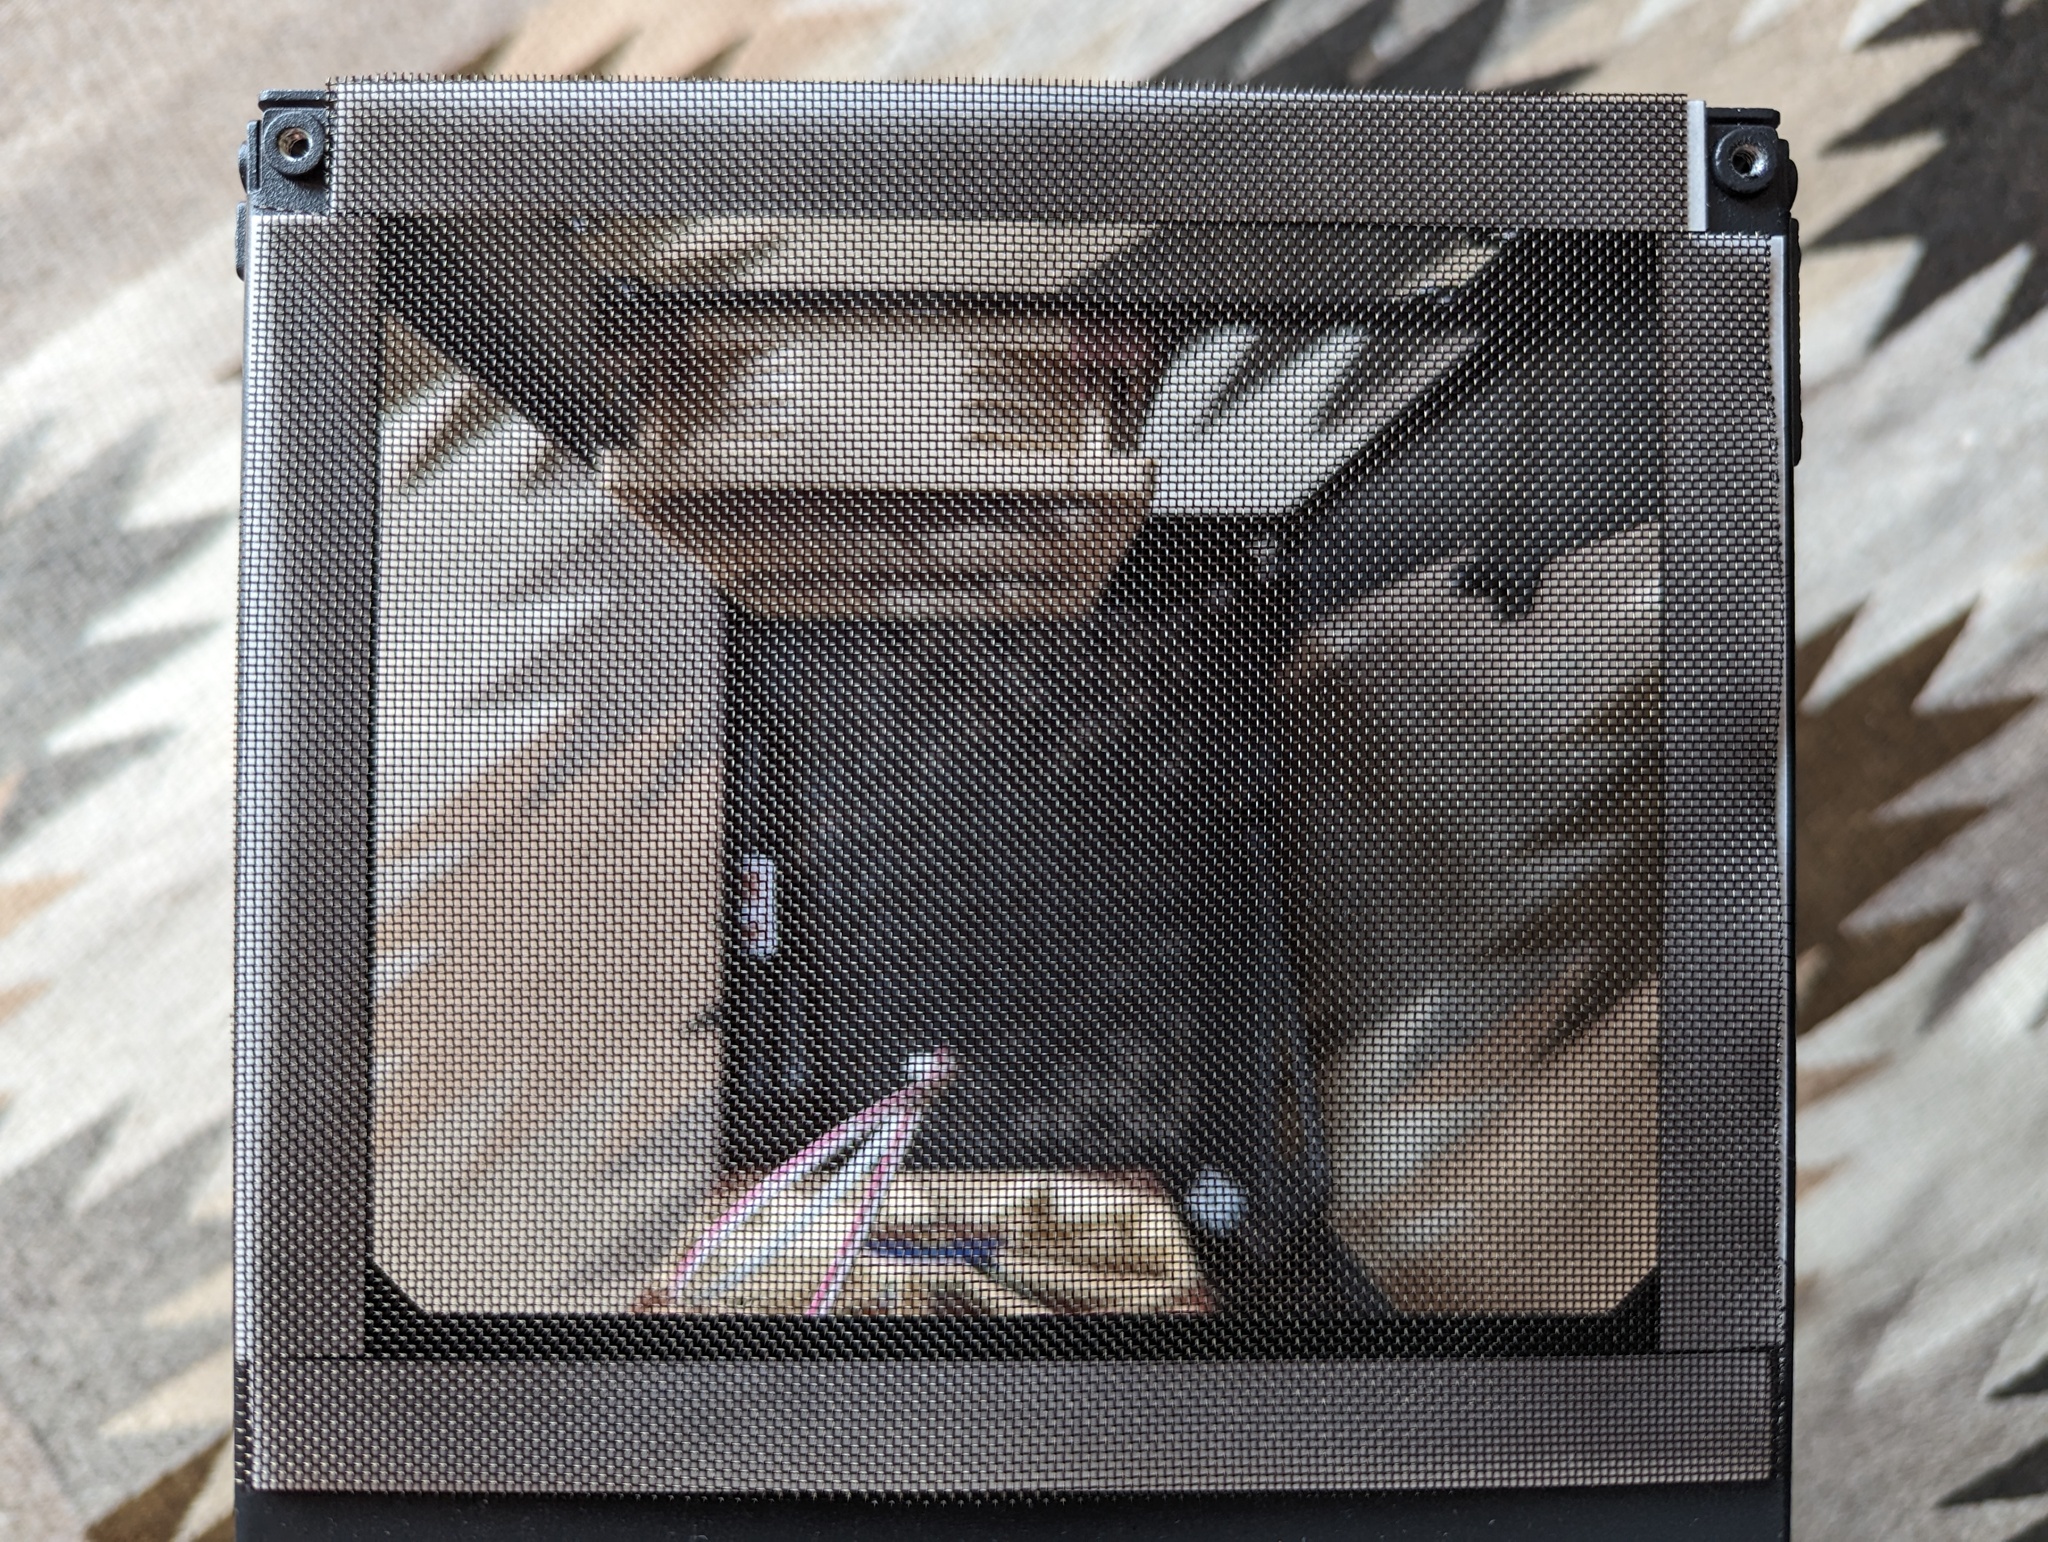
The nylon mesh I purchased had no colourant, which made it a little conspicuous as a filter material out of the box. This was especially true for the PSU intake, which doesn’t completely fill the top panel (and if I made it oversized, it would have to have a cutout for the power button). To make the mesh blend in better, the first thing I did was dye it black. Dyeing nylon is slightly involved in that you need to use an acid dye. I opted for the Jet Black (639) from Jacquard dyes, which was readily available, with citric acid to achieve the necessary pH. Using a cheap baking tray as a vessel to avoid contaminating food use containers (if you do this, ensure the tray does not have a non-stick coating that will off-gas hazardous chemicals if heated directly) I dissolved the dye, soaked some pre-cut sheets of mesh in the dye solution, added citric acid solution, and then brought to a boil and let sit for thirty minutes while agitating. Note that getting the temperature up to boiling is critical for the dyeing process to work - I had to cover the pan with a metal sheet as a lid to keep heat from escaping.
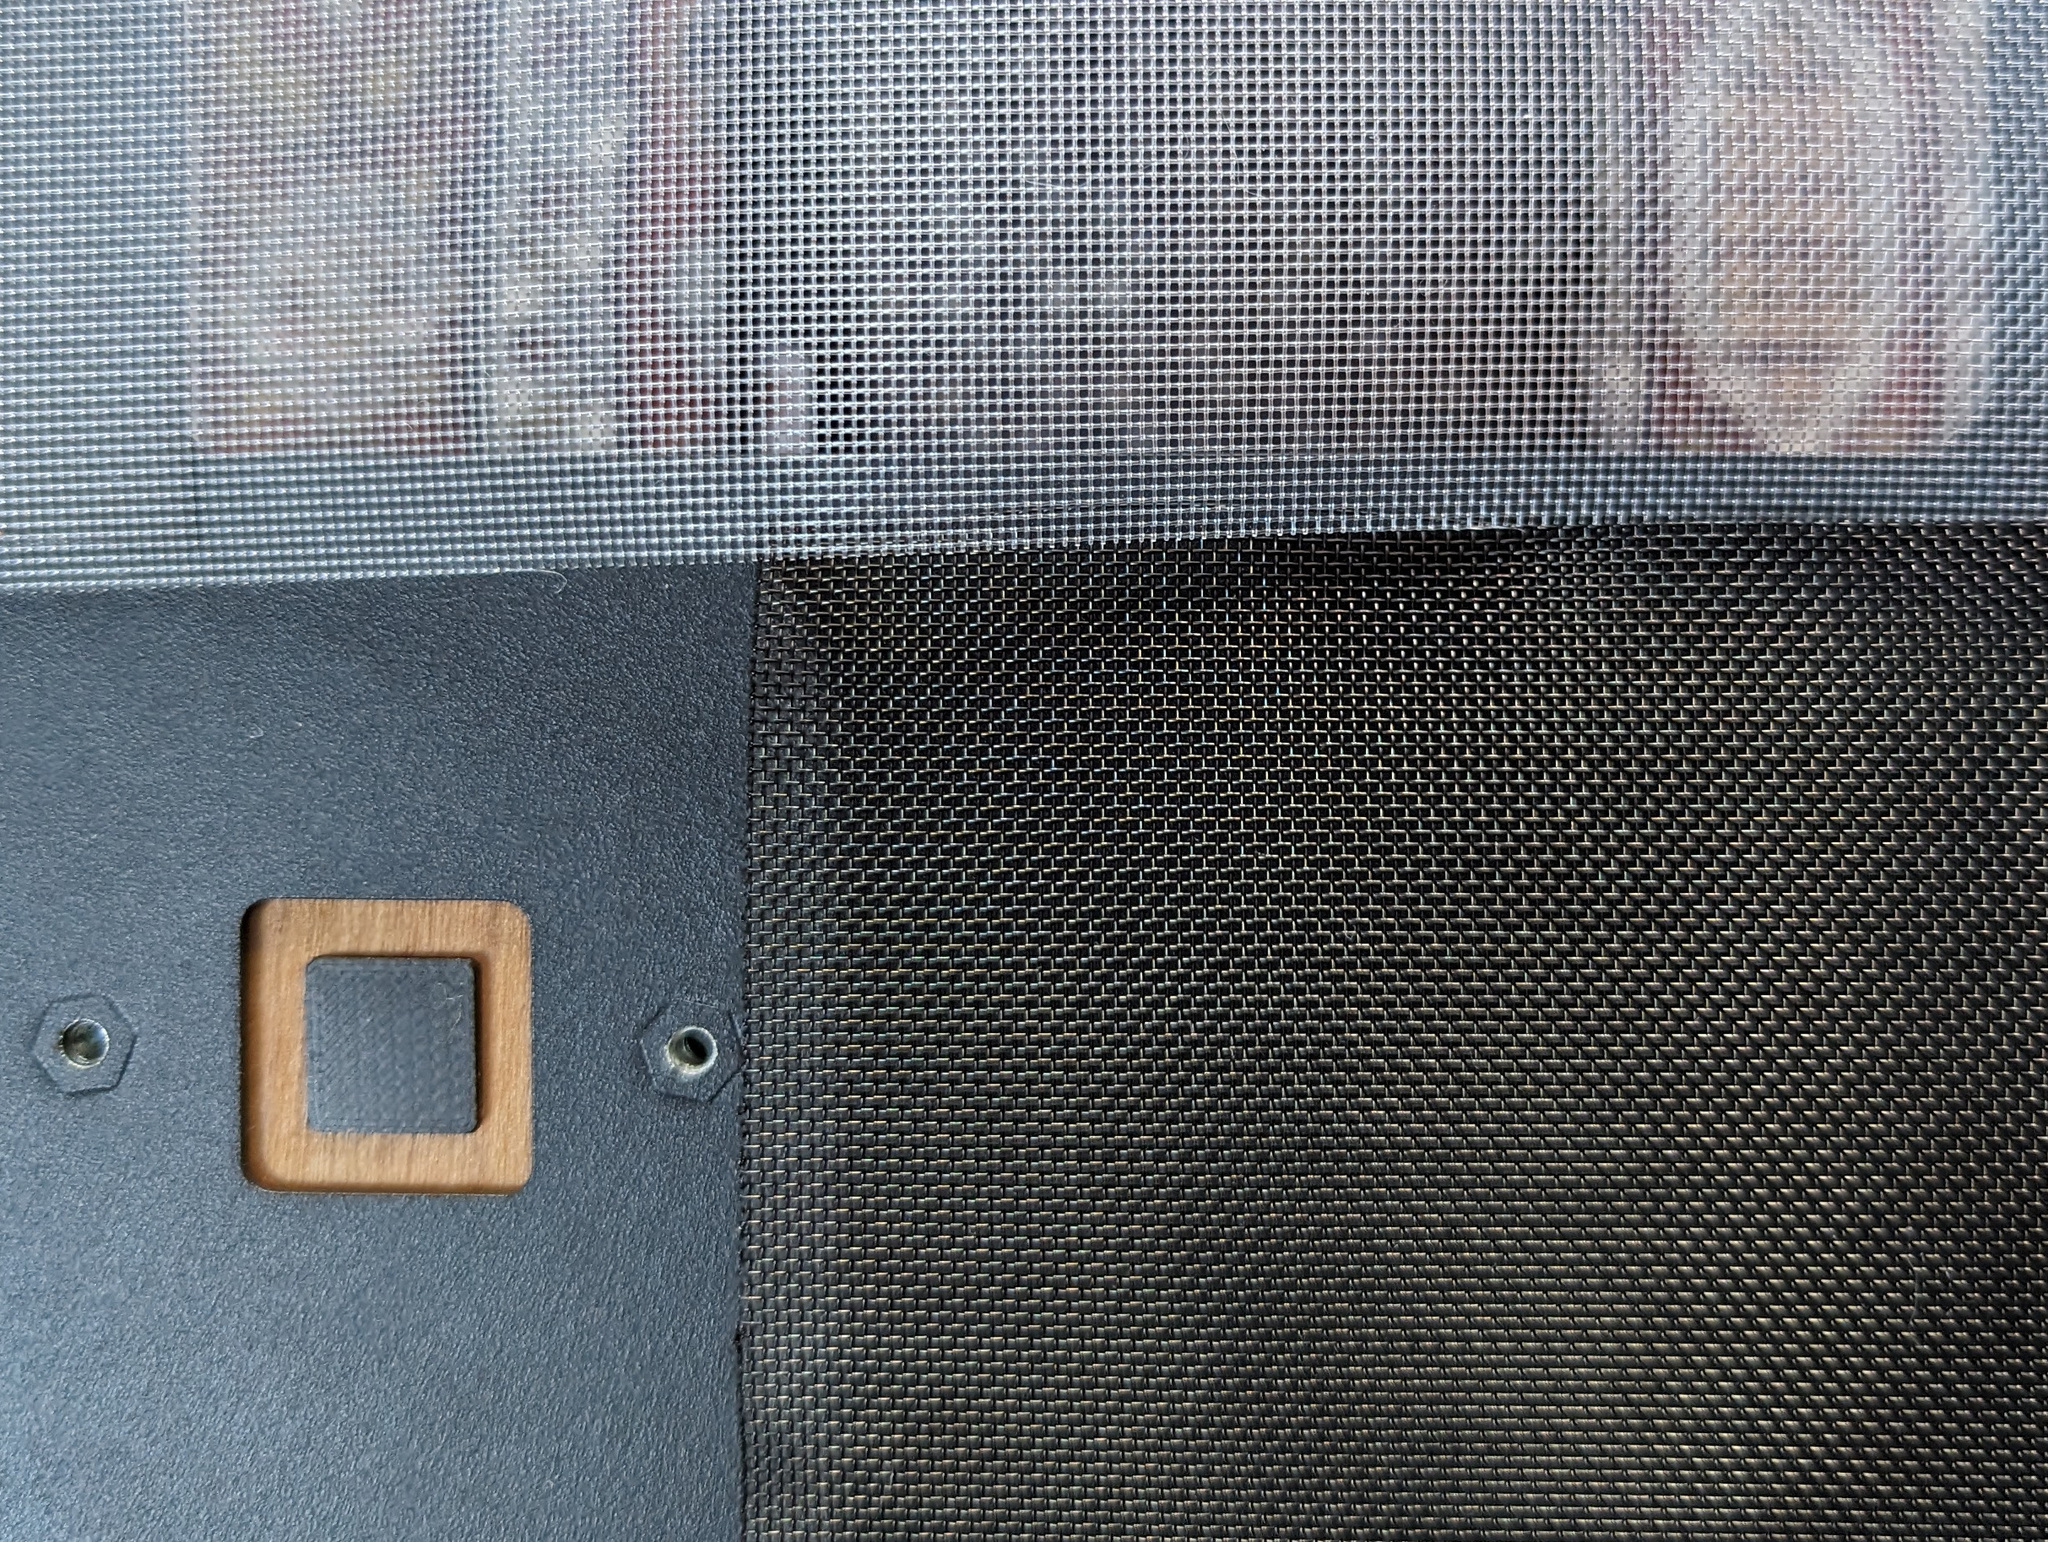
With the mesh dyed, the previously visible edge of the filter material now blends pretty seamlessly with the dark powder coat on the chassis.
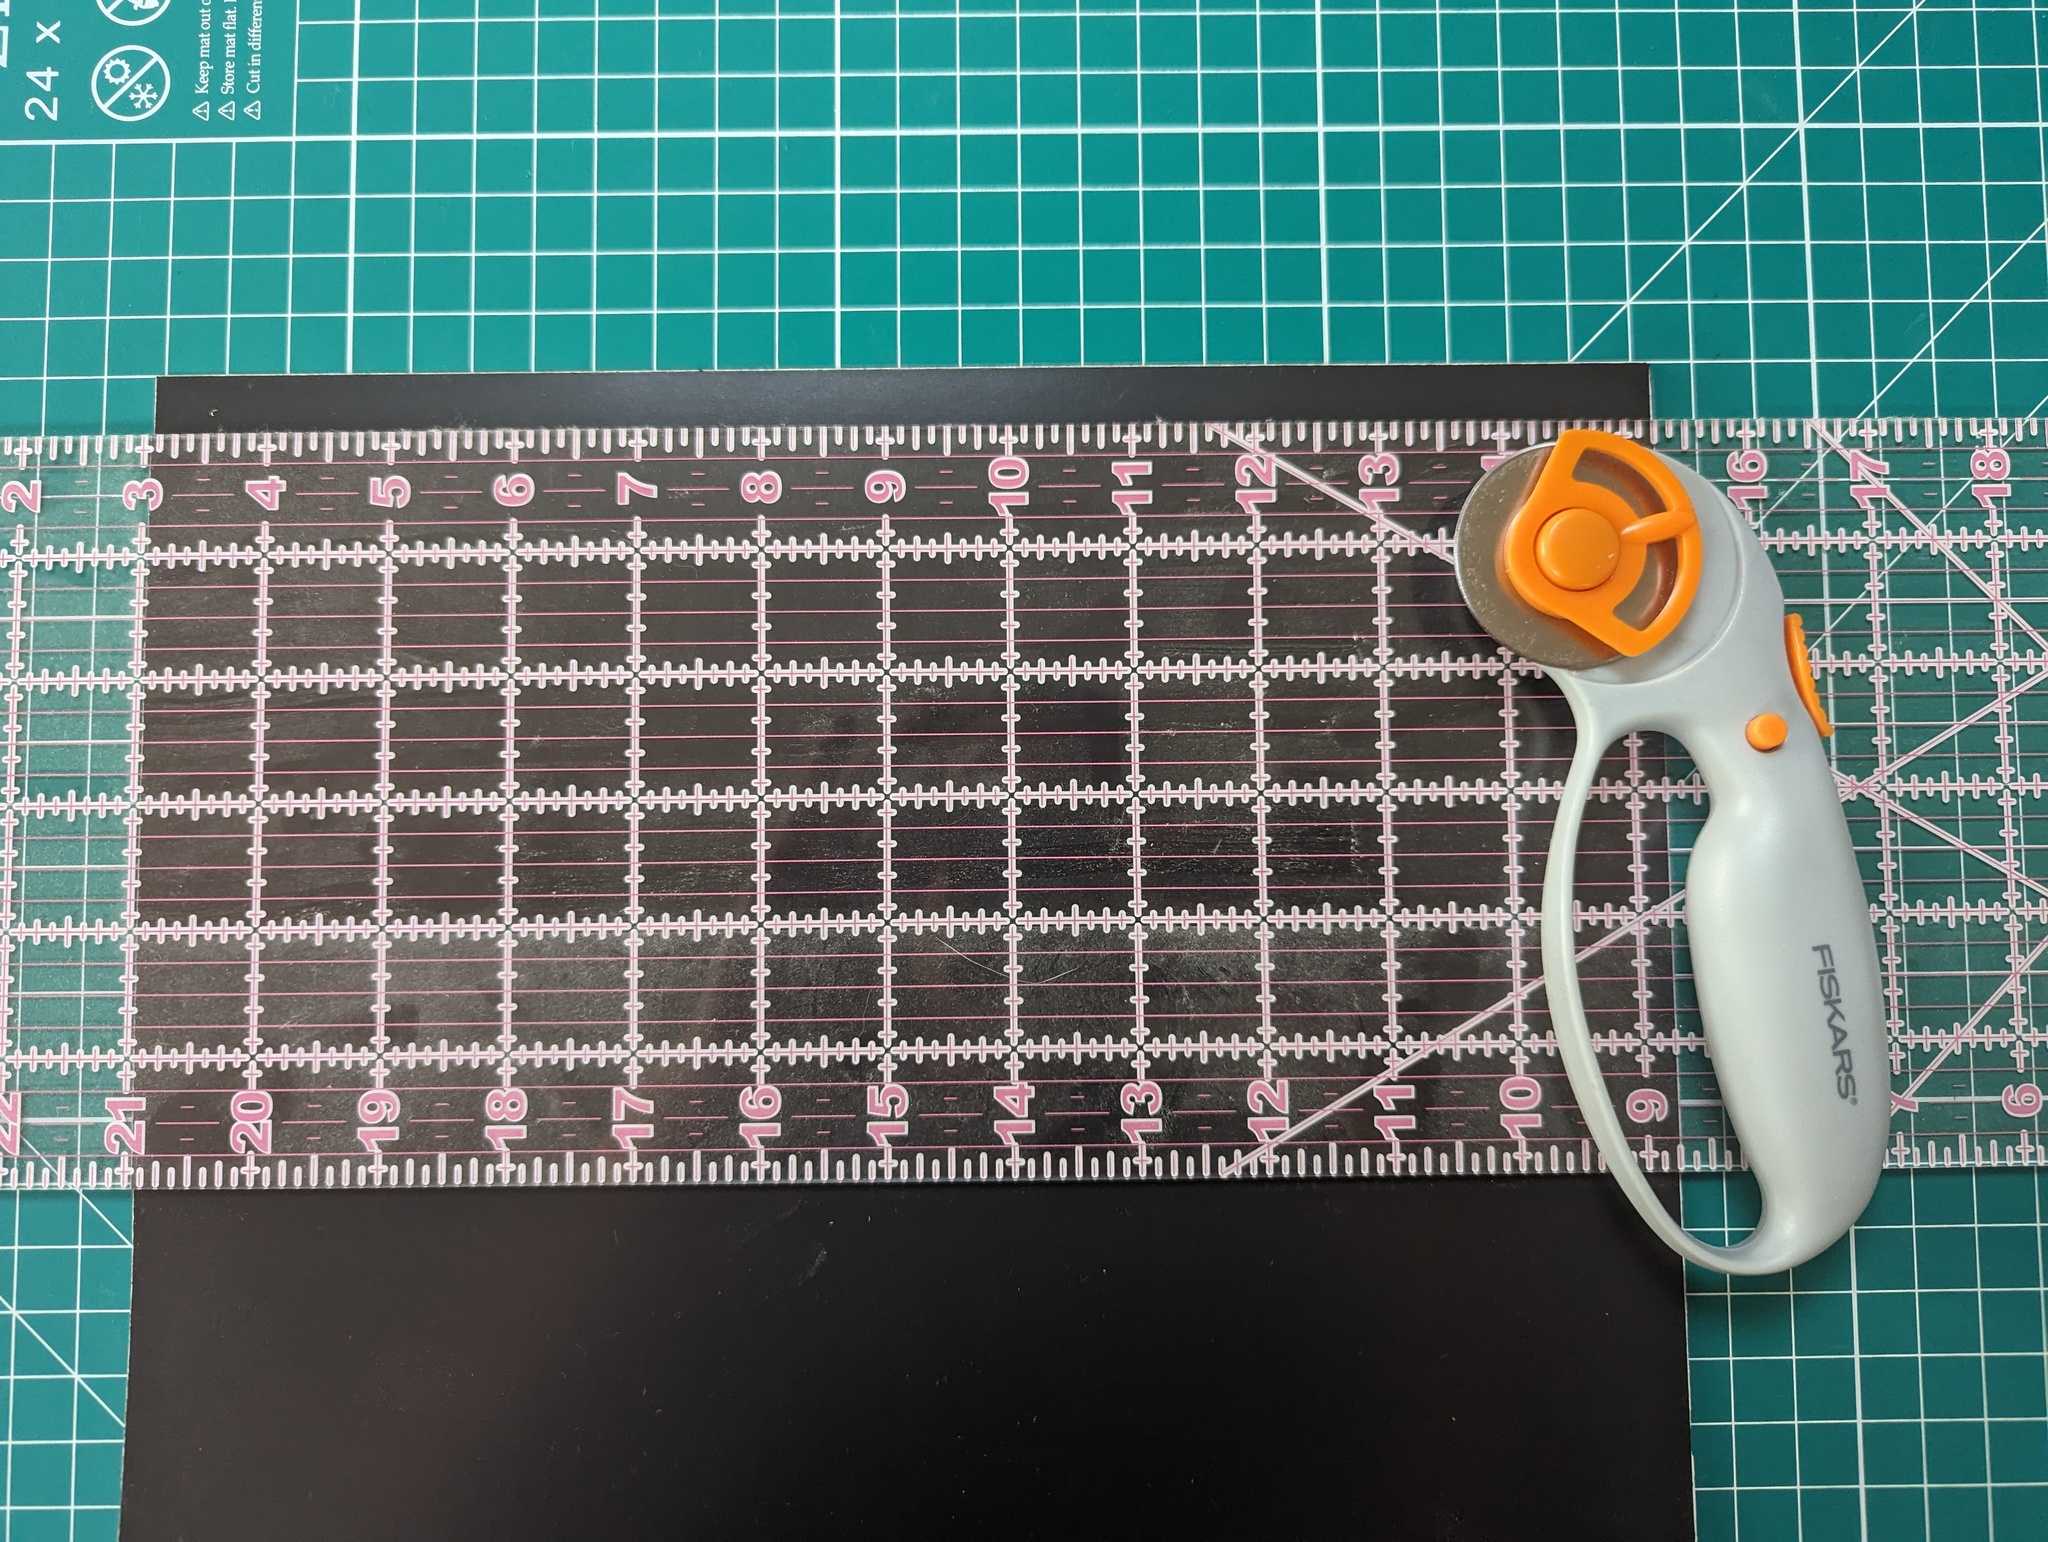
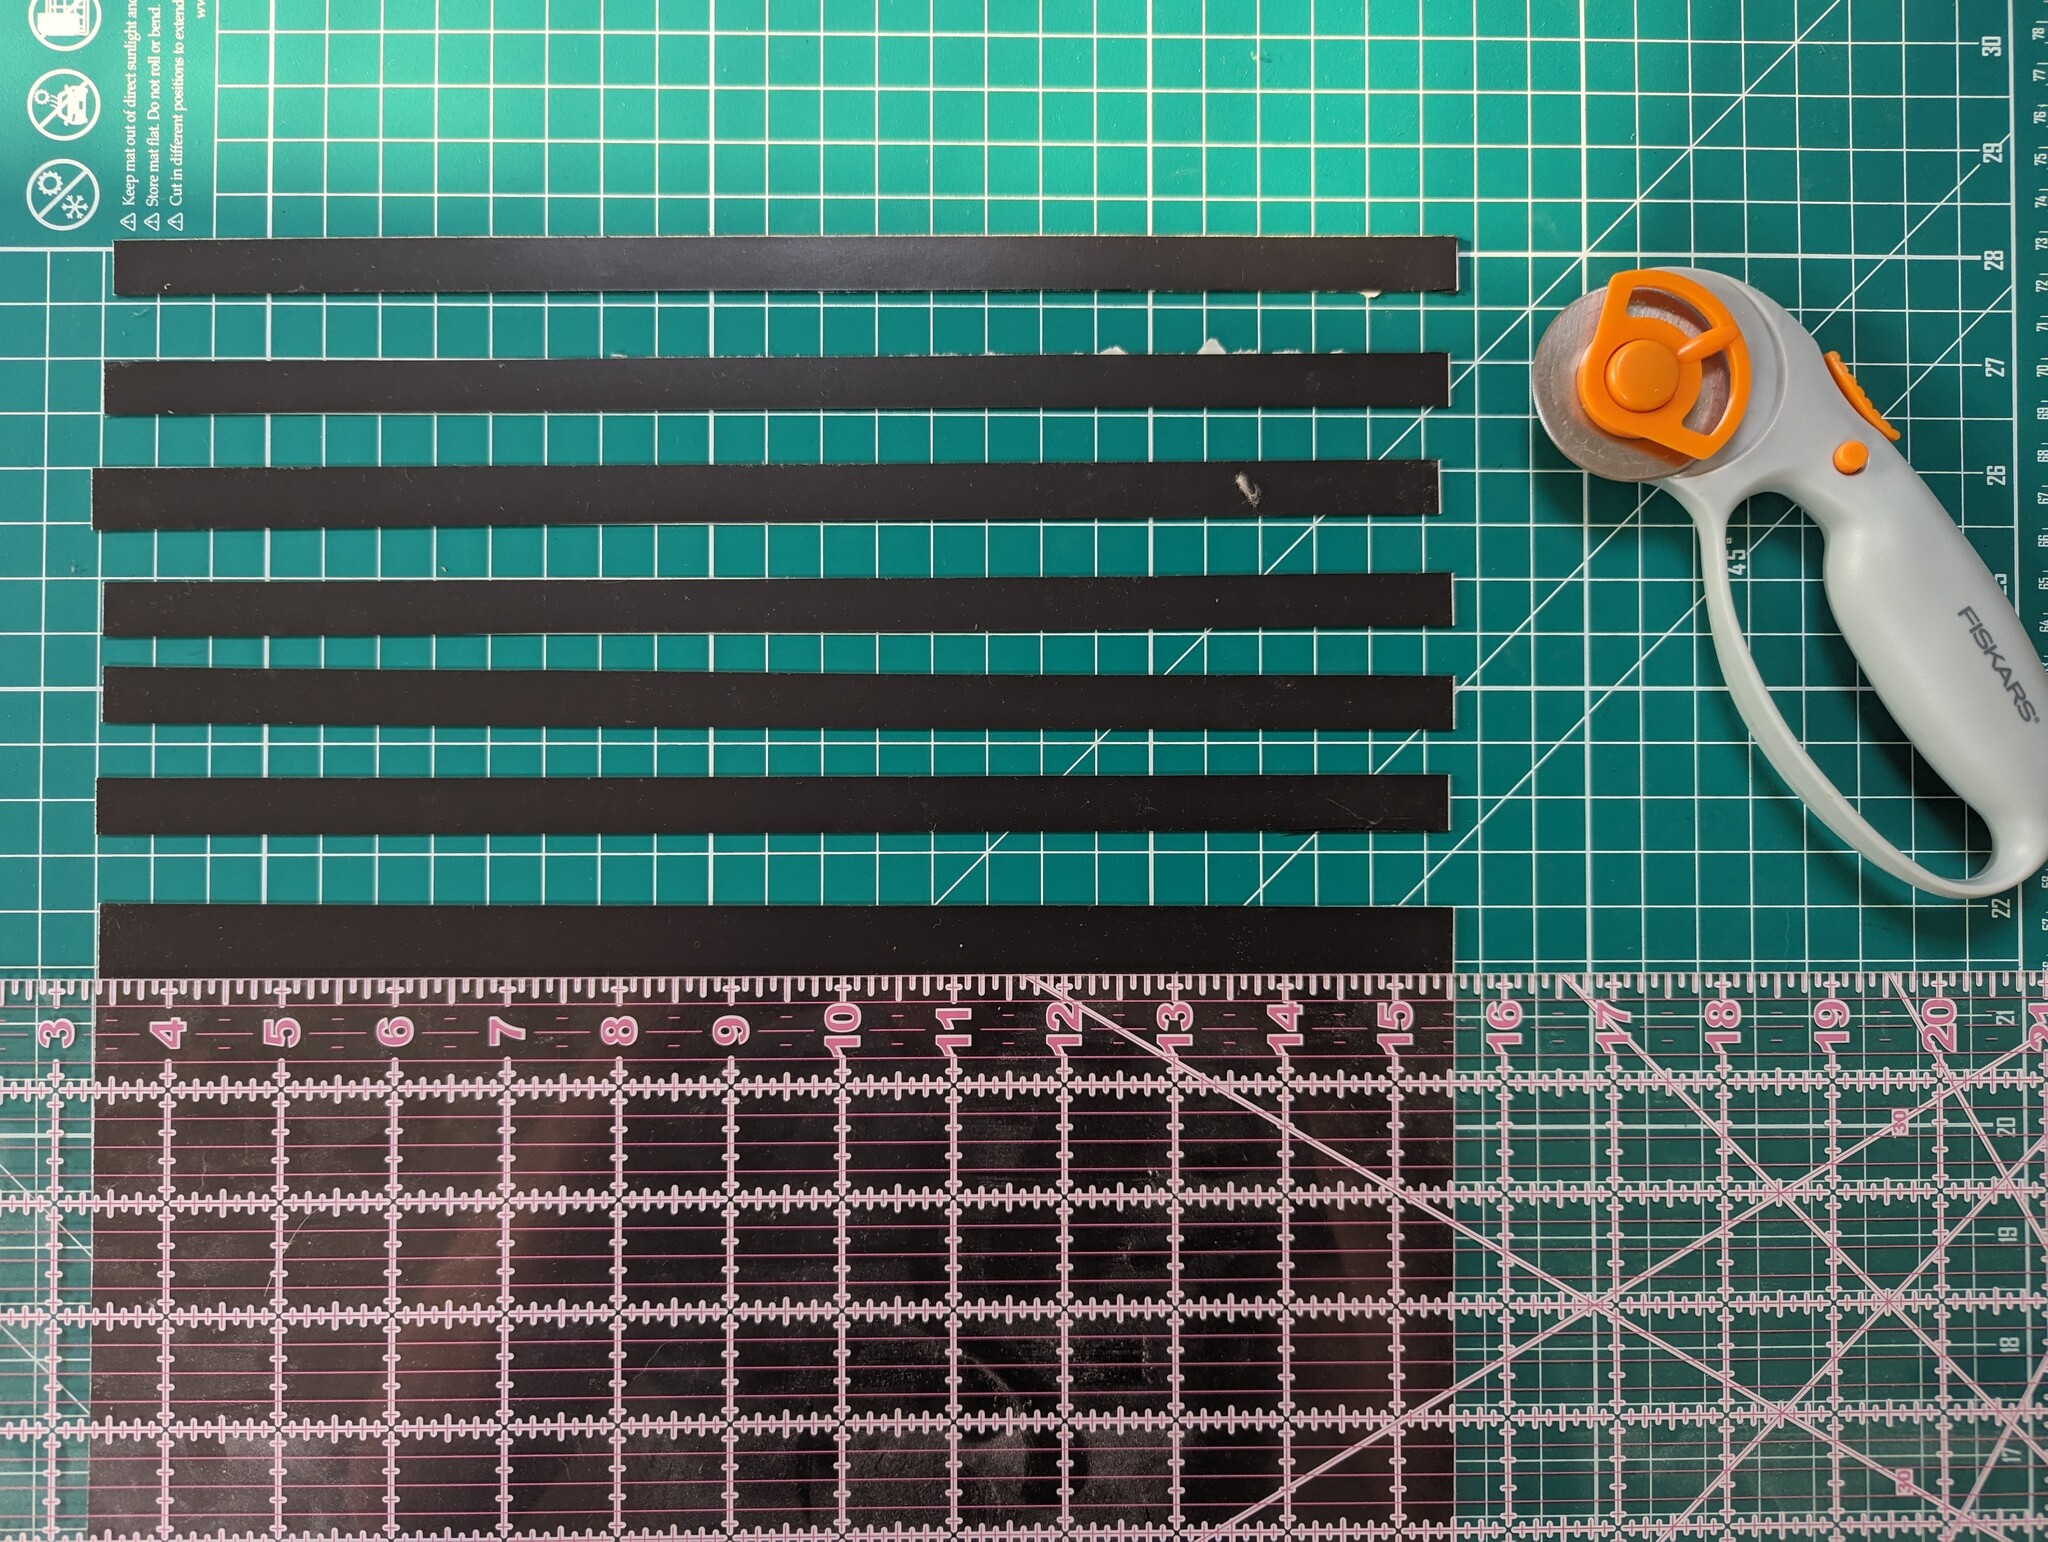
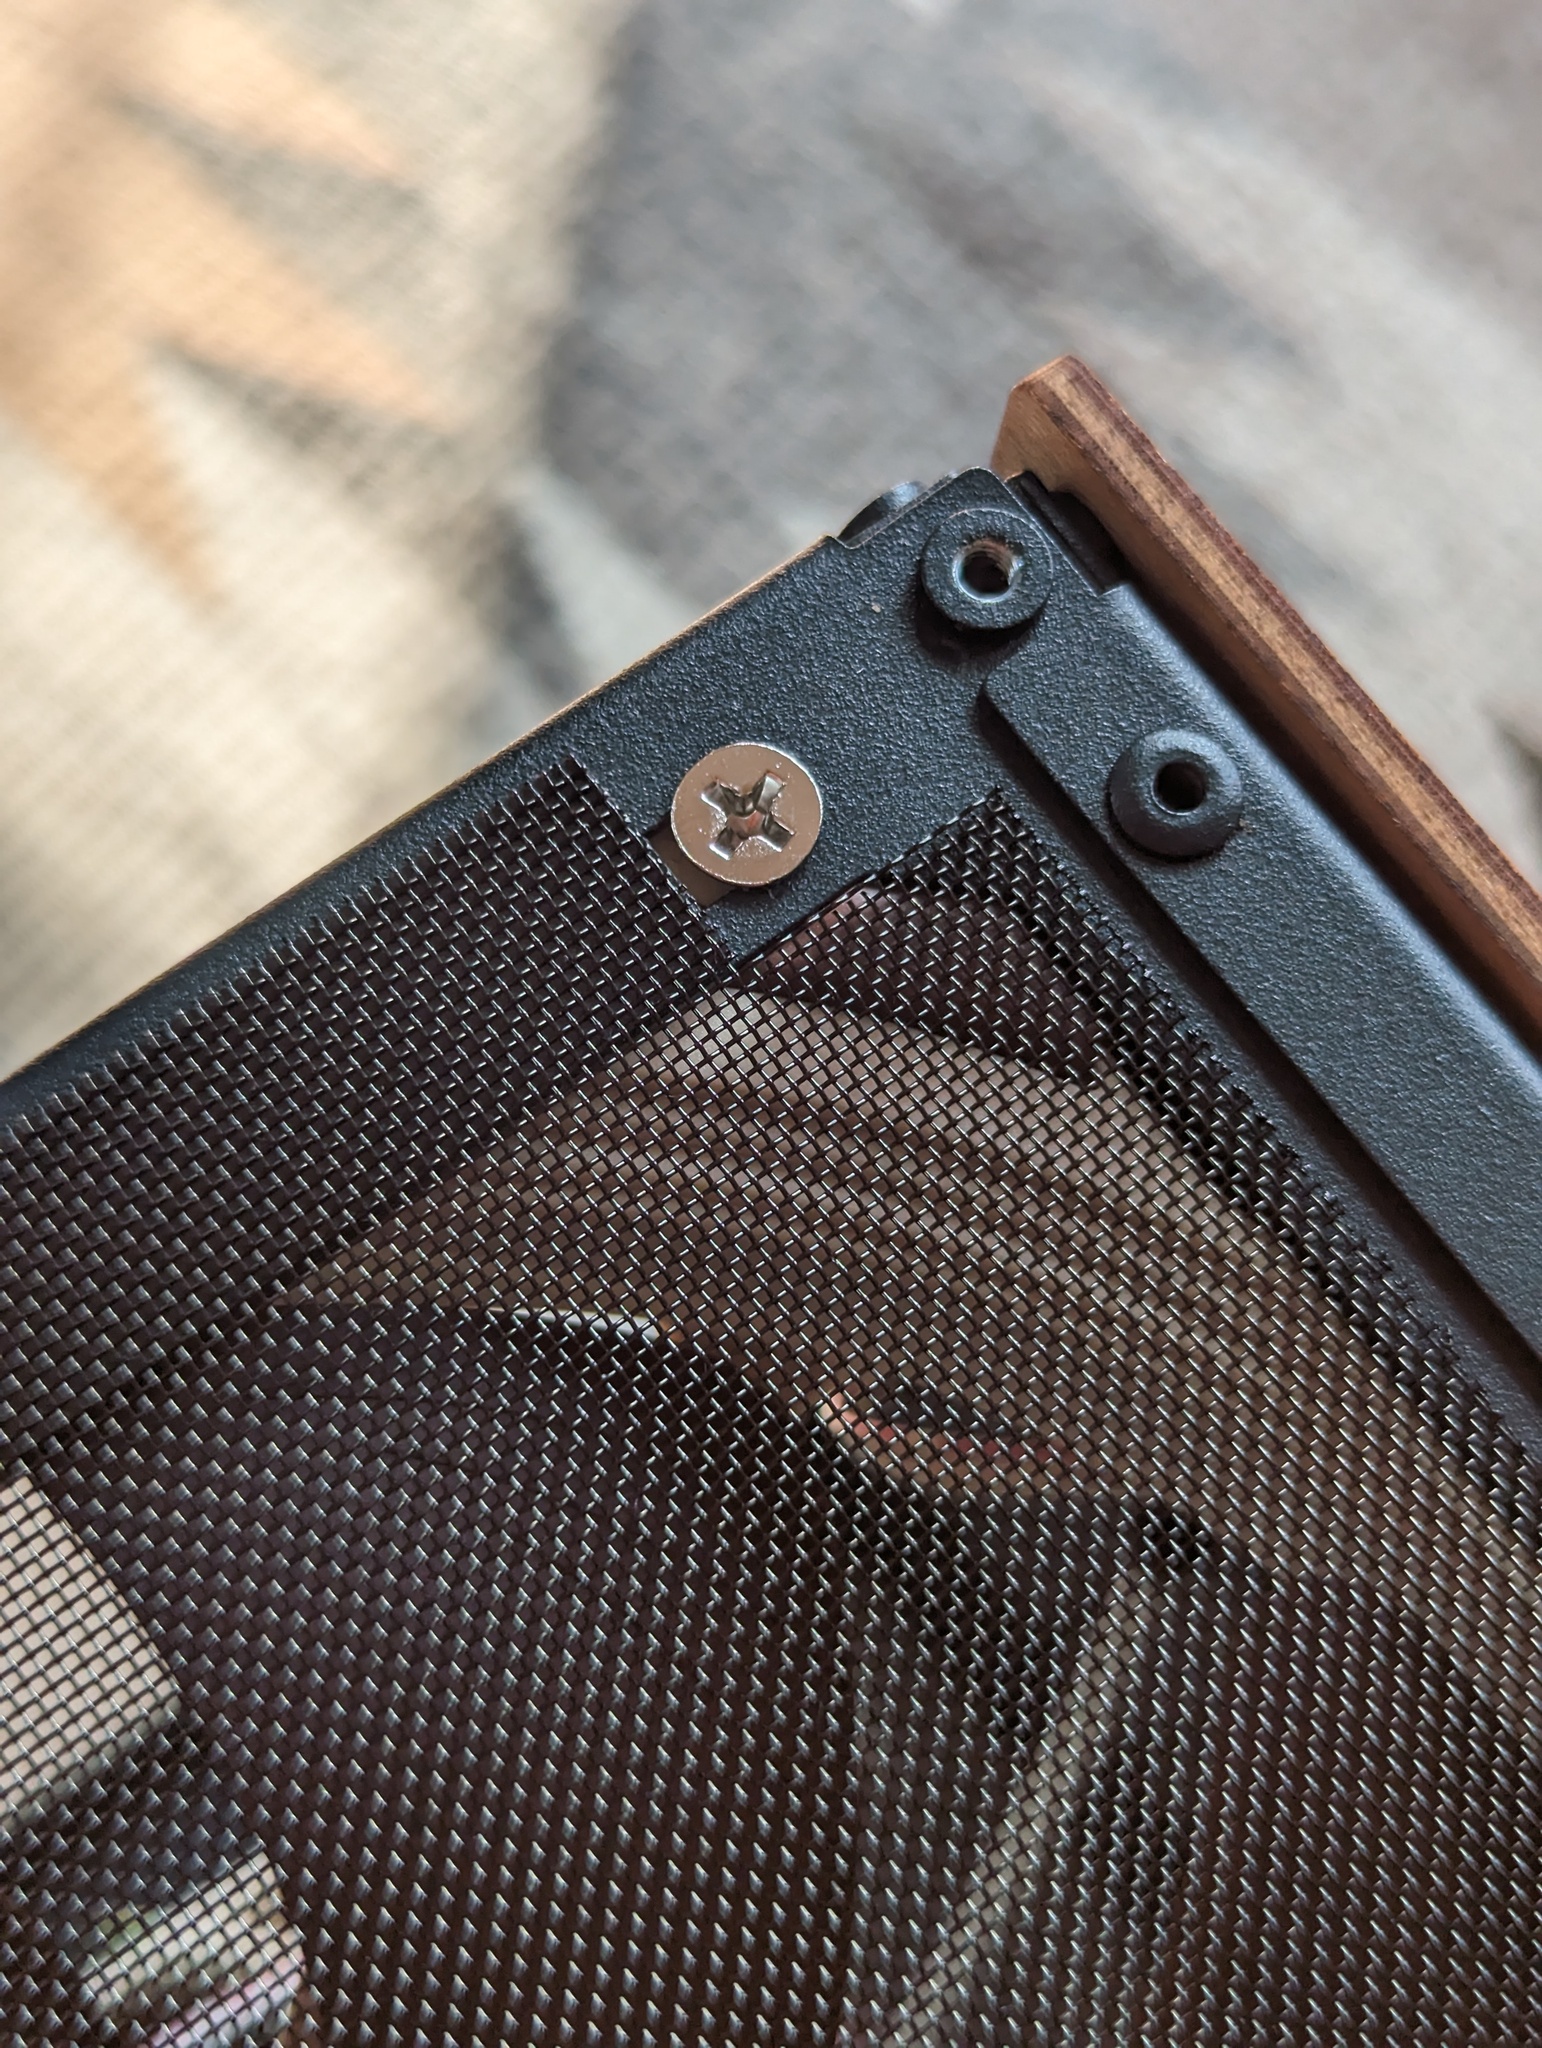
Next, I cut the magnetic sheet into 1cm wide strips using a rotary fabric cutter, and then slipped them onto the bare case chassis around the apertures I intended to put dust covers on (all of the ones that will be intakes). I then cut them down to size lengthwise by eye (cut one then layer it on the other to ensure they are consistent) then used them as a yardstick to measure out the nylon mesh, which I again cut using the rotary fabric cutter. Conveniently the mesh has a built in grid to make sure you cut it square; I found that cutting it slightly large then intentionally peeling off one edge strip at a time allowed fine tuning the size easily, after which you can use a ruler and the cutter to trim the loose ends. I also recommend sizing the mesh patch slightly narrower than the full width of the case, just so that you have some wiggle room to pull it taut over the apertures with the magnets. The adhesive on the back of the magnetic sheet I purchased is strong enough to tack the filter mesh in place, but unfortunately isn’t enough to keep it there long term, especially for the bottom intake which has gravity working against it. To reinforce the bond, I lay a bead of black RTV silicone adhesive (Permatex 81158) along the top of each interface and smoothed it into the mesh with a playing card. Once cured, any excess silicone was trimmed with a pair of scissors. With the additional adhesive, the filters now feel like they should hold up pretty well to light abuse. Note that on the front of the case, the combined thickness of the fan screws and magnet is too much for the front panel to seat comfortably. To get around this, I notched out the filter on that side to ensure a clean fit. Likewise, on the bottom intake, I notched the filter in around the four feet, and on the top intake narrowed one edge so that it can extend between the two attachment points for the top panel.
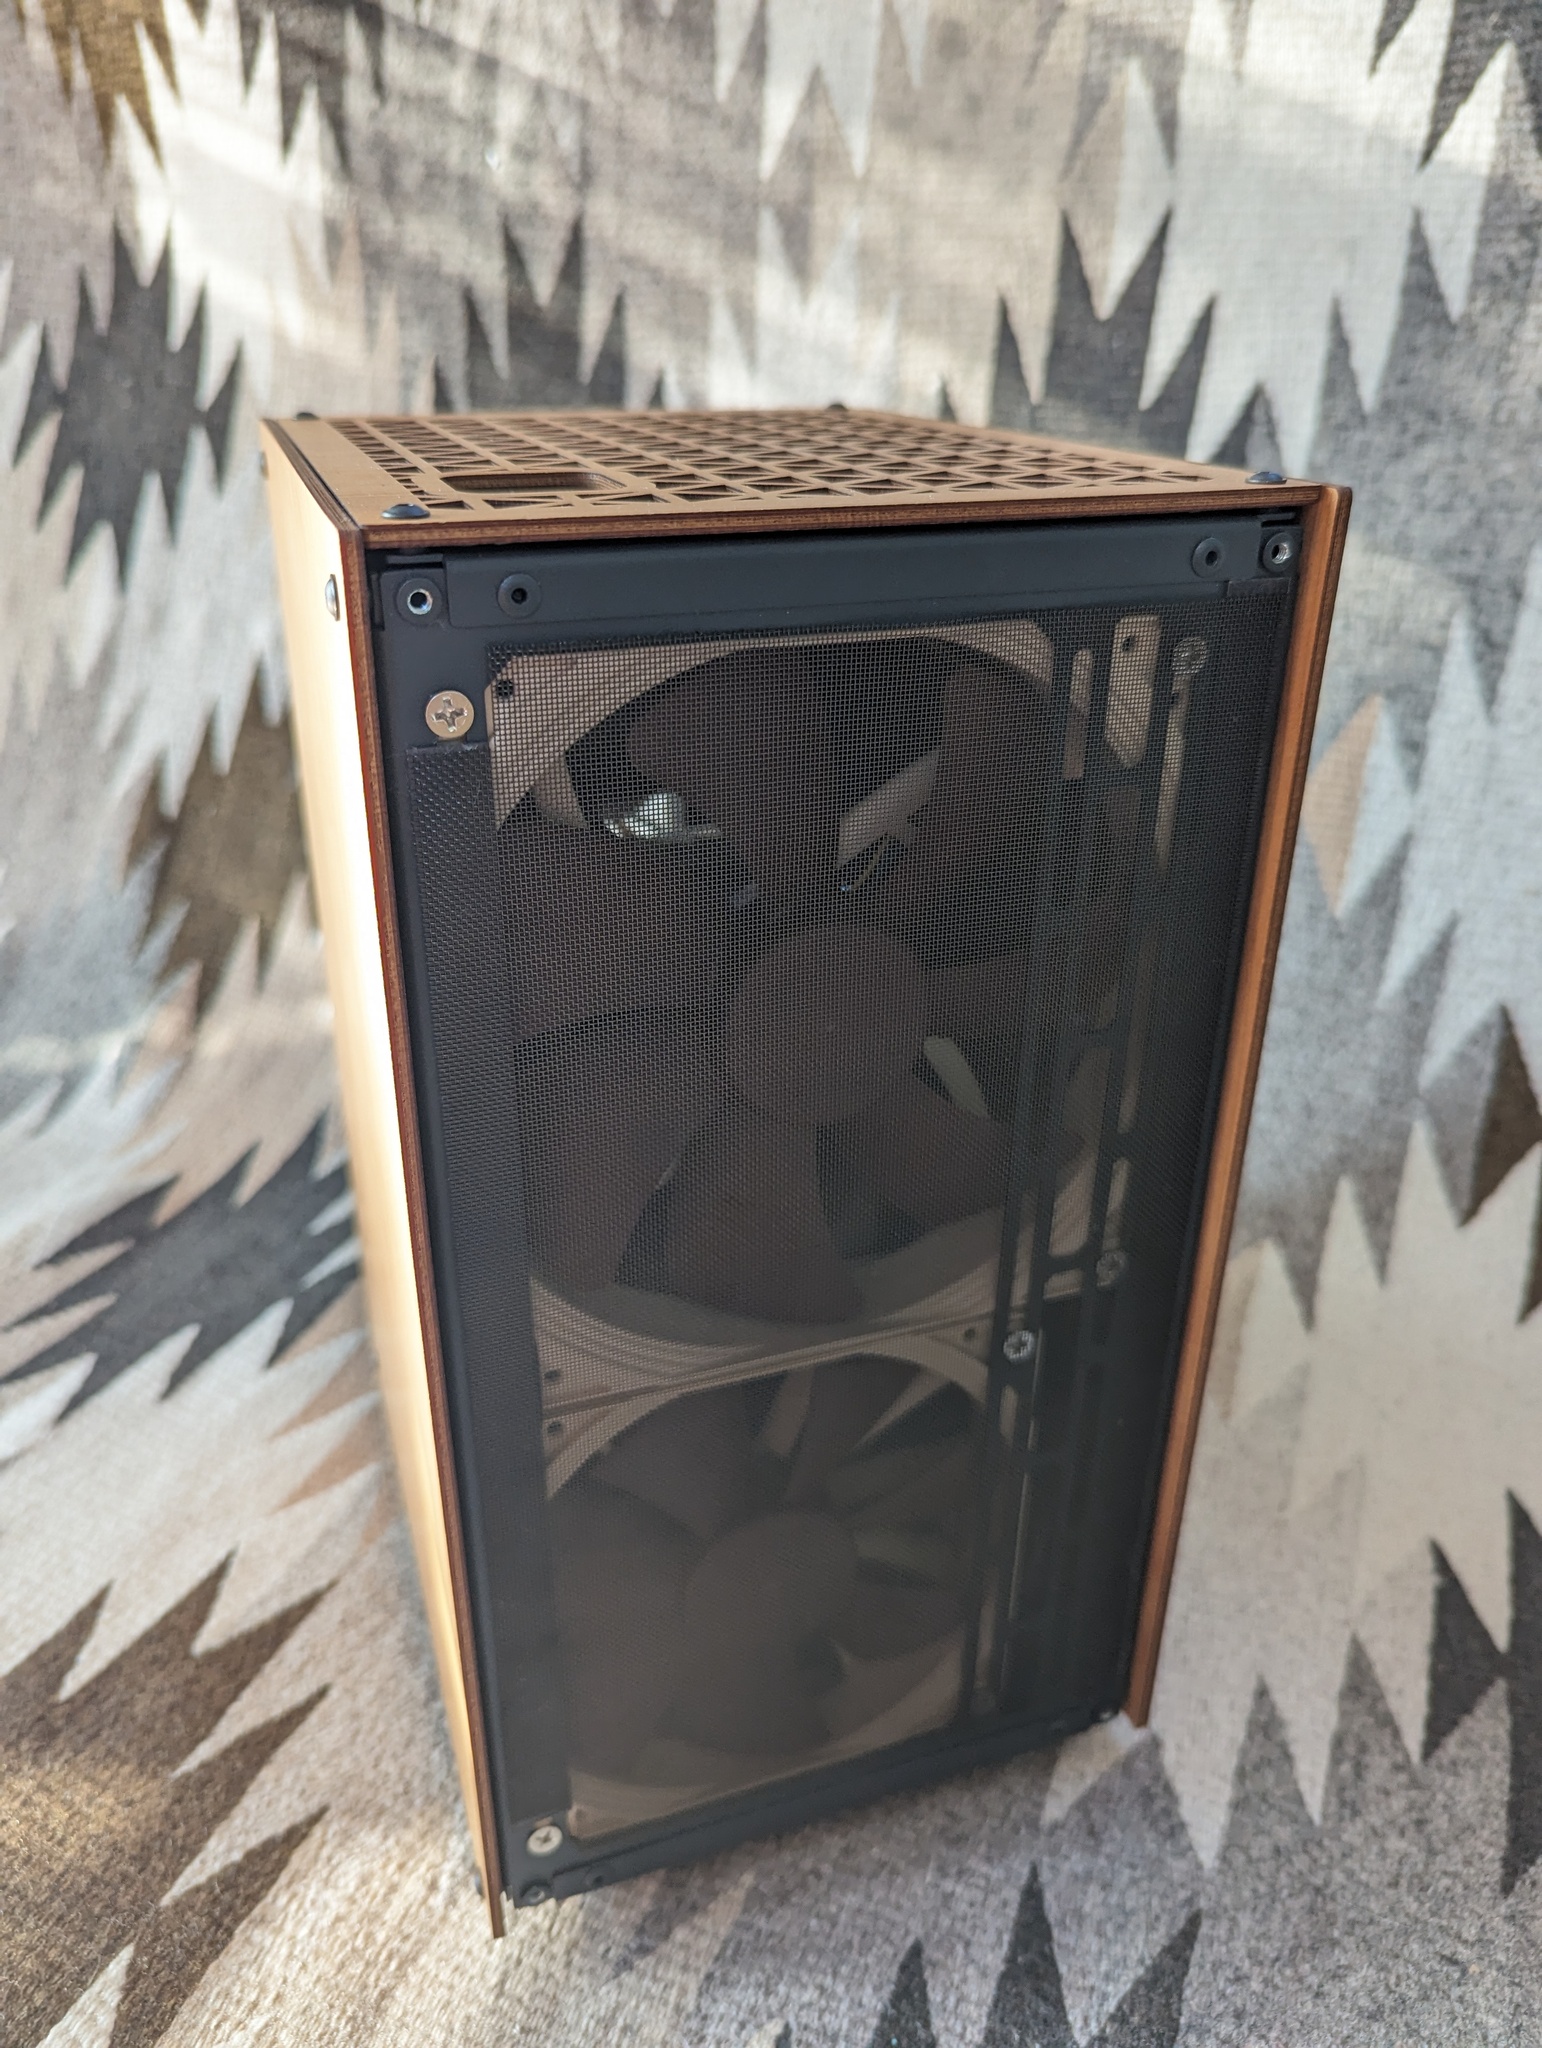
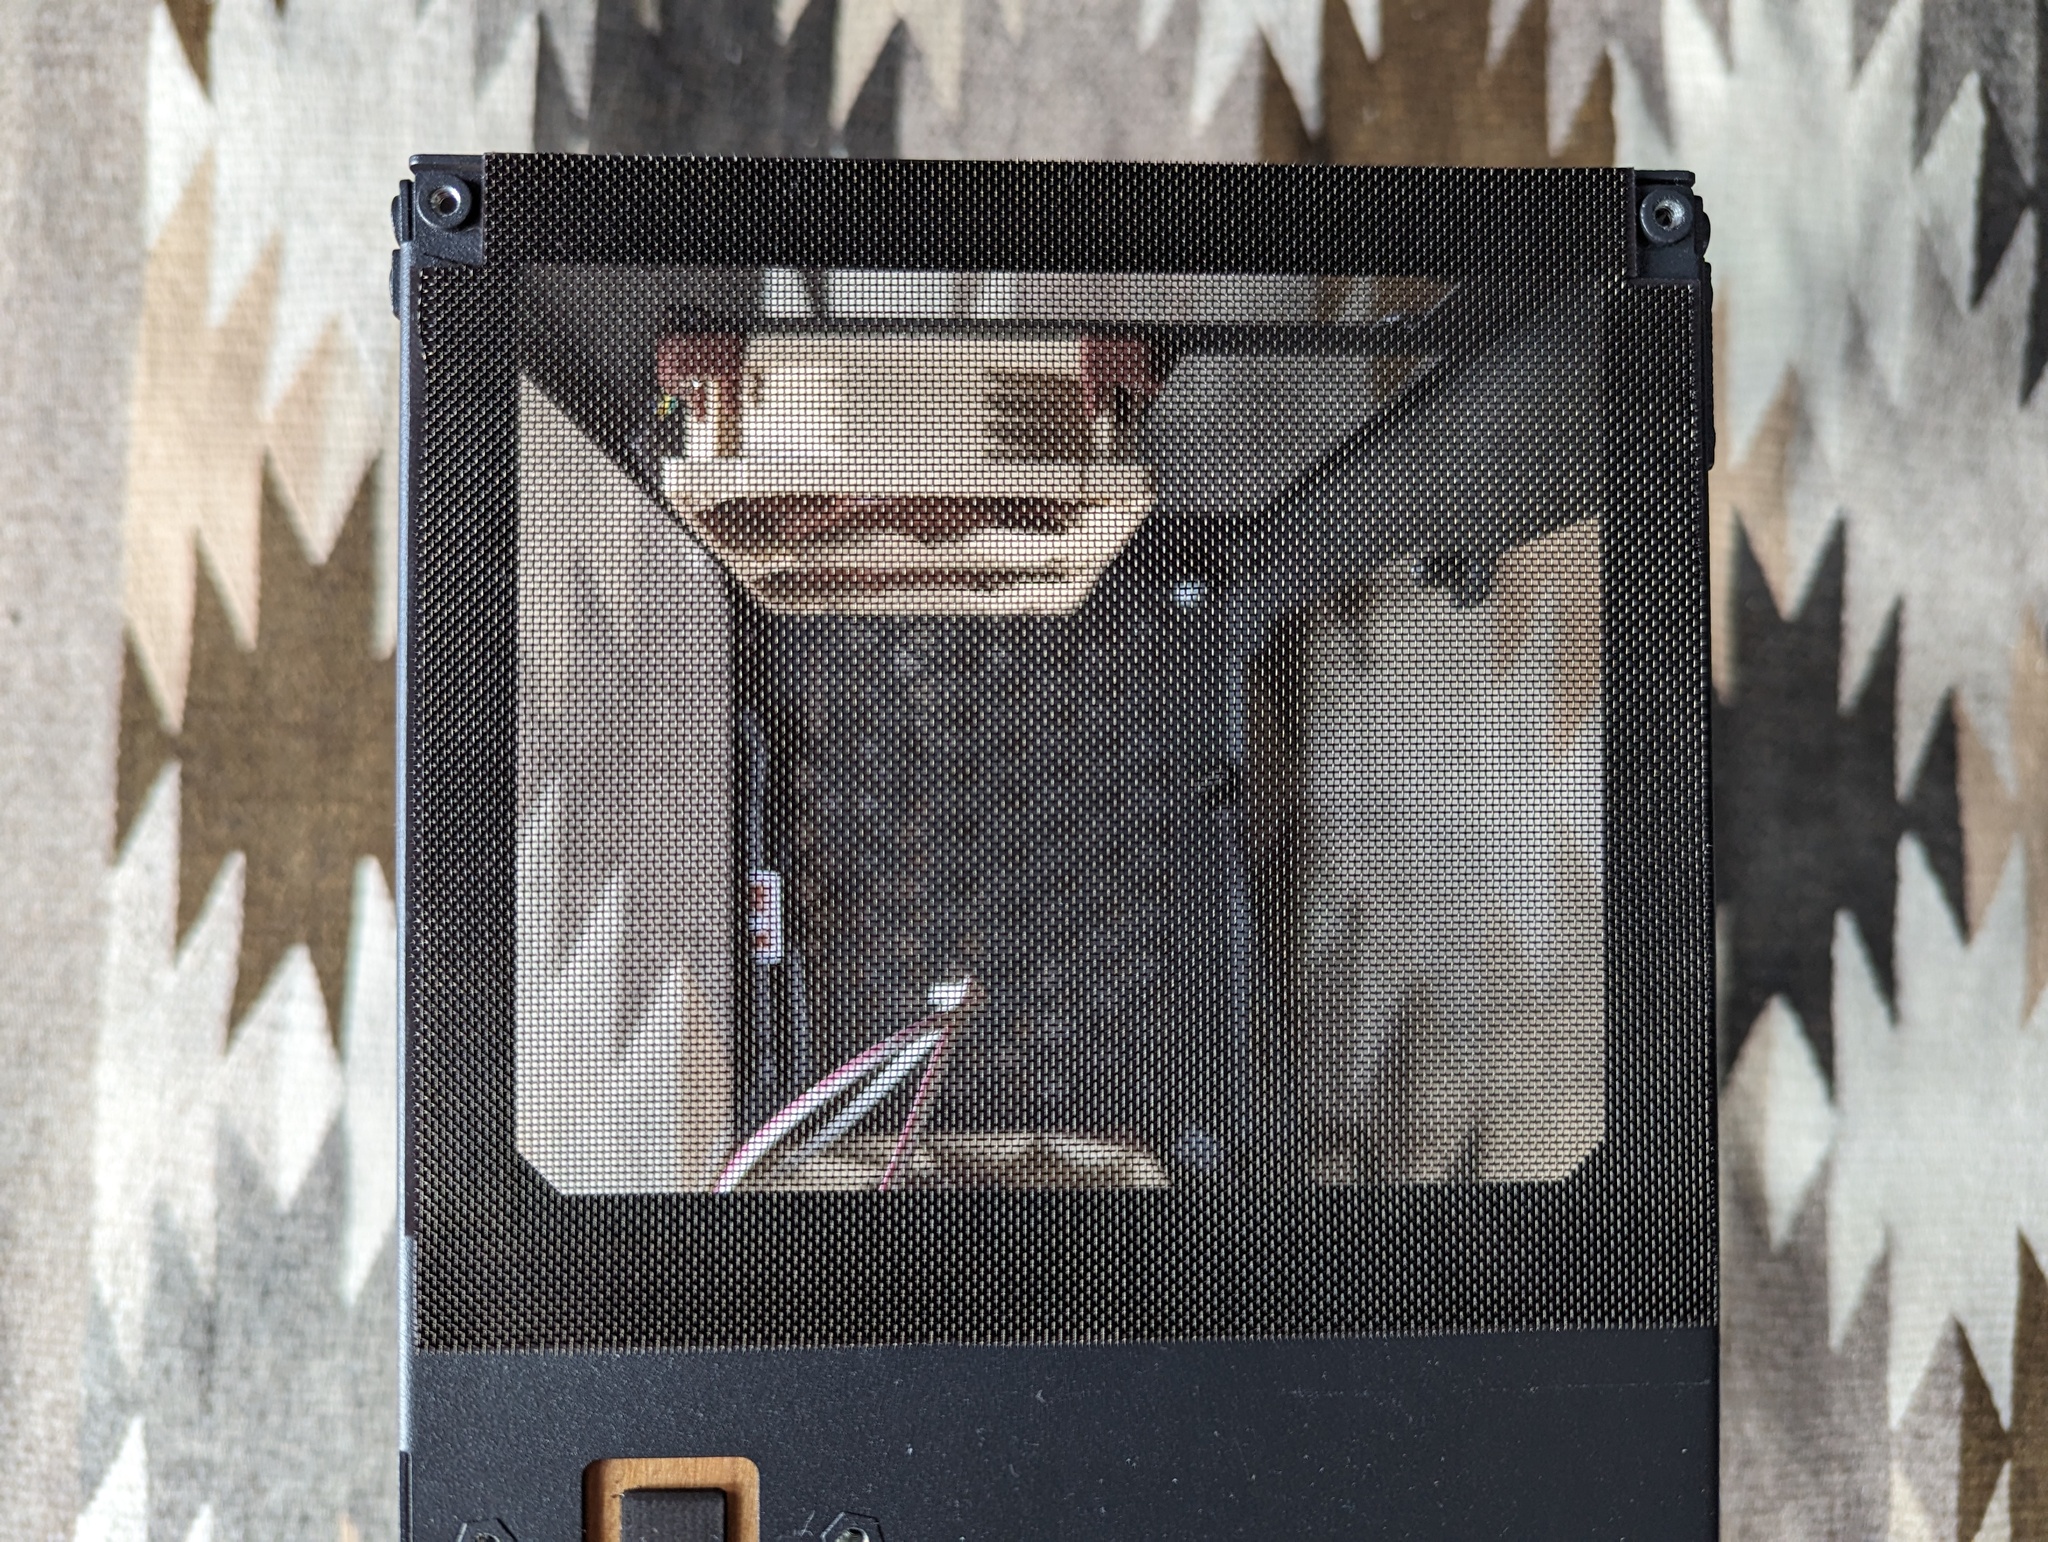
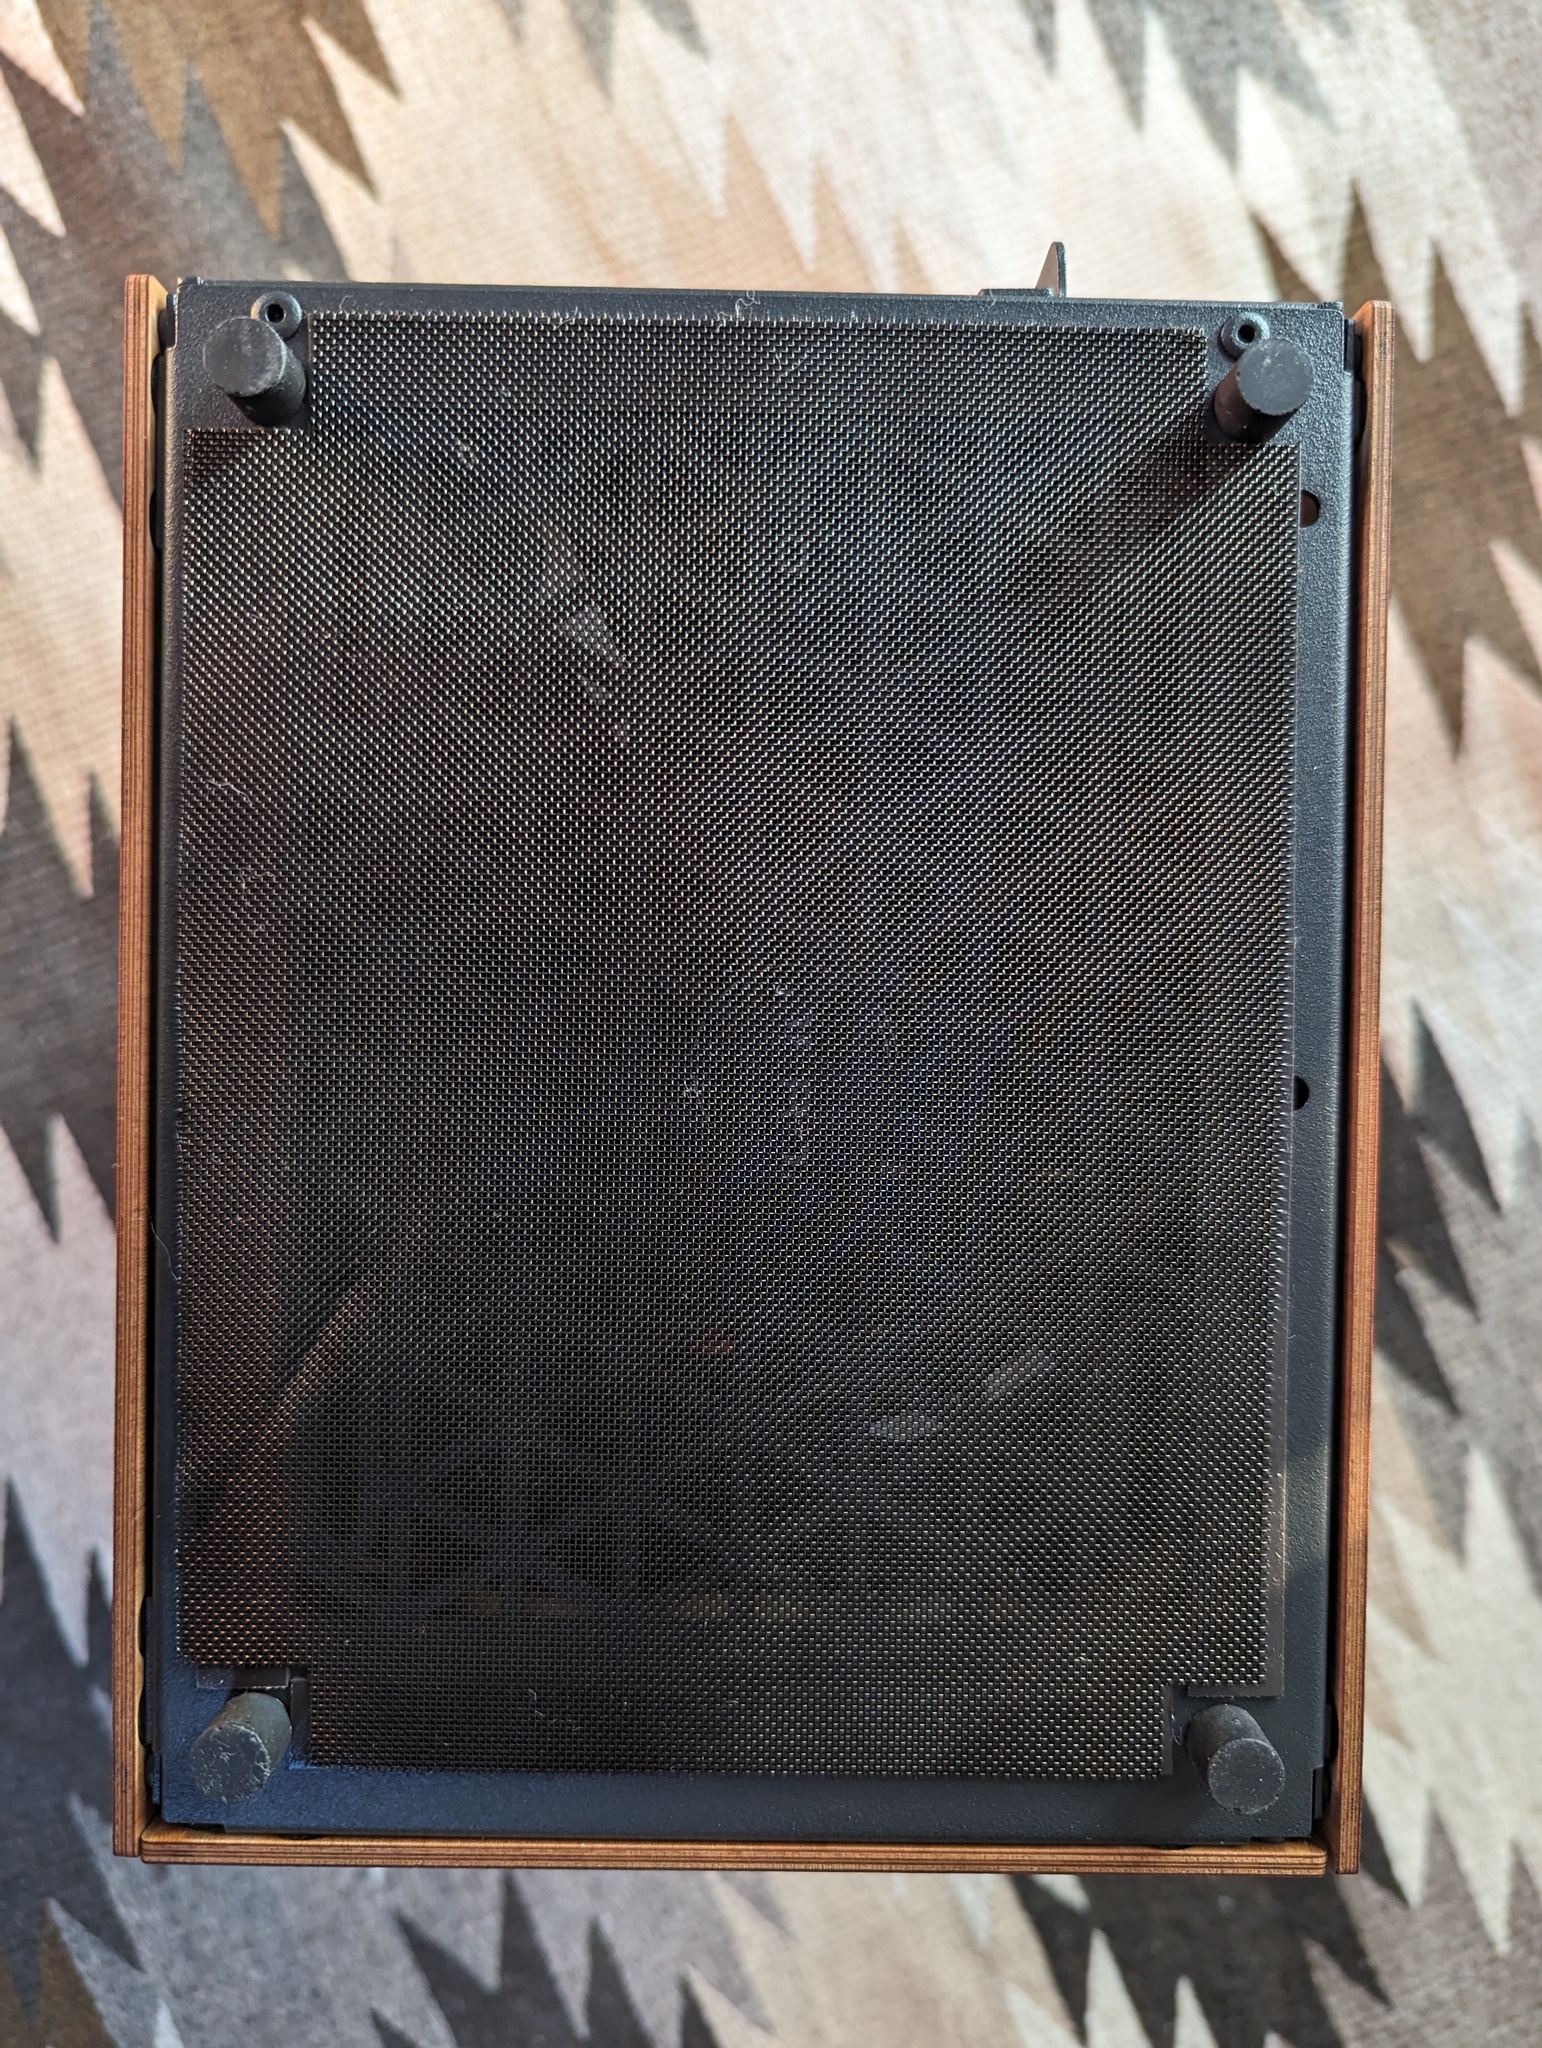
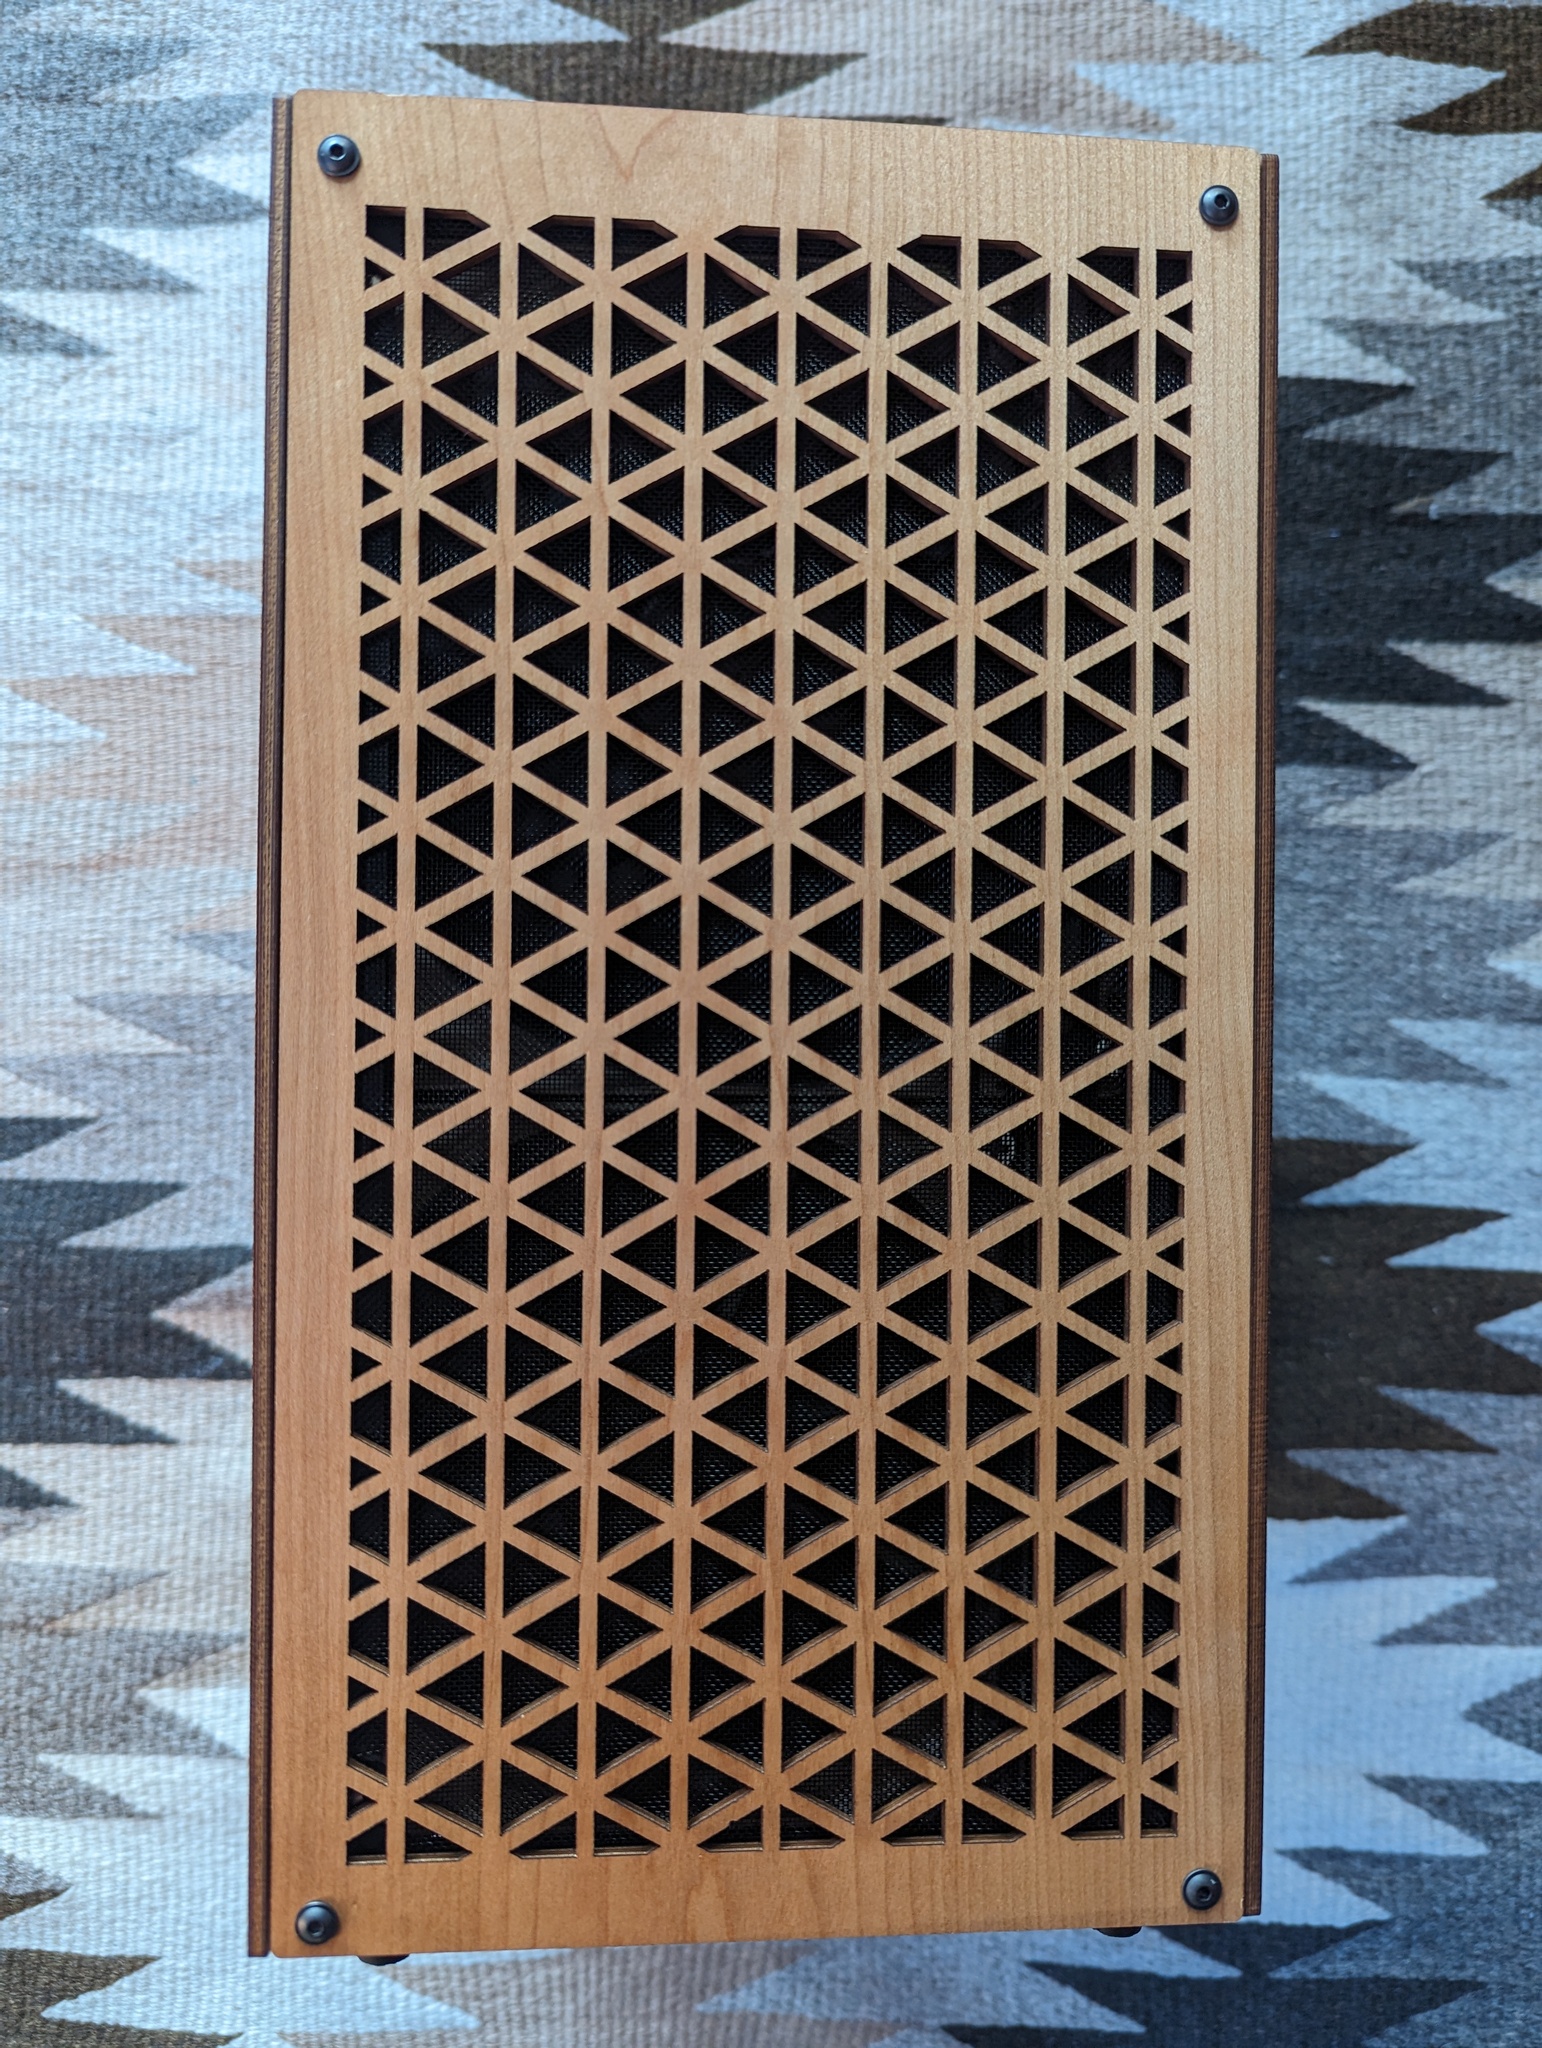
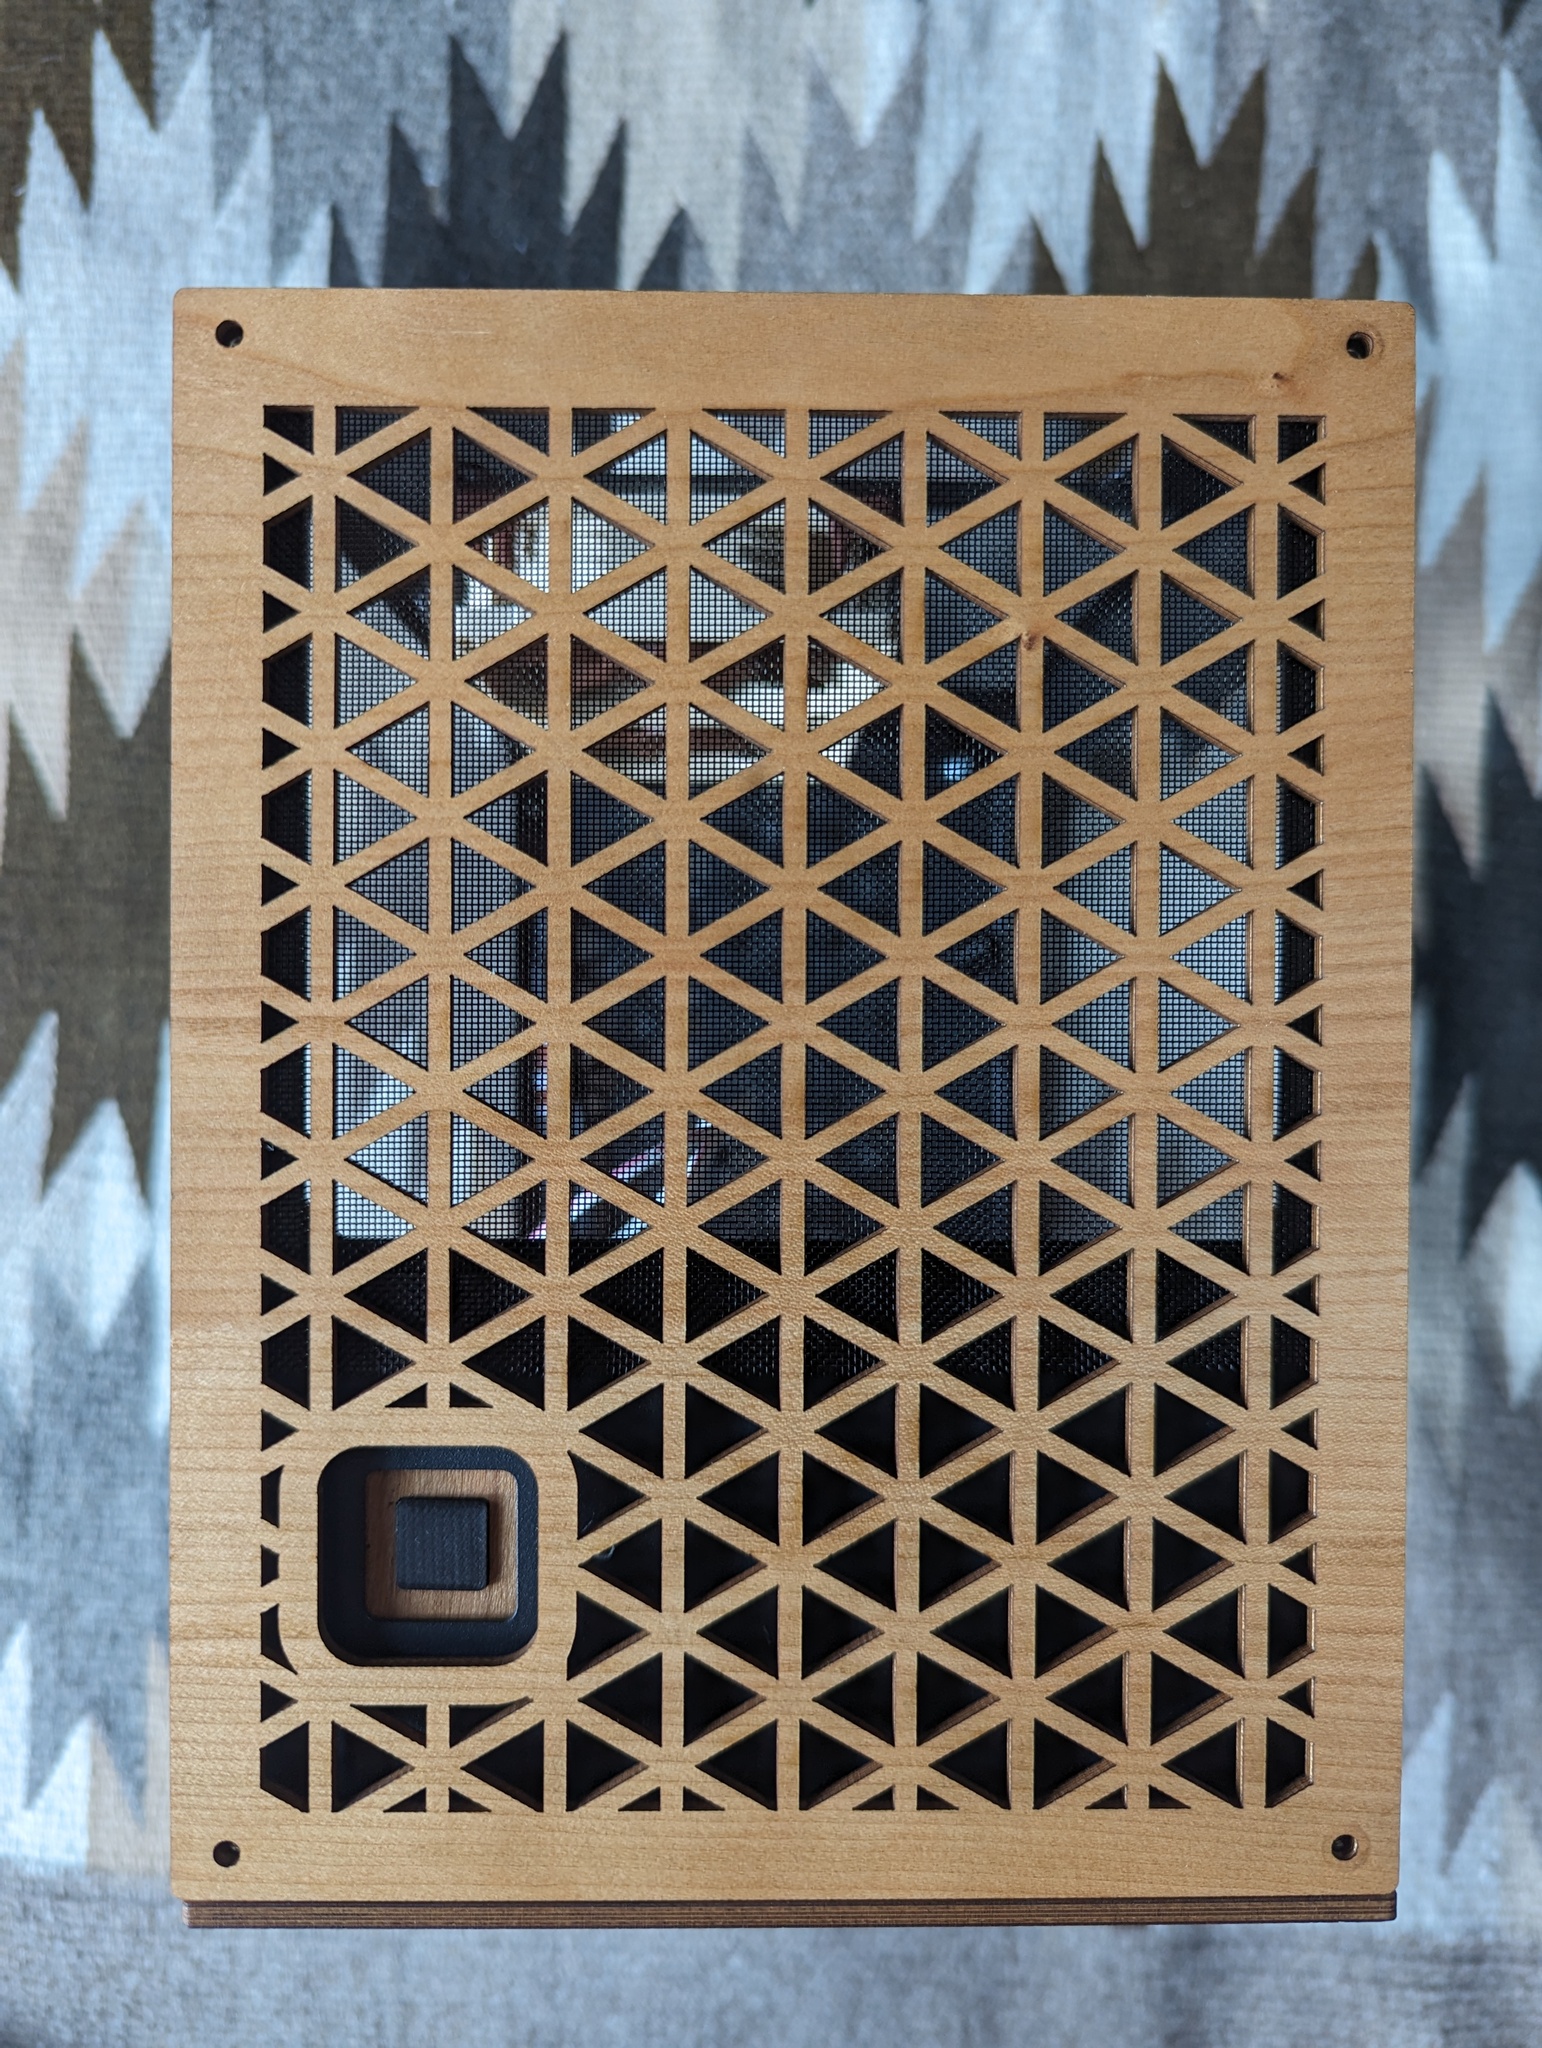
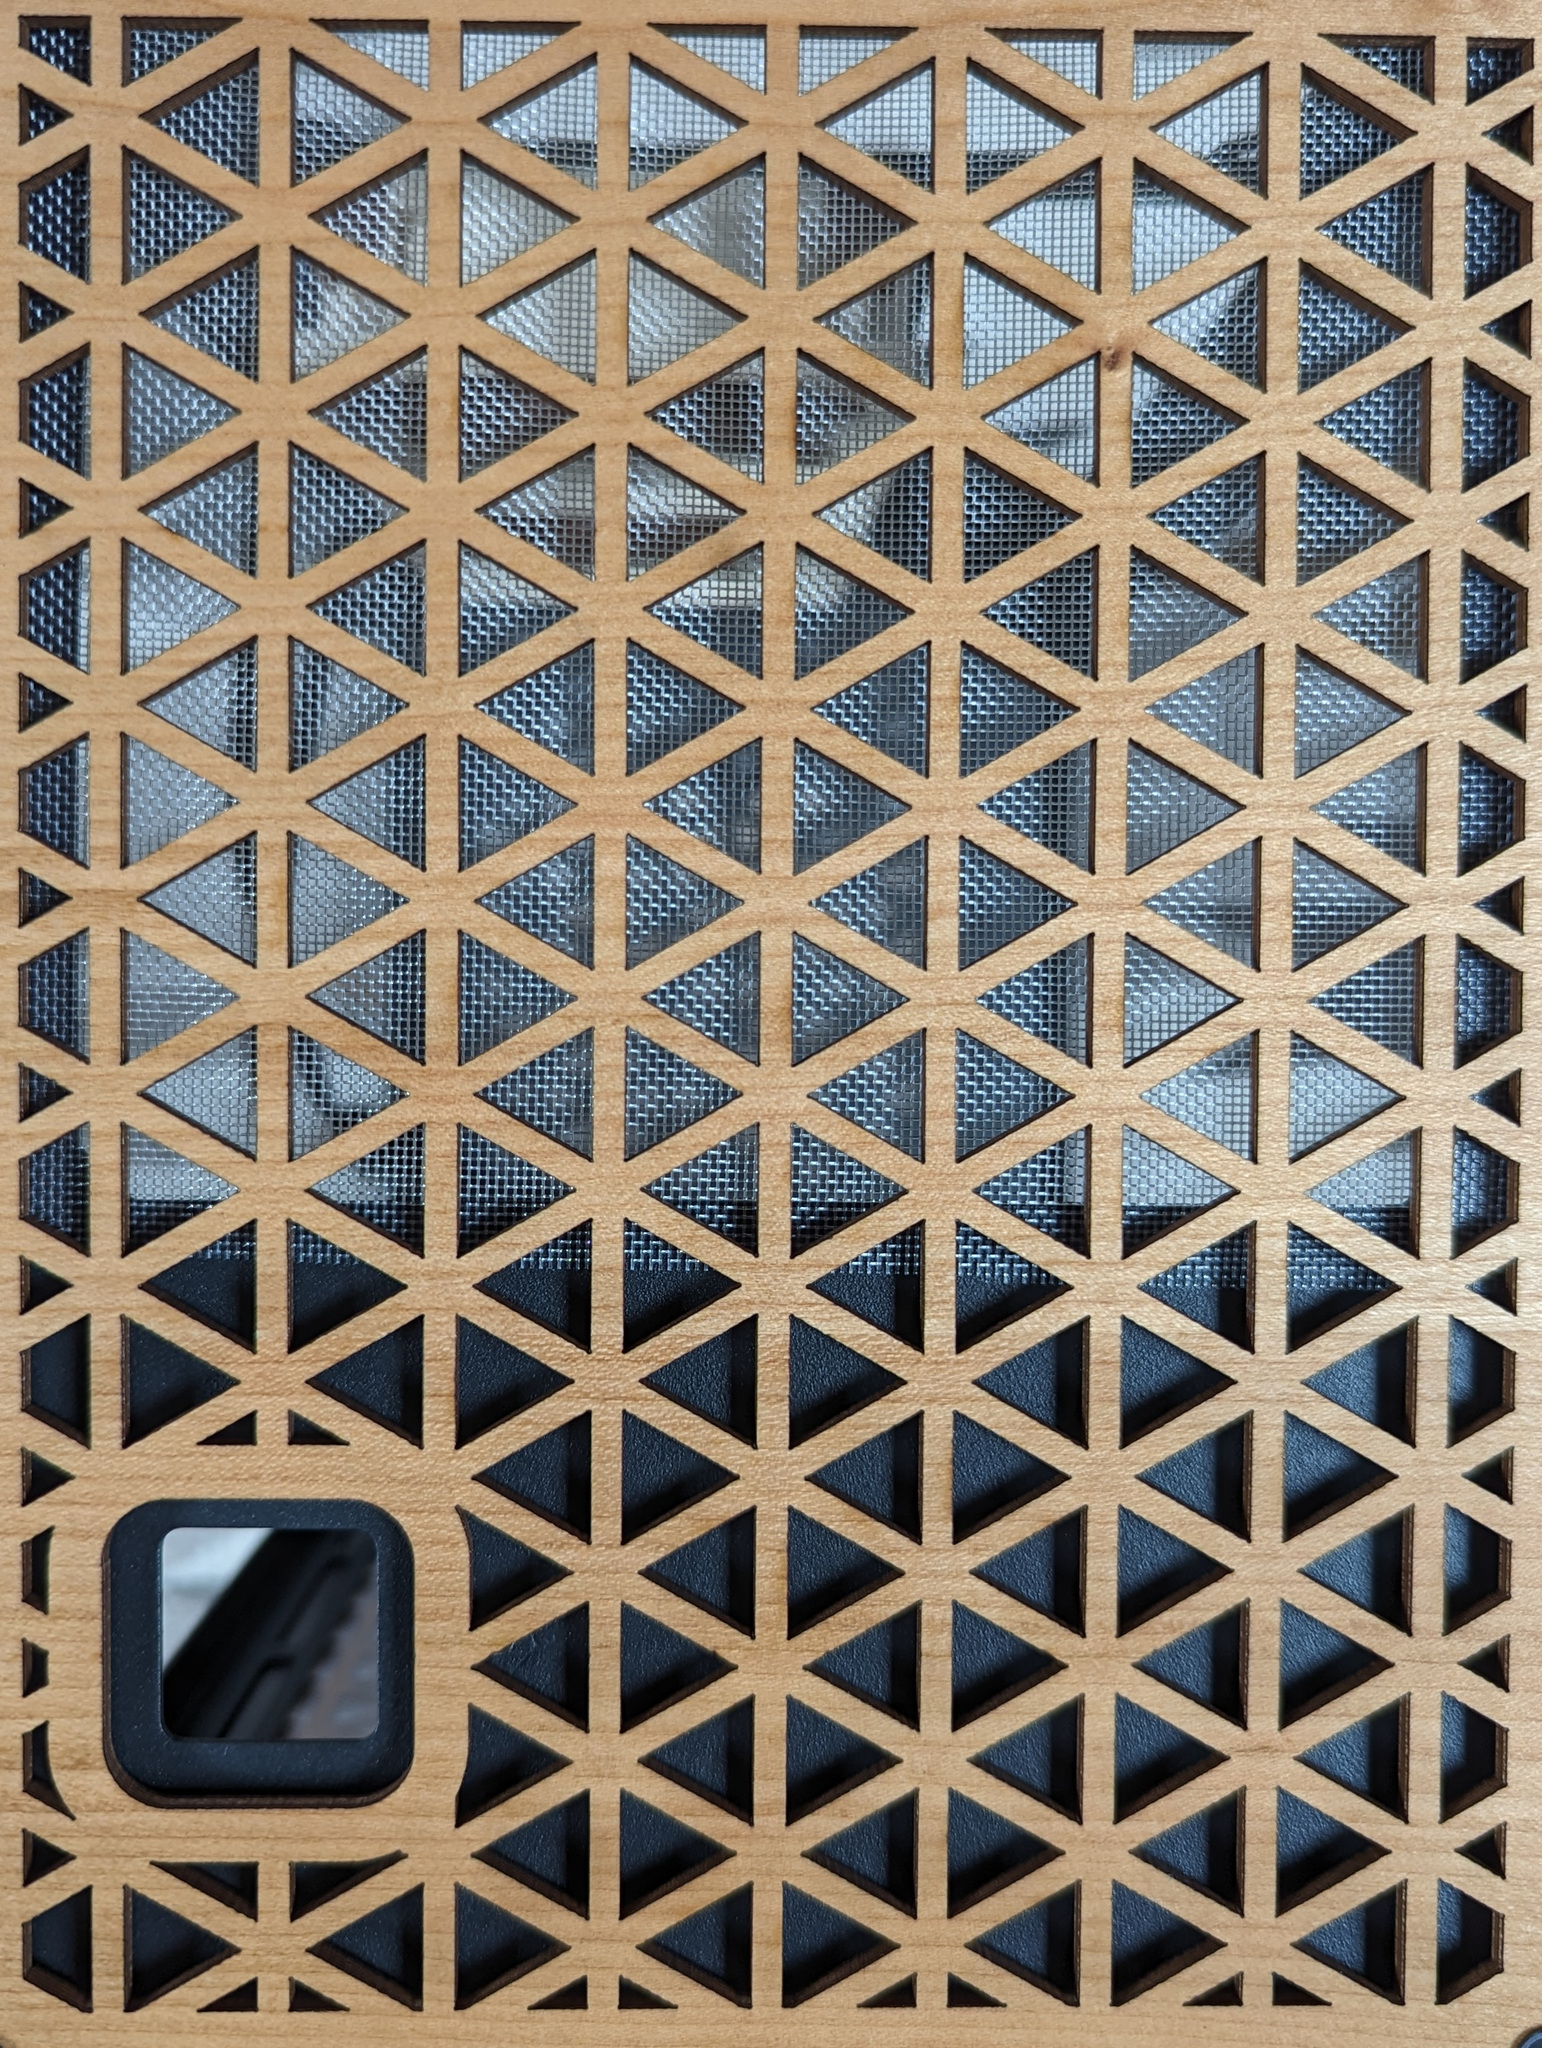
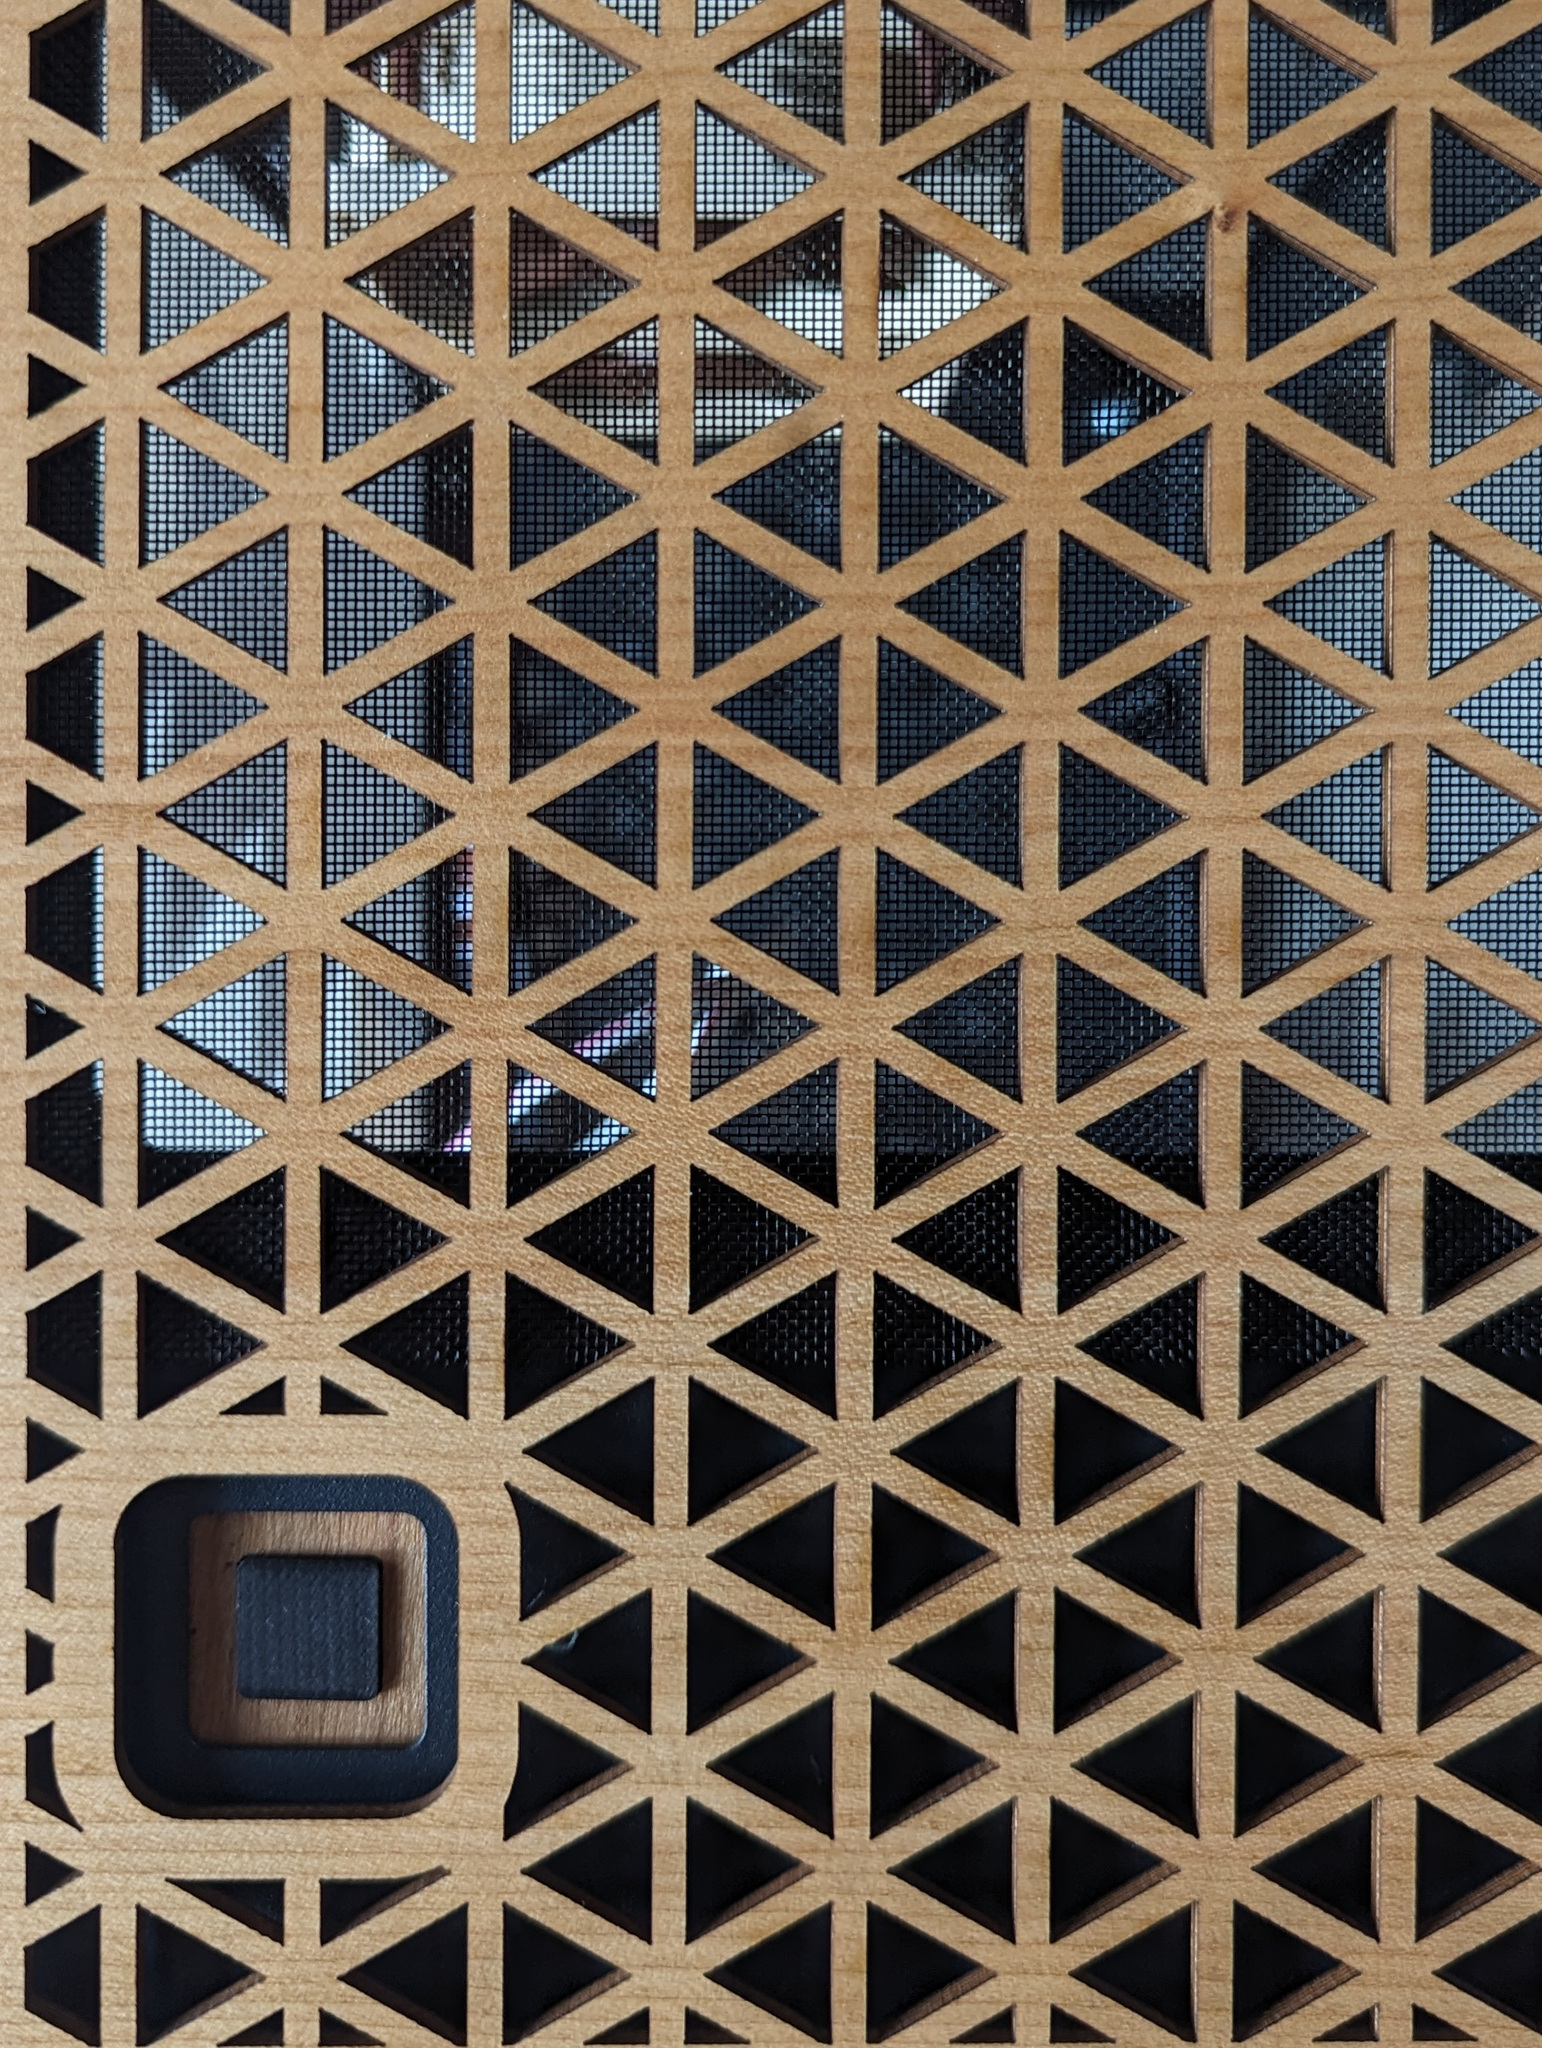
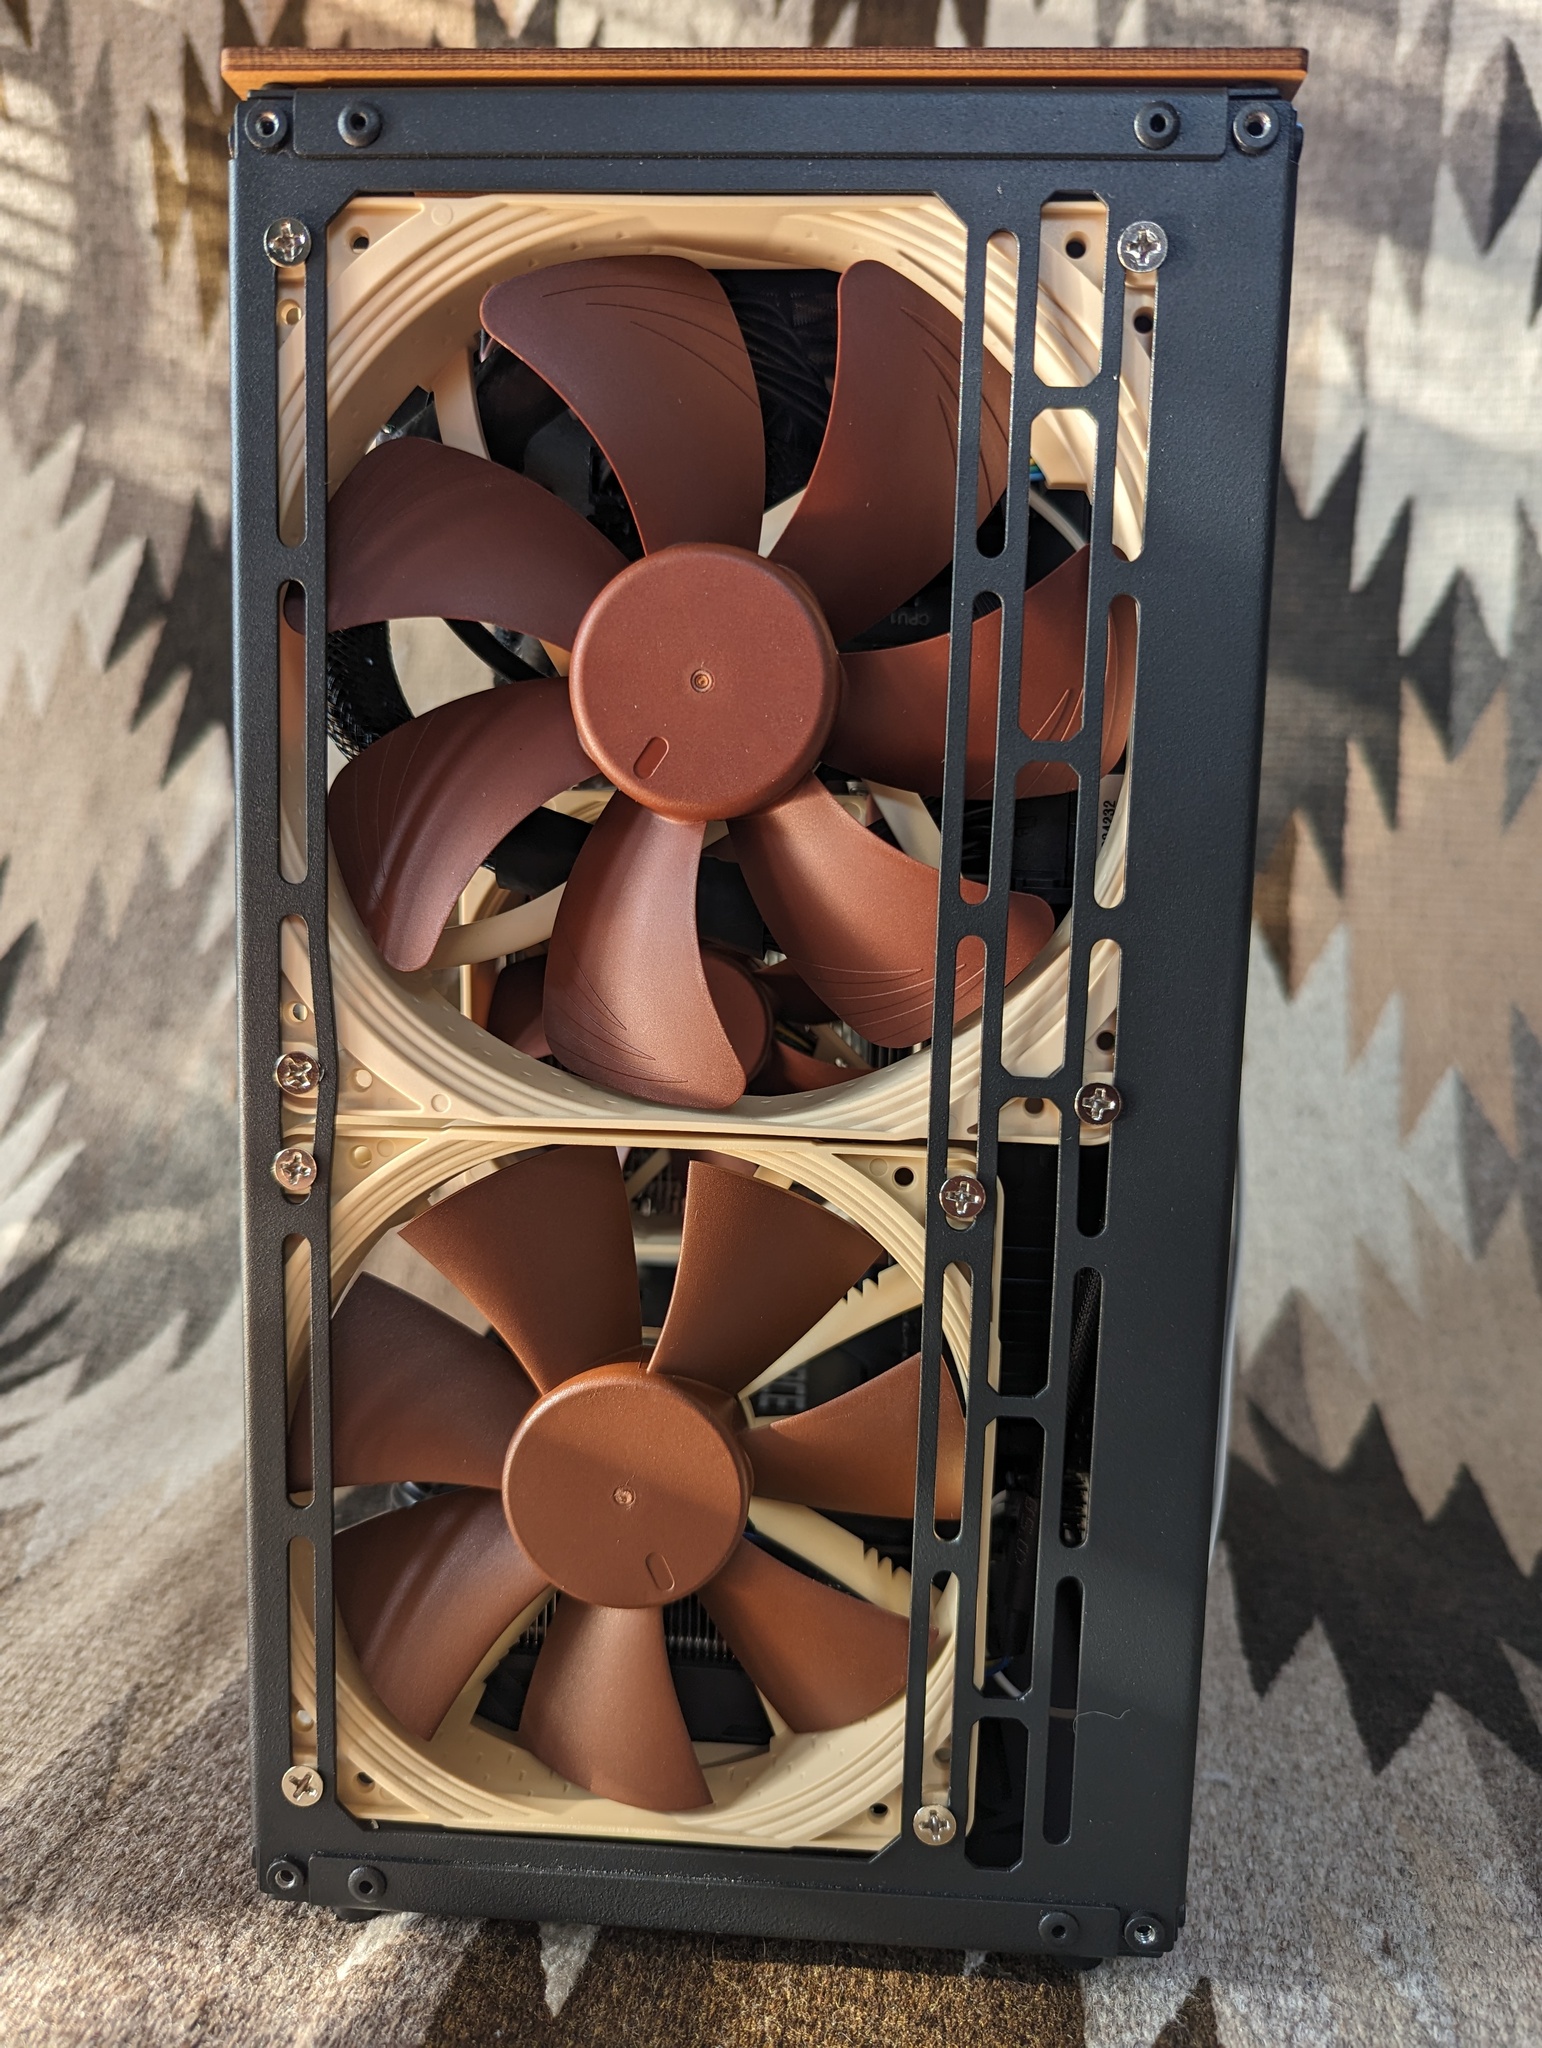
I’m quite pleased by how the filters turned out, especially with the black dye. In addition to blocking dust, the dark filters also help to hide the fans behind the front grille, leading to a nice clean look for the front of the case.
Build Process
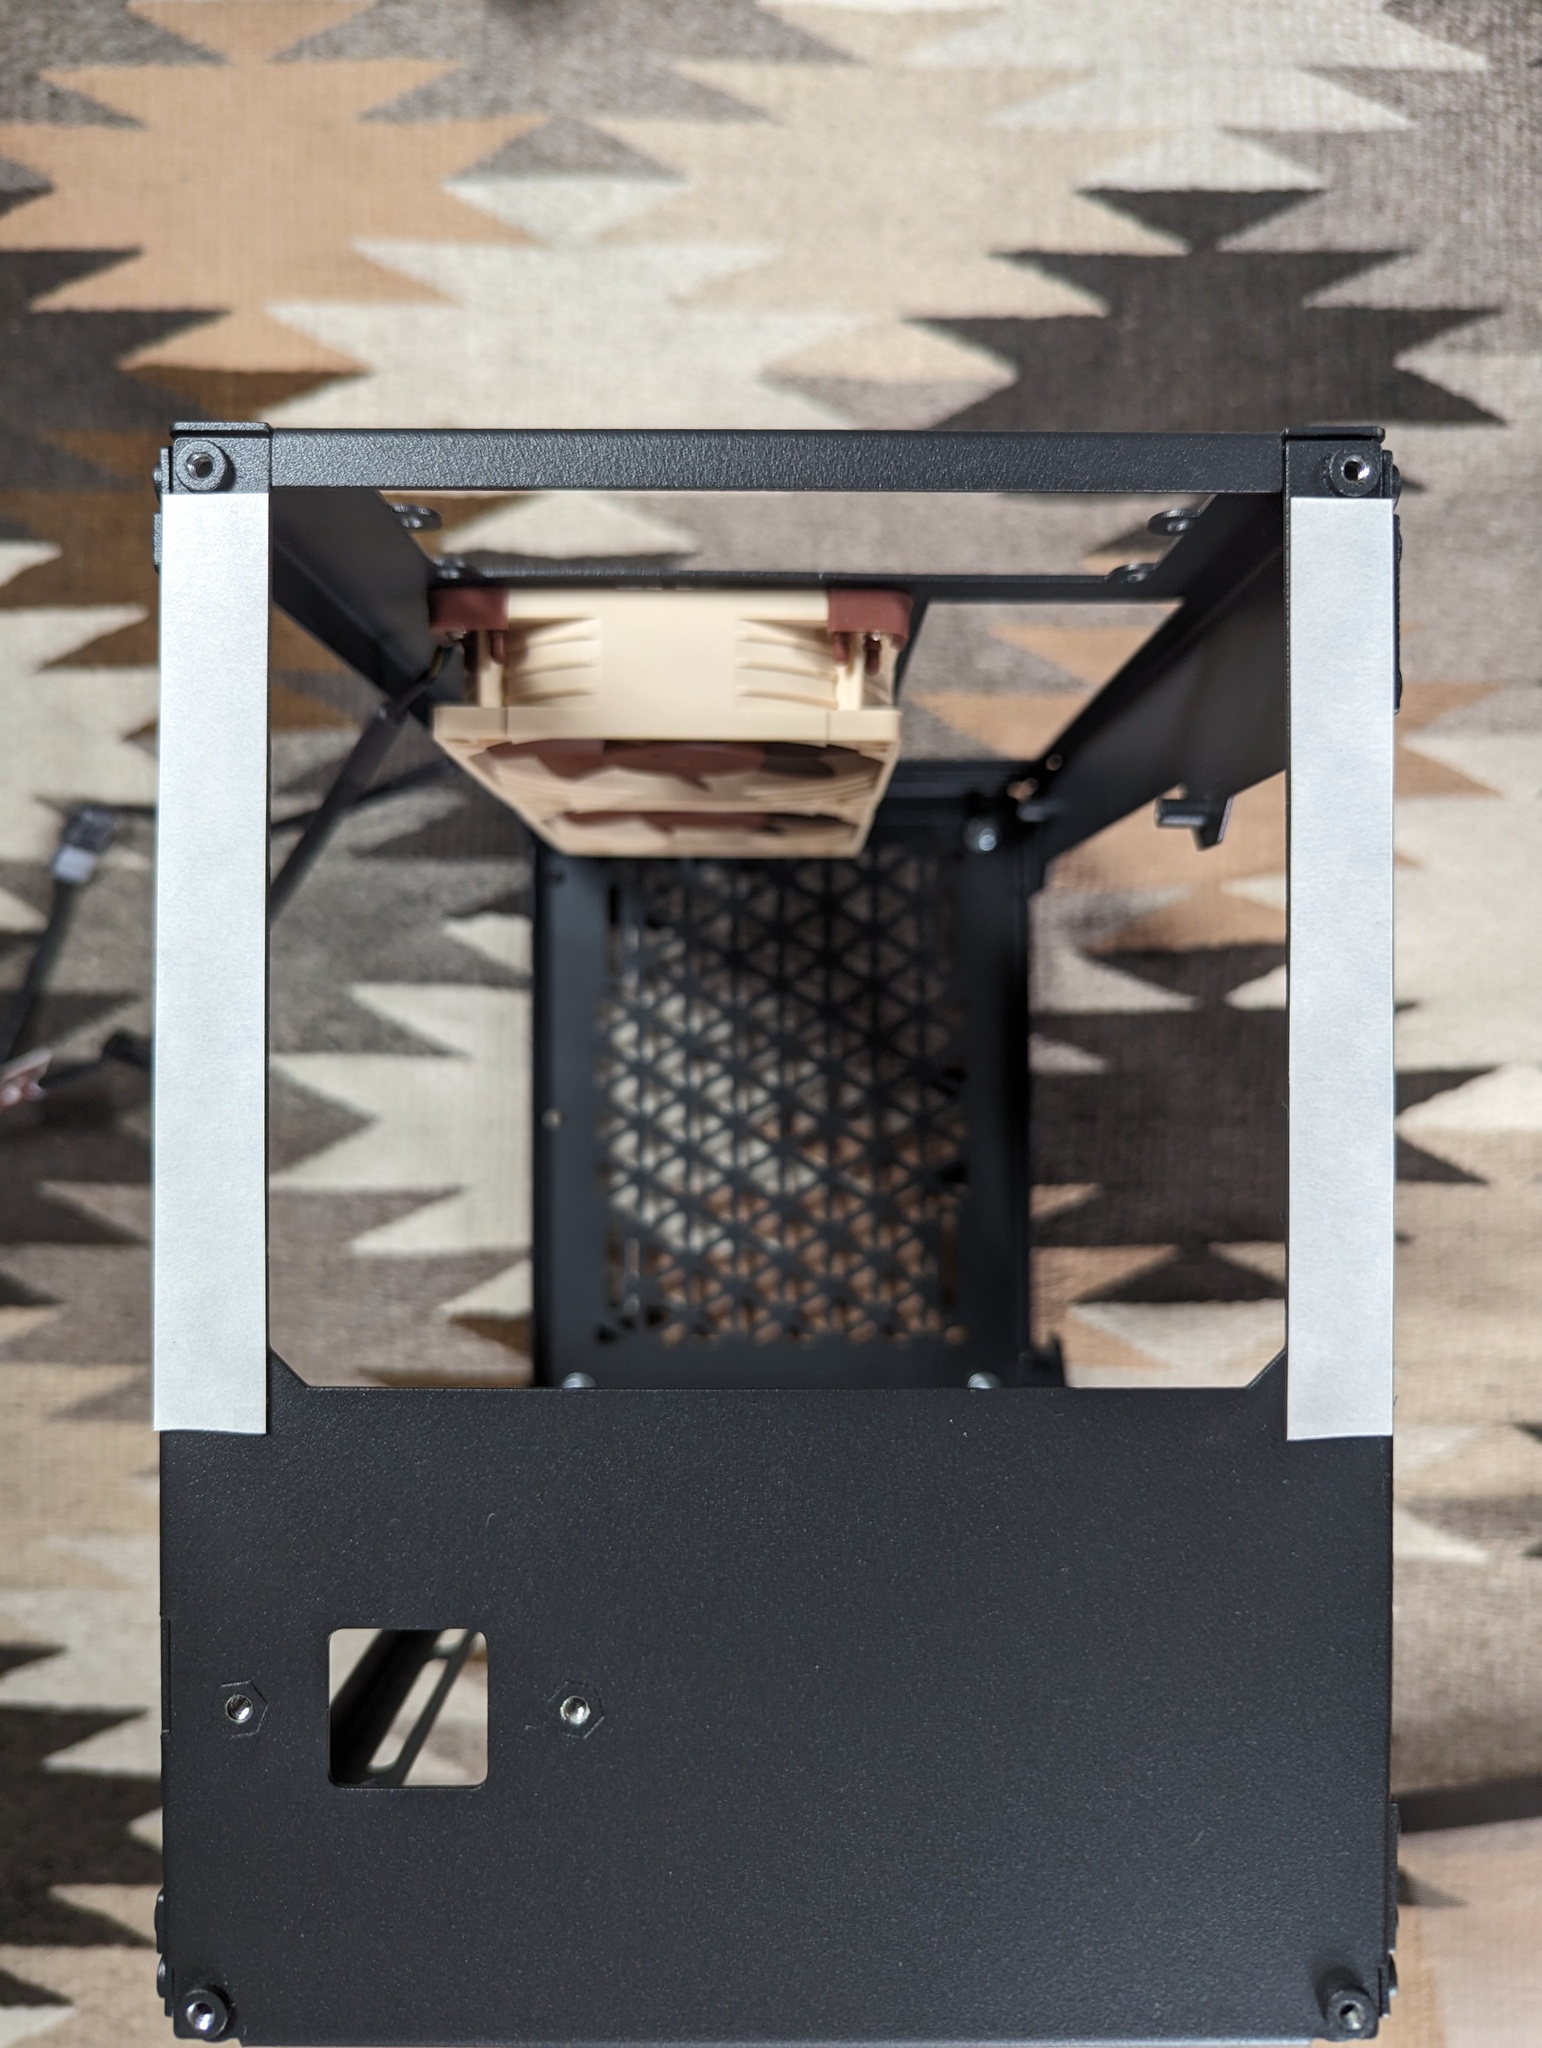
Small cases generally require a fairly specific installation order for things to fit, and this one is no exception. I found it worked best to go in this order:
- Assemble the CPU, cooler, memory and SSD to the motherboard.
- Fit the motherboard into the case. I used M3x12 button head screws with nylon washers.
- Attach the auxiliary CPU power cable to the motherboard while it is still accessible.
- Install the GPU to the motherboard.
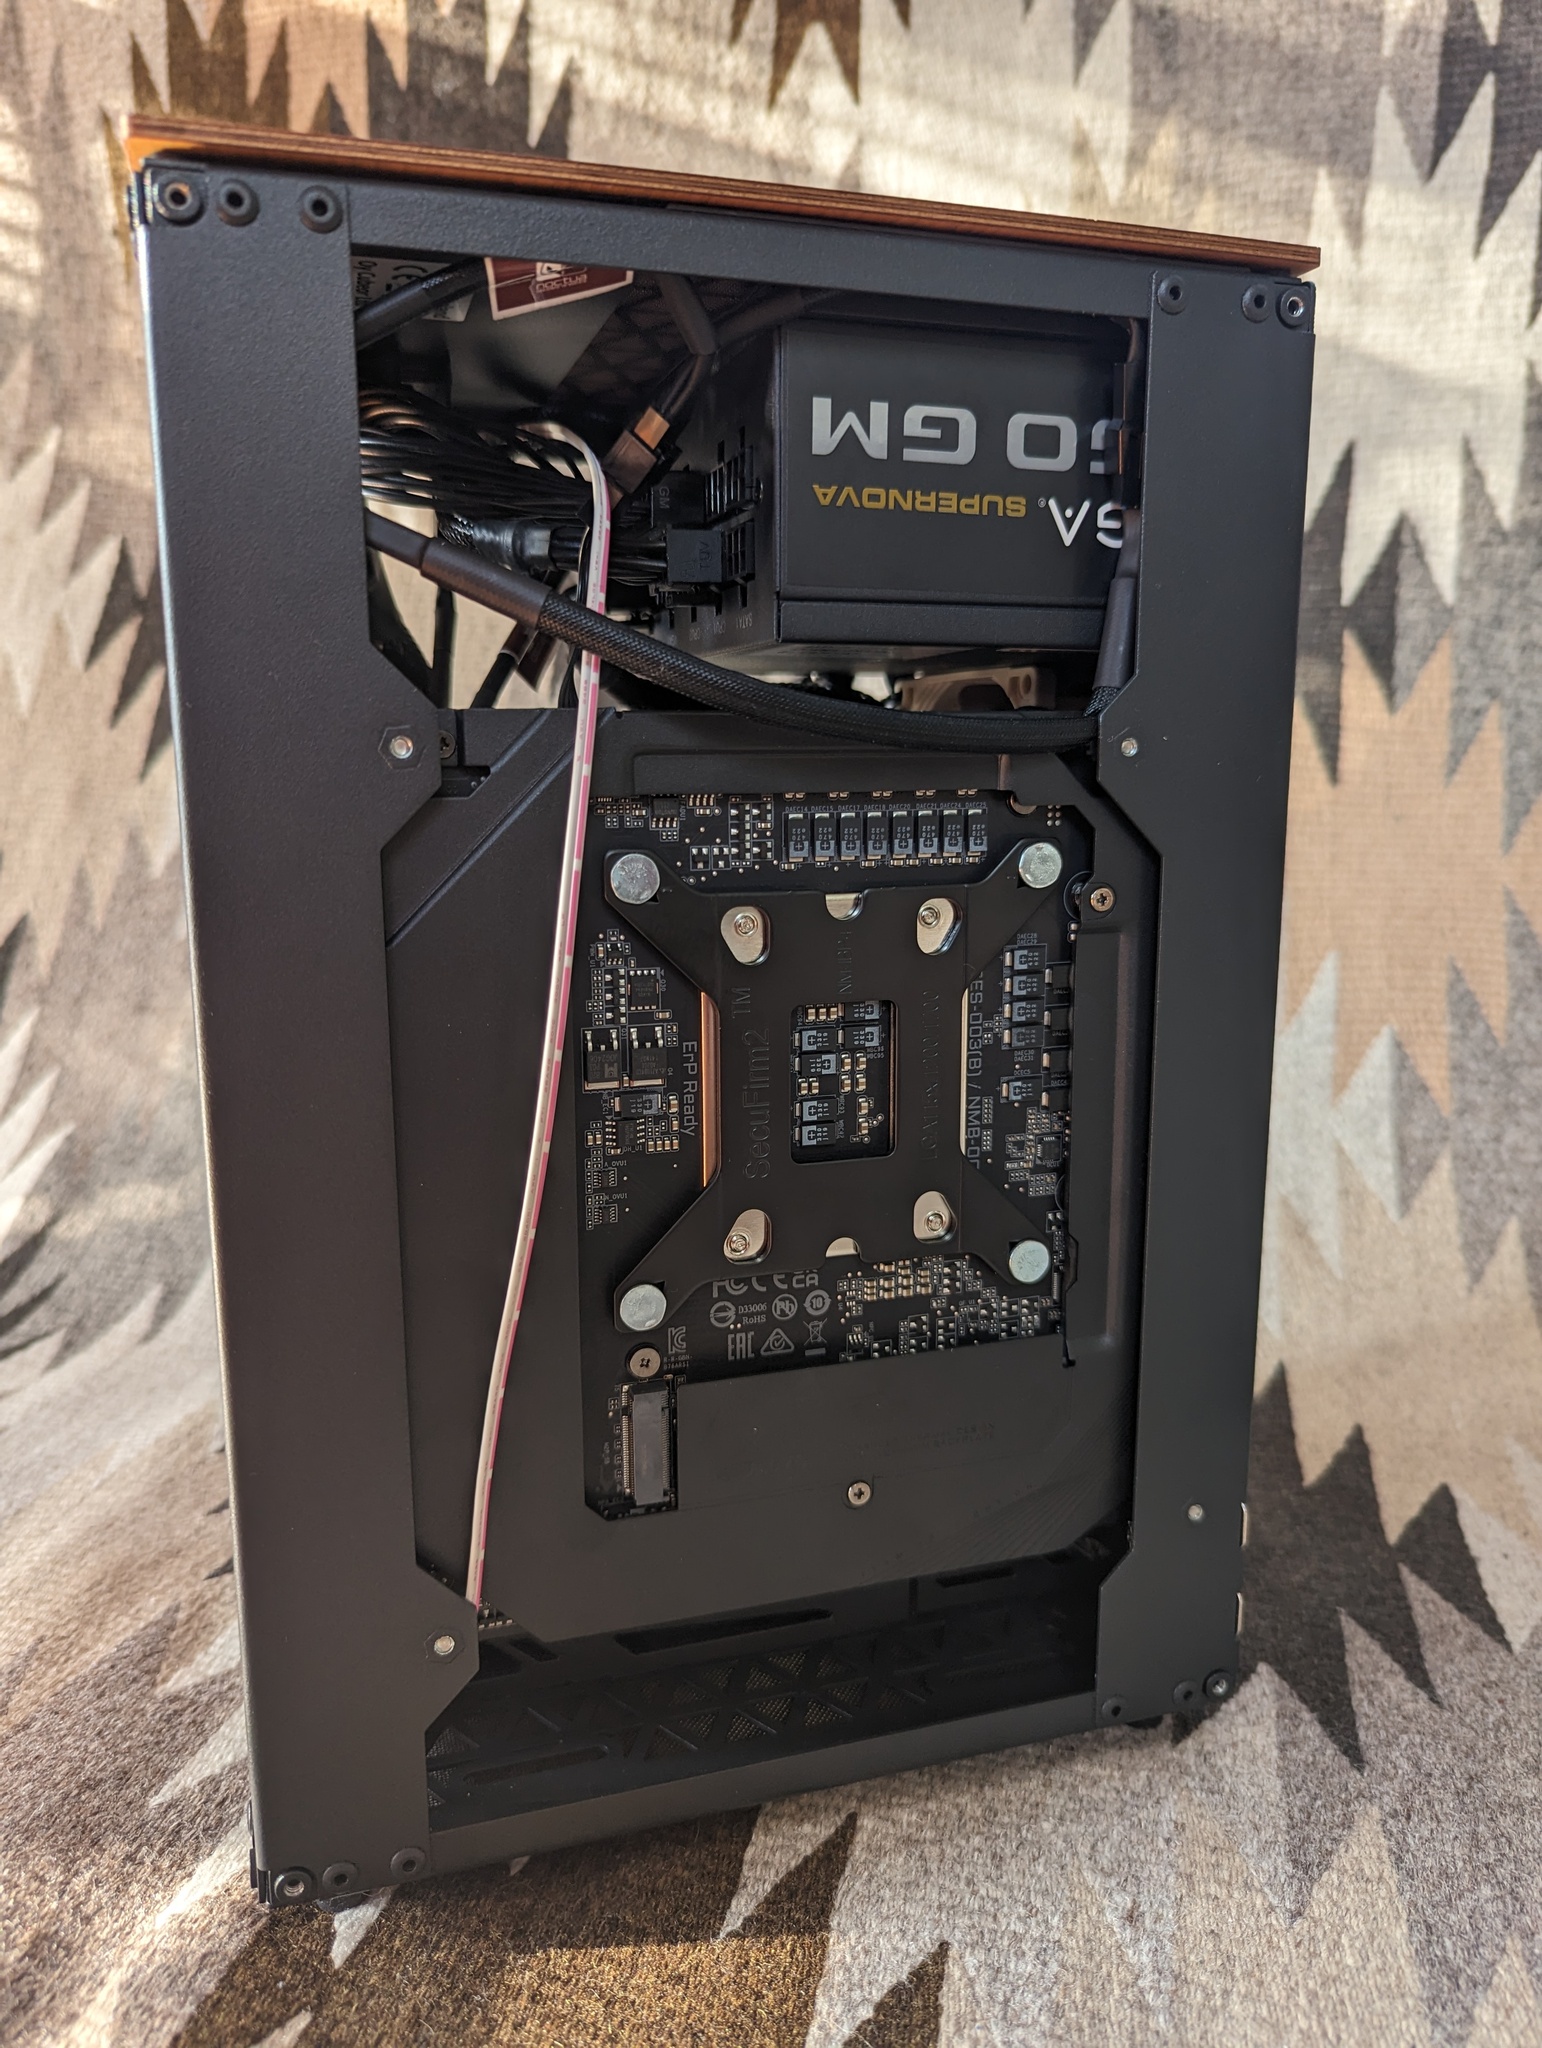
- Connect the power button to the motherboard. I chose to route it along the back side of the motherboard.
- Install the rear exhaust 80mm fans. I routed the cables on the top side, away from the motherboard. Both cables were connected to a splitter and then to the motherboard.
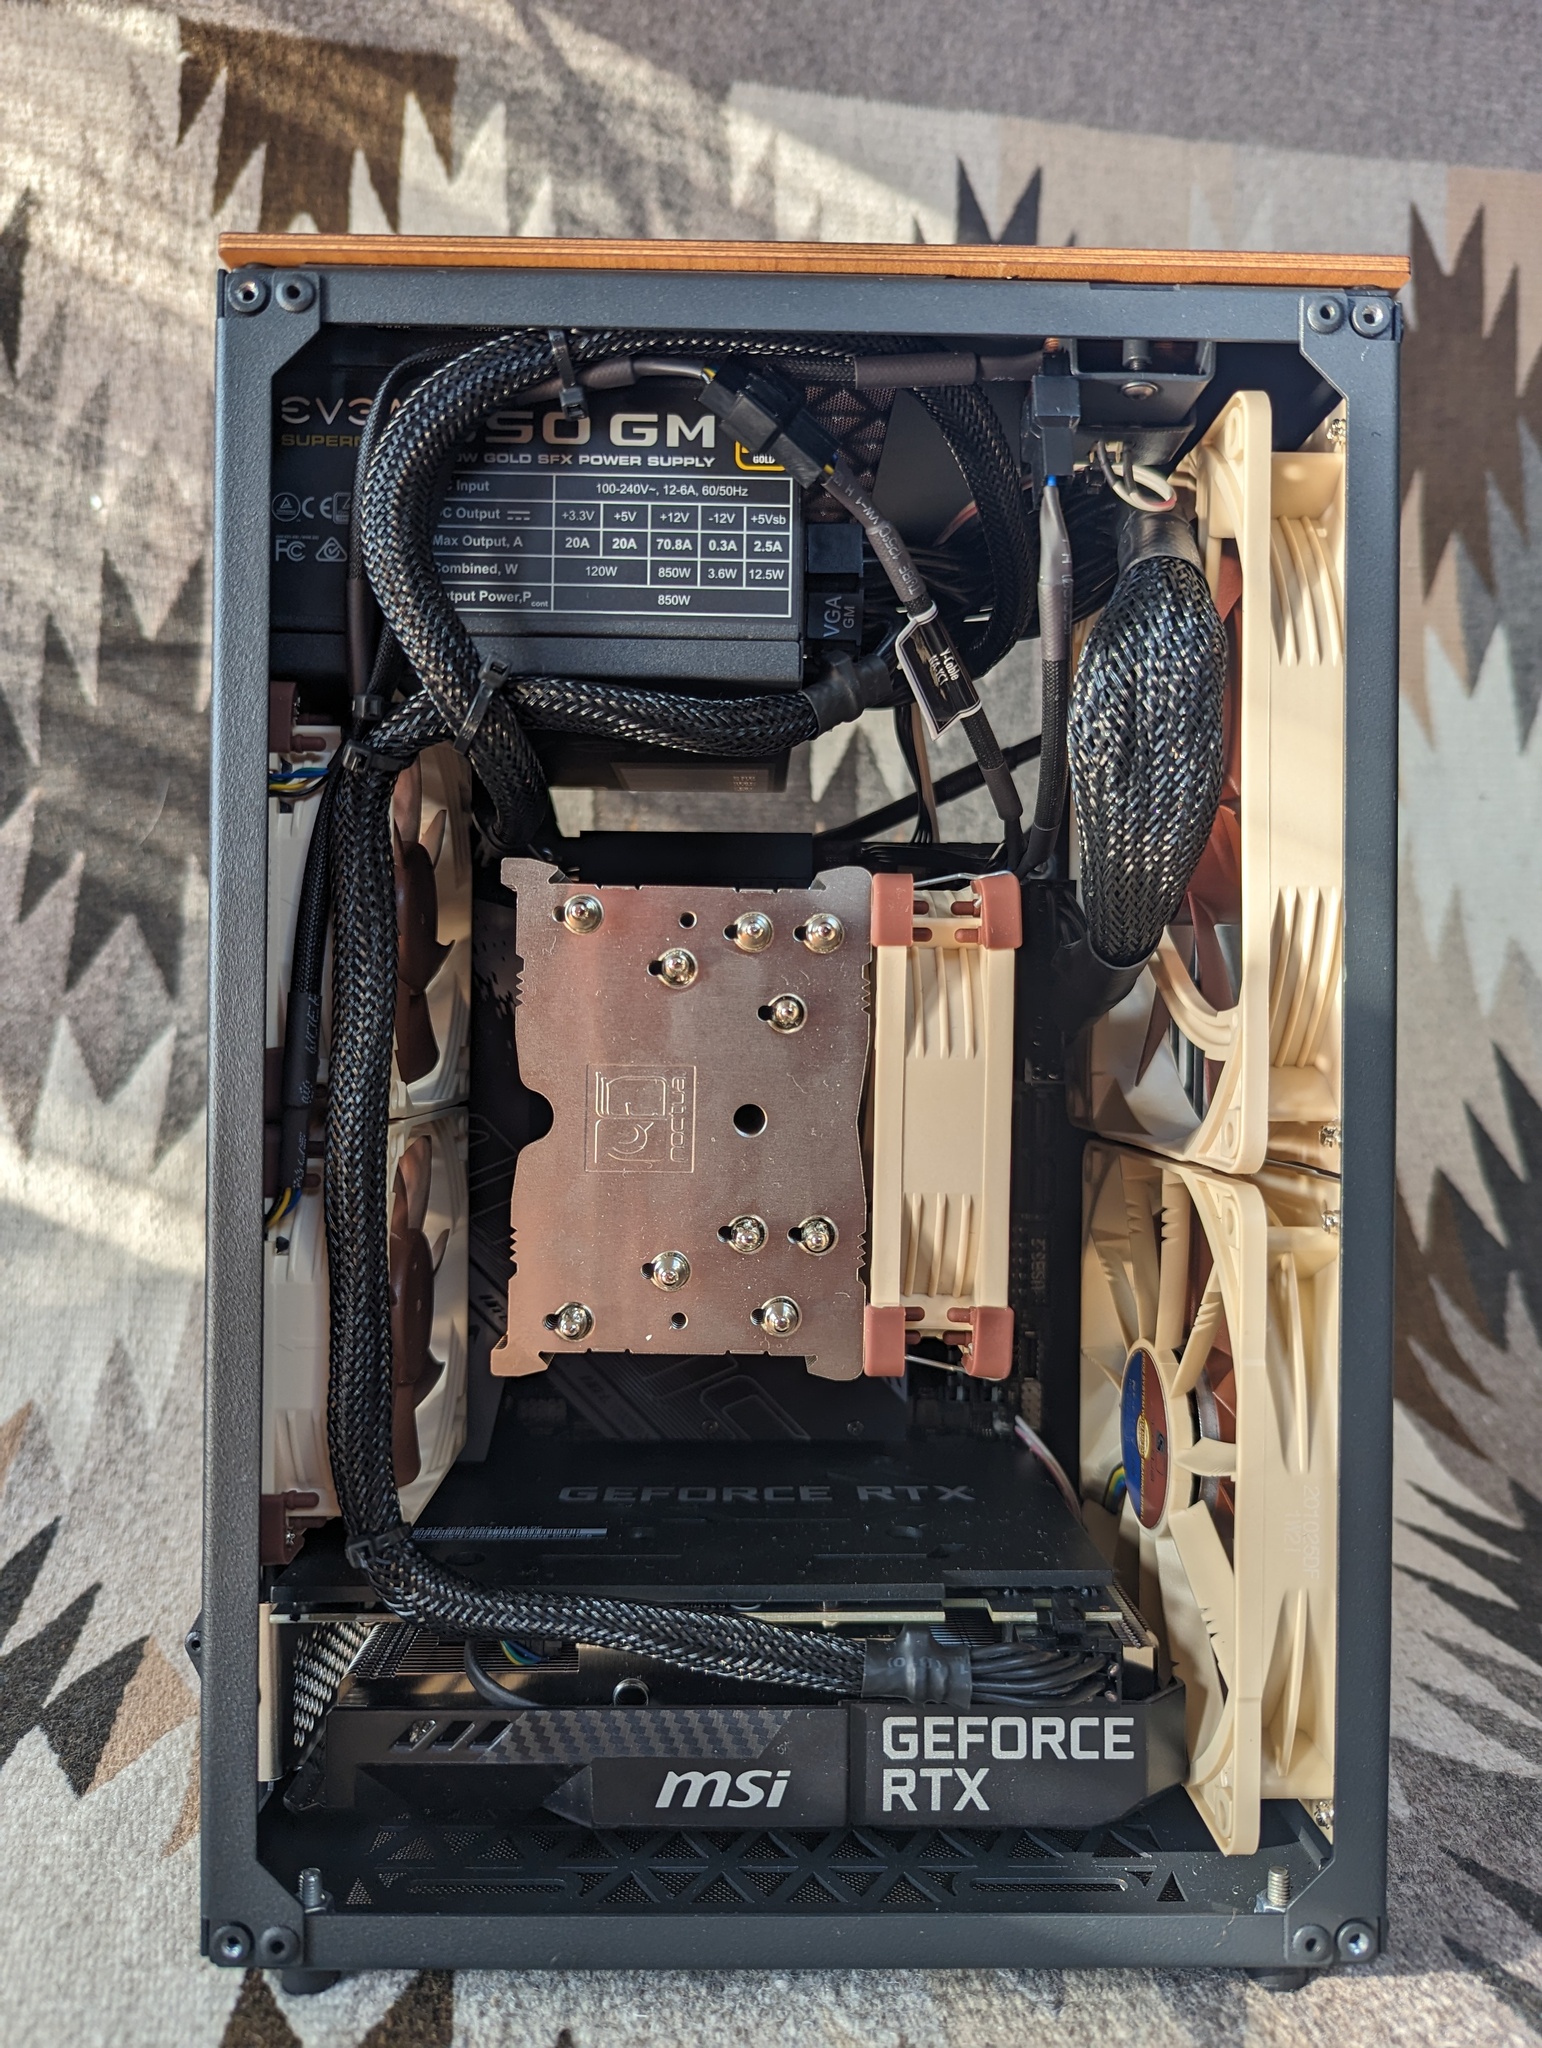
- Install the power supply, plug in the other side of the aux CPU power cable, and install the primary ATX power cable.
- Install the front fans. I found that I had to remove the silicone dampers in order to gain the extra mm of clearance needed to get them past the GPU.
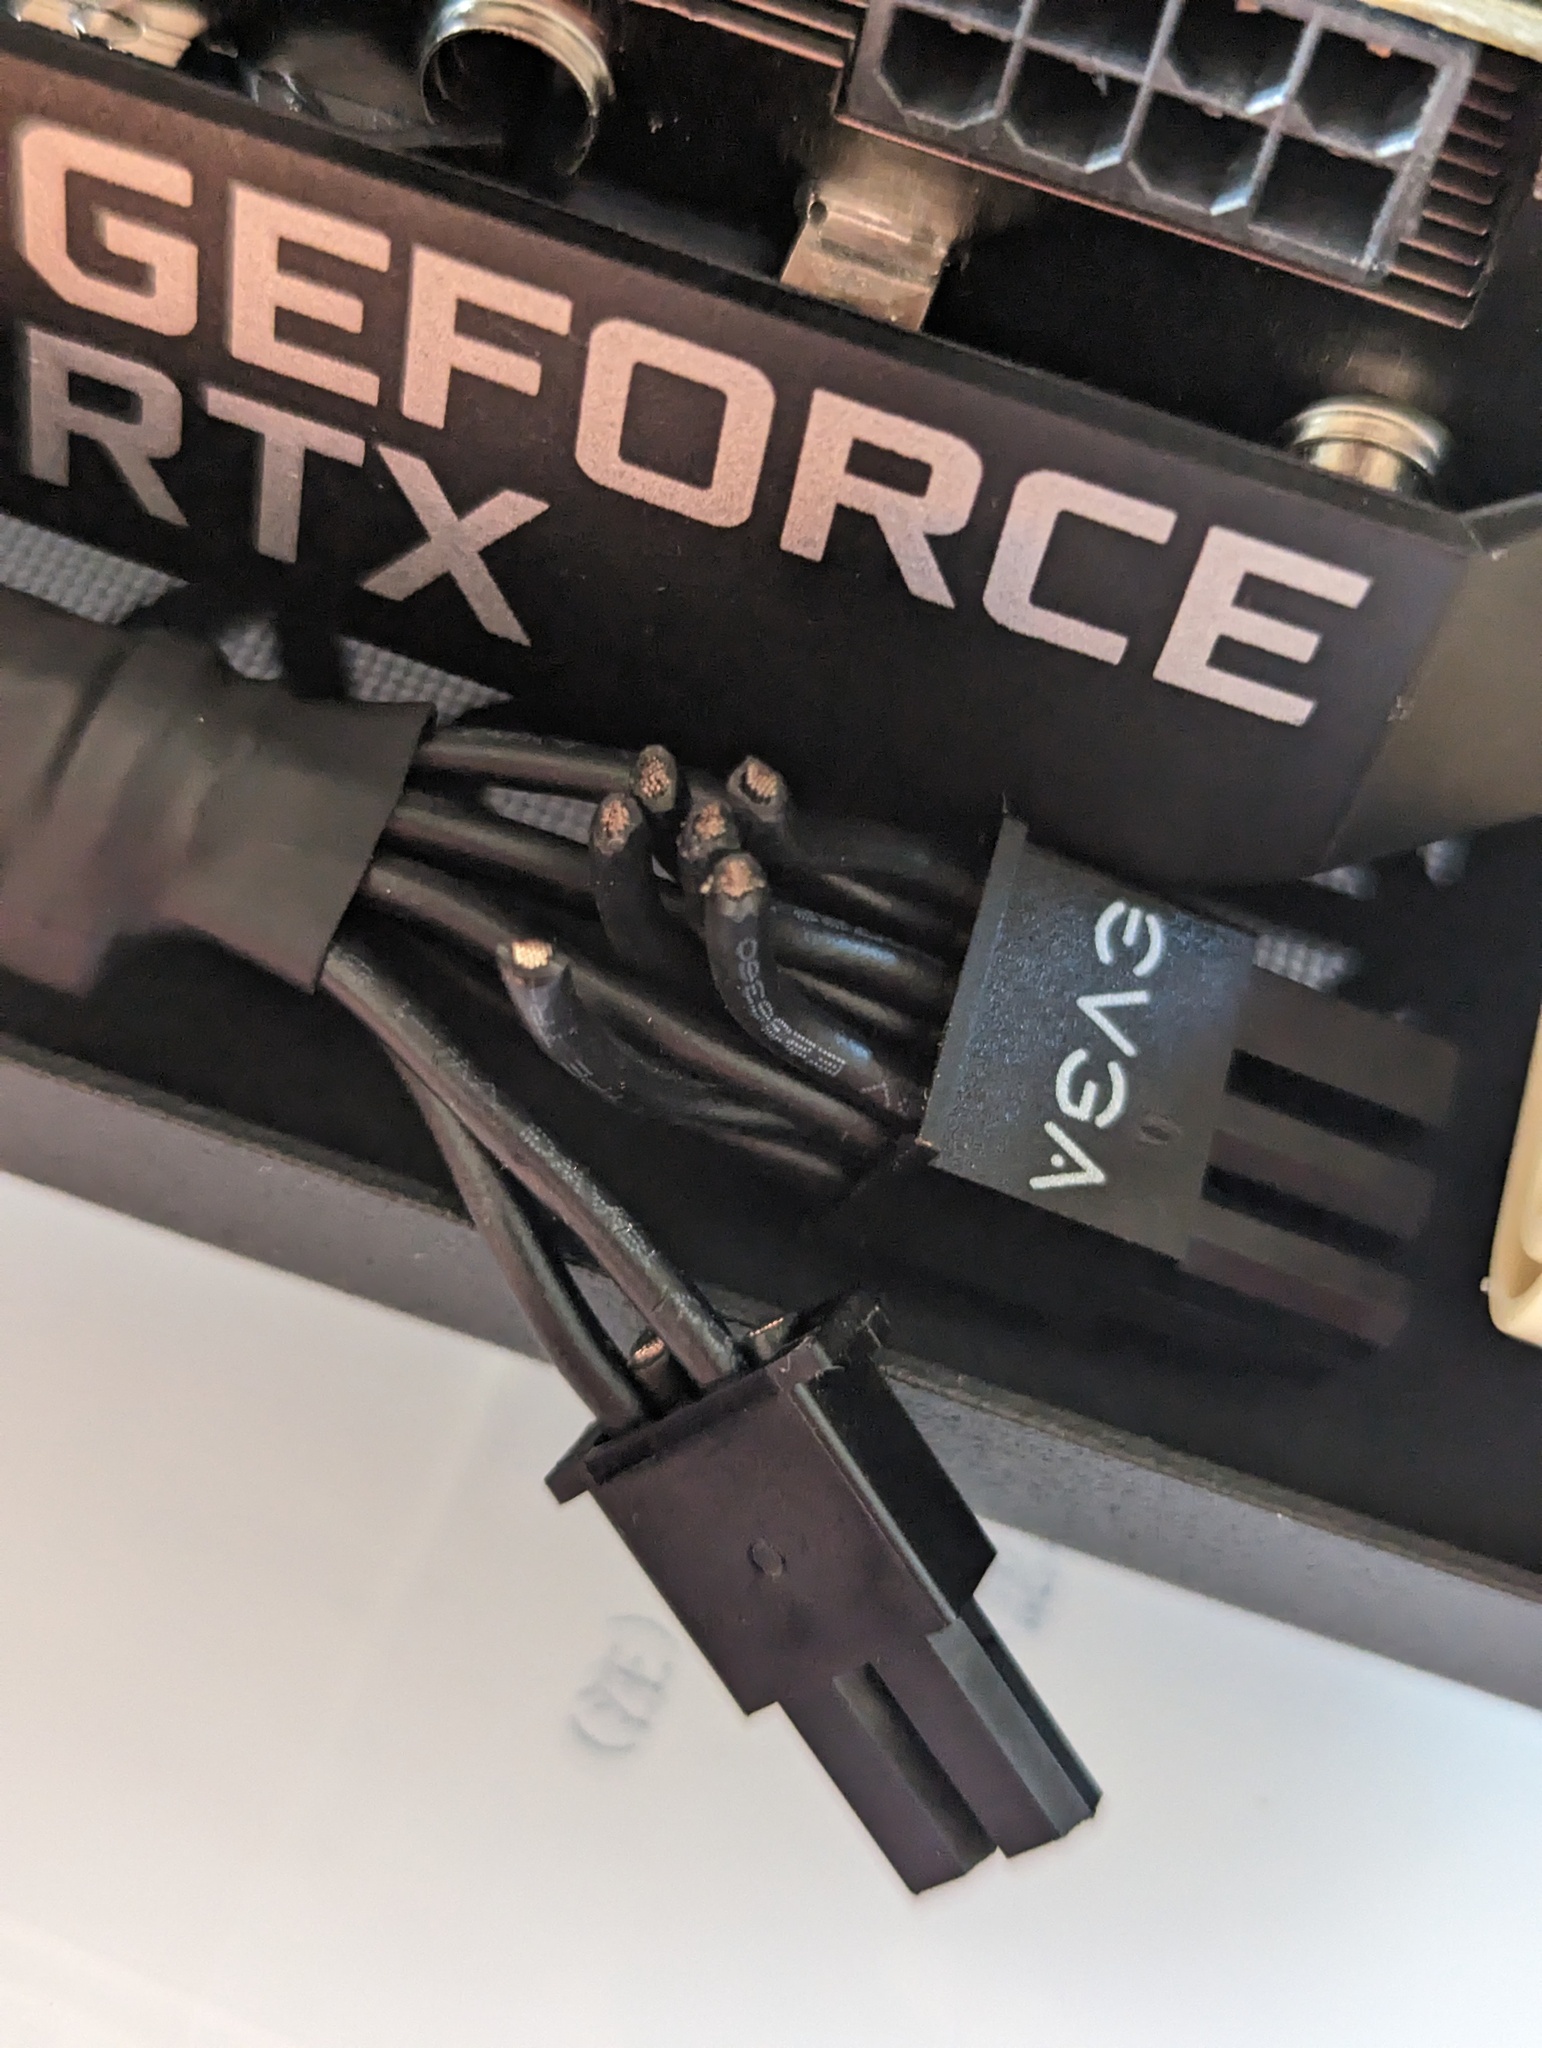
- Install the GPU aux power cable. I chose to clip off the daisy chained connector for a cleaner fit. Ensure that if you do this you trim it very close to the connector to minimize risk of shorts (shorter than the example image).
- Cable manage the GPU aux power and rear fan cables along the back of the case using the intake mounting holes of the 80mm fans as binding posts.


System Performance
This case is about 1/7th the volume of my old PC, and I was curious to see how much raw CPU performance I was giving up, as well as just whether the very small noctua cooler would be able to keep up with the amount of power thrown off by the i9-13900K. To generate a realistic load for the work I usually do, I used a compile of the 6.1 Linux kernel as a benchmark. The system was initially run ouside the case on my desk, with unrestricted airflow, and only the onboard CPU cooler fan for air movement. Here are the results for that, along with reference results from my old desktop and my current laptop:
ATX Desktop (Threadripper 5965WX):   5m21.738
SFF Desktop (Intel i9-13900K):       6m14.078
Framework Laptop (i7-1260P):        20m17.199s
These results are honestly pretty shocking. The i9 is hot on the heels of the Threadripper, despite its $600 MSRP being only one quarter of the Threadripper’s $2400. I expected much more of a margin here. The Threadripper obviously has other advantages (ECC memory, more memory channels, dramatically more PCIe lanes, etc) but for this application it’s clear that the i9 blows it out of the water. Of course, both desktops completely outclass my laptop, which despite also being a modern CPU SKU can only hit about 35W of continuous package power with its fitted thermal solution.
Speaking of thermal solutions, the Noctua NH-U9S is rated by Noctua as ‘medium turbo/overclocking headroom’ for the i9-13900k, and I think that’s a pretty accurate assessment. The CPU very quickly hit 100°C package temp, and throttled the P-cores back from about 5.4GHz to about 4.9GHz by the end of the build, remaining at about 100°C the entire time. By way of comparison, the Threadripper with a NH-U14S TR4-SP3 sat at at (comparatively) cool 76°C and 4.3GHz all core clocks for the duration of the run.
Cooler Mod
To see if I could eke some more performance out of the NH-U9S, I browsed Digikey for alternate 92mm fans that might be able to push more air. The best replacement seemed to be the Delta AFC0912D-AF00, which offers much higher numbers than the Noctua across the board:
                    Noctua NF-A9        Delta AFC0912D-AF00
Airflow             1.315 m³/min        2.87 m³/min
Static Pressure     2.28 mmH₂0          13.35 mmH₂0
Acoustic Noise      22.8 db(A)          53.0 dB(A)
Power               1.2 W               9 W
Rated RPM           2000                4800
Note that that includes noise, and this fan is decidedly more of a ‘server-class’ sound than the Noctua fans. I crimped a standard PC fan header onto the Delta fan, attached it to the cooler tower using the Noctua mounting clips, and re-ran the compile:
                                    Time        Busy MHz    Package temp
SFF Desktop (With NF-A9 fan):       6m14.078    ~4990       100°C
SFF Desktop (With Delta fan):       5m59.175    ~5300        96°C
The additional airflow does actually manage to boost the P-core clocks by 300MHz or so, which certainly isn’t nothing. The package temp is also marginally lower, though still above the 85°C usually used as a cutoff for non-industrial silicon operating ranges. However, it comes at a significant noise cost. I don’t have a decibel meter to verify, but subjectively the fan is distractingly loud. 10dB is approximately a doubling of perceived loudness, so the thirty decibel rated difference between the fans suggests the Delta is 8x is loud as the Noctua. For the 4-5% increase in performance, this modification probably isn’t worth it given the design target of the PC.
Case Airflow
With a baseline for how the system performs in open air, I then installed it into the case along with all of the auxiliary fans and re-ran the benchmark. For these runs, the system is back to using the stock Noctua NF-A9 fan since that’s what I will likely run in the system going forward.
                            Time        Busy MHz    Package temp
SFF Desktop (Open Air):     6m14.078    ~4990       100°C
SFF Desktop (Inside Case):  6m06.618    ~5000       100°C
The result was actually a little faster, presumably because of the additional four fans channeling air around the system. The VRM on this motherboard is working pretty hard to feed the CPU, and has a relatively small heat sink that gets quite hot. Annoyingly, despite being present in the BIOS that temperature control doesn’t seem to be exposed by lm-sensors, but I’d wager it’s also happier with the guided case airflow, as are the memory DIMMs. At idle, all temperature zones measure around 40°C.
Overall
I’m very charmed by this case. I think it looks very attractive as a desk piece, is well built, and the internal design makes it surprisingly easy to work with despite the small size. Being able to fit a 2U PCIe card in there without a riser is also a very nice design achievement. The patterning on the front allows for pretty good airflow, even with the added dust filters. If I were to complain about anything, it would be that there are no filters included, but considering the space to work with it’s understandable. The complete lack of any front panel I/O could also be a downside depending on your preferences, but at least for me I’m alright trading it for a clean design.